
Watch this video for a step by step process on how to configure contact form with SMTP/PHP mail
In this tutorial you will learn to configure your Contact Form Setting for allowing SMTP/PHP Mail to send email from Contact Form.
Configure Contact Form with SMTP/PHP Mail (New Dashboard)
Steps to Configure Contact Form with PHP Mail
1. Login to cPanel.
2. Scroll down to Software and click on SitePad Website Builder.
3. Click on the Admin Panel icon of the site on which you want to configure the contact form.

4. From the left-side menu of the admin panel, go to Settings and click on Contact Form.

5. The Contact Form Settings will get displayed. In this,

- TO Email: It is the email on which you will receive your contact form email.
- FROM Email: It is the email through which your contact form email will be sent.
- SUBJECT: It is the subject of the contact form.
- Additional Headers: Here you can add additional email.
- Messages: Here you can edit messages used for the information of your form.
6. After filling in the fields as per your preference, click on Save Changes to save the changes done.
Steps to Configure Contact Form with SMTP Mail
1. Click on Advanced -> SMTP Mail from the left-side menu of the admin panel.

2.The SMTP Mail Settings will get displayed:
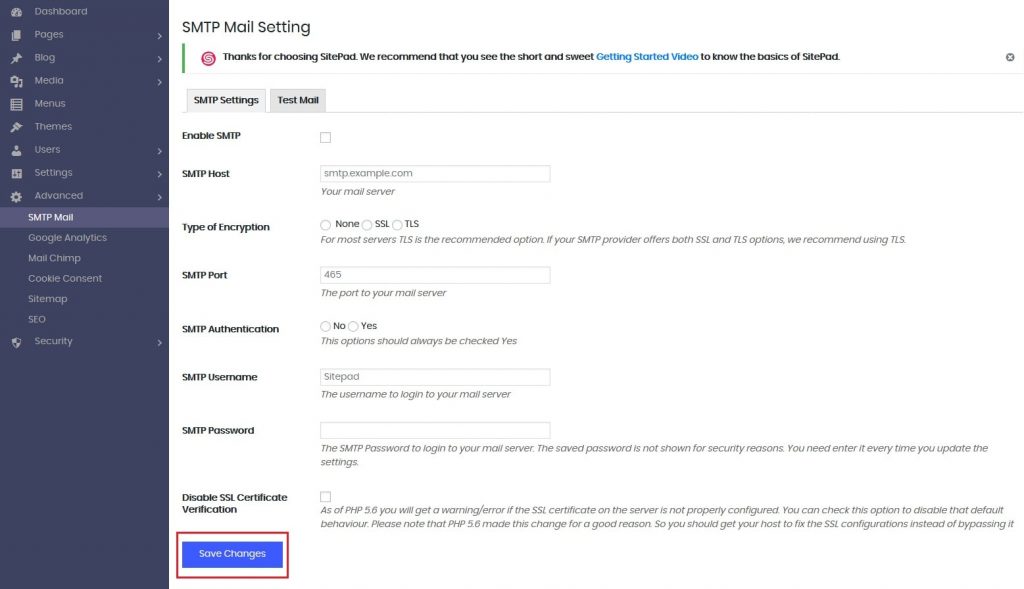
3.Tick on the Enable SMTP checkbox to configure contact form with SMTP mail.
4. In the SMTP Host, enter your mail server.
5. Select the Type of Encryption from None, SSL and TLS.
6. Enter the SMTP Port number.
7. Click on Yes for SMTP Authentication.
8. Enter the SMTP Username and Password to login to your mail server.
9. Keep the ‘Disable SSL Certificate Verification’ option unchecked as it is important to verify SSL certificate for security reasons.
10. Finally, click on Save Changes.
Configure Contact Form with SMTP/PHP Mail (Old Dashboard)
Steps to Configure Contact Form with PHP Mail
Your localhost is used by PHP Mail function to send email from contact form while SMTP Mail function used a server to send email from your contact form. The contact form settings can be configured from SitePad Dashboard > Settings > Contact Form.
PHP Mail

1. You will find that PHP Mail is selected by default.
2. The same email-id needs to be added in To and From fields. So, enter multiple email address separated with comma, if you want to send emails to multiple recipients.
3. In Subject field enter the subject you want. You can add enter the for-mat here, if you need Dynamic Subject.
4. You are allowed to change the Success/Fail Message.
5. In order to avoid spam from your contact form you can add reCAPTCHA.
6. Next, click on Save button after filling the Settings.
Steps to Configure Contact Form with SMTP Mail

1. For configuring SMTP mail you will need a Gmail/Yahoo/Hotmail account. Alternately, you can use your Webmail account with all the SMTP settings given by your host in your control panel.
2. In Mailing Method, from the drop-down list select the SMTP Mail.
3. Fill the below fields:
SMTP Server (if you are using secure server port then please add ssl:// before the server domain i.e ssl://domain.com).
SMTP Port
SMTP Username (i.e Email Id)
SMTP Password (i.e Email Id Password)
4. Configure the settings for SMTP similar to that for PHP Mail i.e change Subject, change Success/Fail Message, Add reCAPTCHA to avoid spam.
5. Then click on Save button after filling the settings.
That’s it! You have now learned to configure the contact form with SMTP.


