
Watch this video for a step by step process on How to Create/Restore an Admin Backup with DirectAdmin
As an administrator of your hosting, you can use DirectAdmin to create/restore an admin backup. It will allow you to restore user files and help you preserve important data.
To Create Admin Backup
1. Log in to your DirectAdmin’s reseller account
2. Go to the Reseller Tools section and click Manage User Backups.

3. Click on the SCHEDULE BACKUP button.

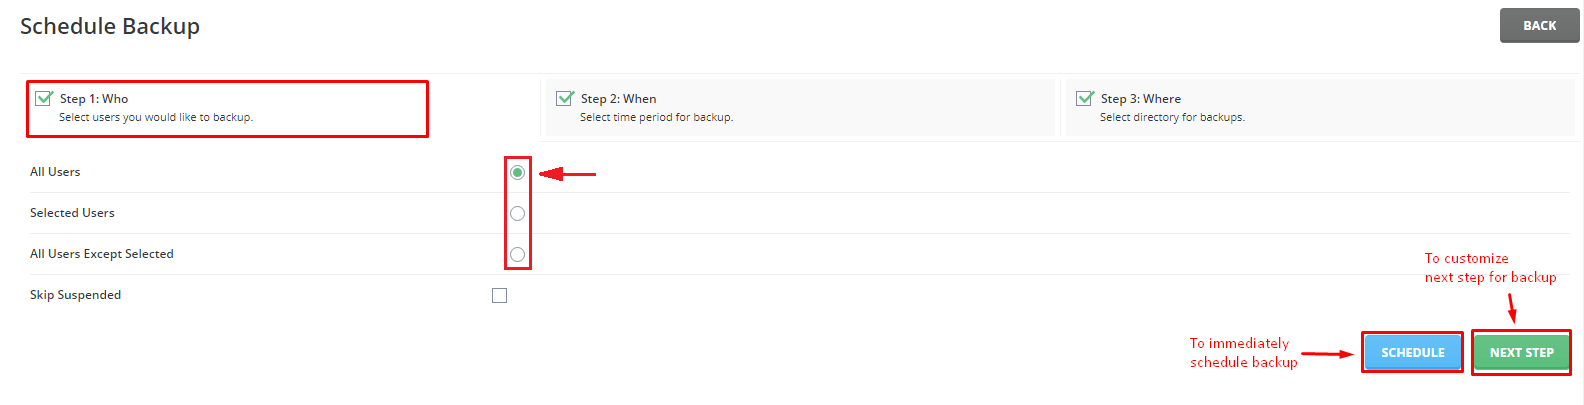
With this, you will be at Step 1 of scheduling a backup for selected users.
DirectAdmin offers you three choices:
- All Users: Take backup for all user accounts.
- Selected Users: Take backup for selected user accounts.
- All Users Except Selected: Exclude selected users and take backup for the rest of user accounts.
4. Make your choice for the backup you want and choose to either SCHEDULE or move to customize NEXT STEP.
If you choose NEXT STEP, you will move onto Step 2. Here, you can decide when to schedule the backup.
5. Determine if you want to take the backup Now or On schedule.
In the latter case, you will have to customize the Cron Settings for the backup schedule.
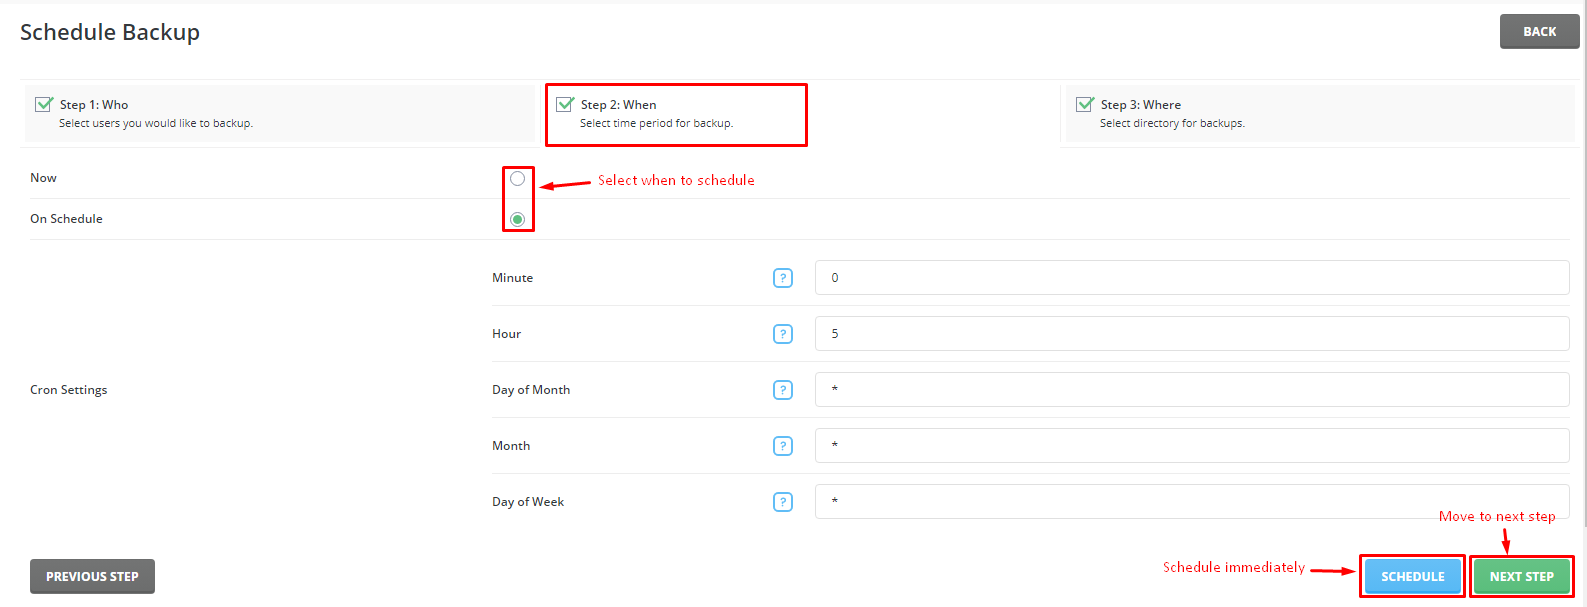
6. Choose to SCHEDULE or move to NEXT STEP as per requirement.
If you move to Step 3, you can select a directory to store your backups.
7. You can store backup to your Local directory or on a customized FTP if you want to create the backup on a different server.
You will have to configure the FTP Settings with the corresponding values.
8. You can select the time to Append the backup from the dropdown list.
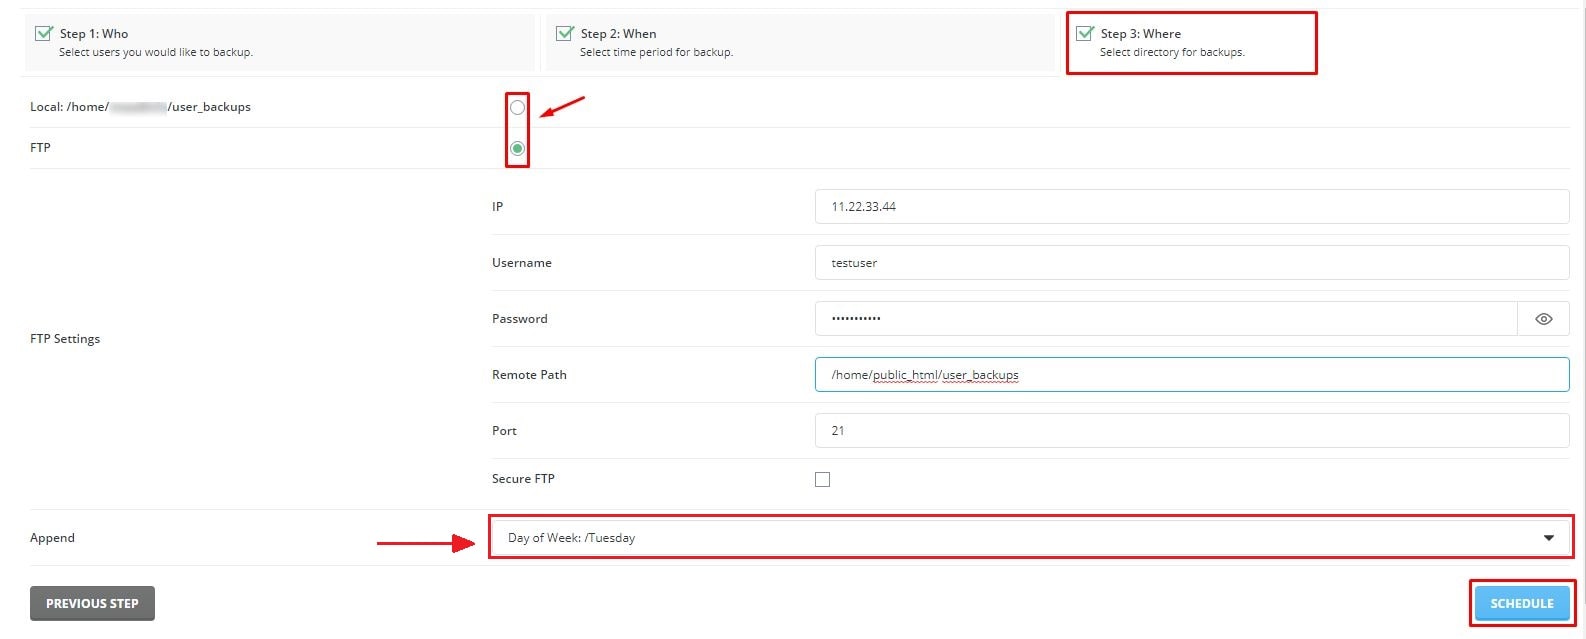
9. After checking all the customizations and settings, click the SCHEDULE button.
A success message will flash on-screen, showing you have scheduled the backup.
To Restore Admin Backup
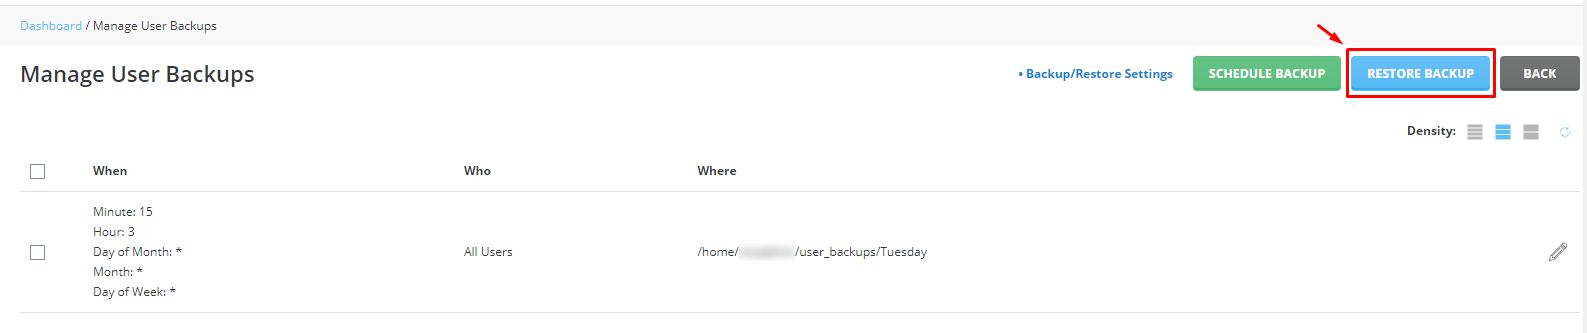
1. Go to the Reseller Tools section and click Manage User Backups.
You will see a list of scheduled backups here.
2. Click on the RESTORE BACKUP button.
Step 1 to restore your backup is to choose a directory location.
You can decide to store it on your Local server or a different FTP server.
3. Select between Local or FTP as per your necessity.
You will have to modify the FTP Settings if you choose to go with FTP.

4. Click the NEXT STEP button.
At Step 2, you get to set the IP address to restore the backup. To do that, you have to Use the IP stored in the backup.
5. Select between
- stored in the backup: use the IP already stored as default in the backup. (Local machine)
- from the list: select another IP address from the list. (Other server)
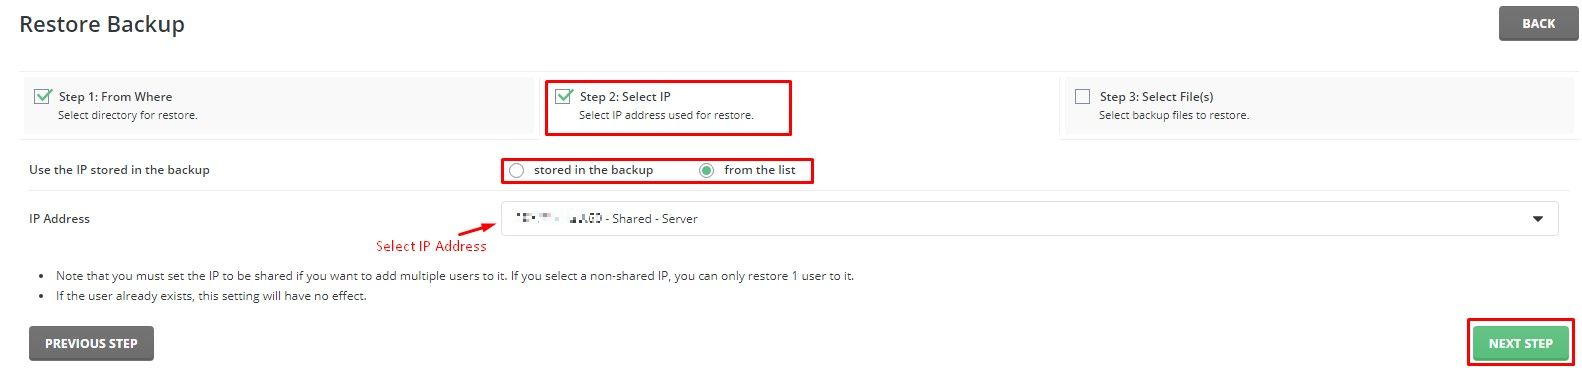
6. Click the NEXT STEP button.
In the final Step 3, you have to choose what backup files to restore from your server.
7. Select the backup file/files you want to restore from the Files list. Click the RESTORE button once you have selected them.
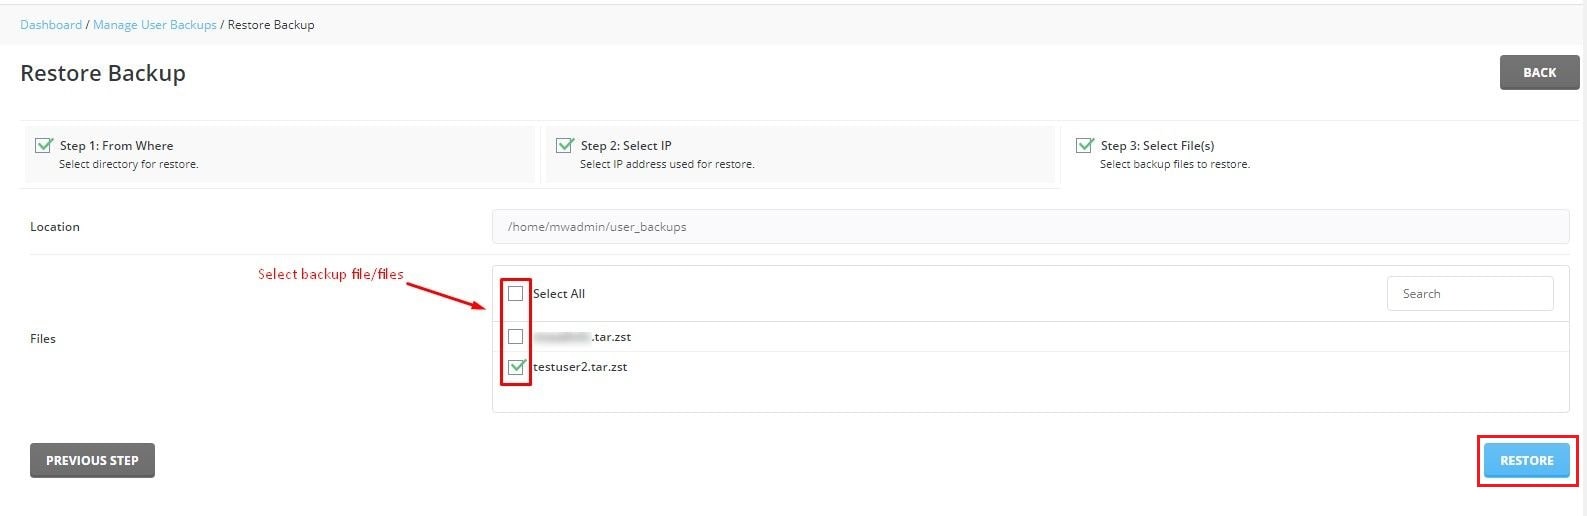
DirectAdmin will display a success message as it adds the restores to the queue. The restoration process may take a while and, the system will notify you once it is done.
This is the way you can create/restore admin backup with the DirectAdmin reseller account.


