
Watch this video for a step by step process on how to create website using SitePad
SitePad is a website builder tool that is powerful and easy to use. It comes with great features that help you to create any kind of website.
Steps to create a website in SitePad:
1. To access SitePad, you need to login to cPanel.
2. In the search box, type SitePad and click on SitePad’s icon.

This will take you to the SitePad dashboard.
3. You will need to select a theme for your website. You can also search for a Theme through its Search option.

4. Click on the “Activate” button once you find a suitable theme for your site.
This process can take up to a few seconds.
Now you will be taken to the preview and edit mode of this Theme.
You can customize your website pages from here.
5. To add new pages to your site, go to pages and click on “Add New”.
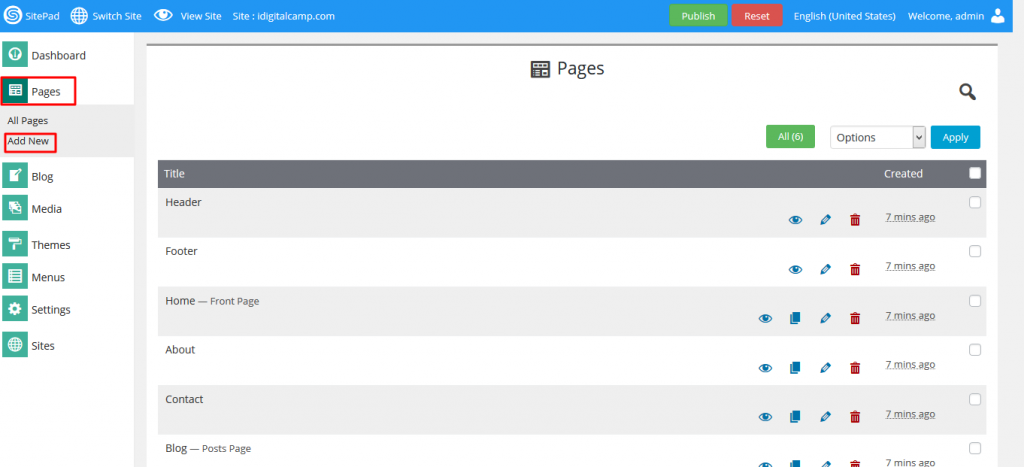
6. If you want to modify existing page content, go to all pages and click on the edit icon of that page.
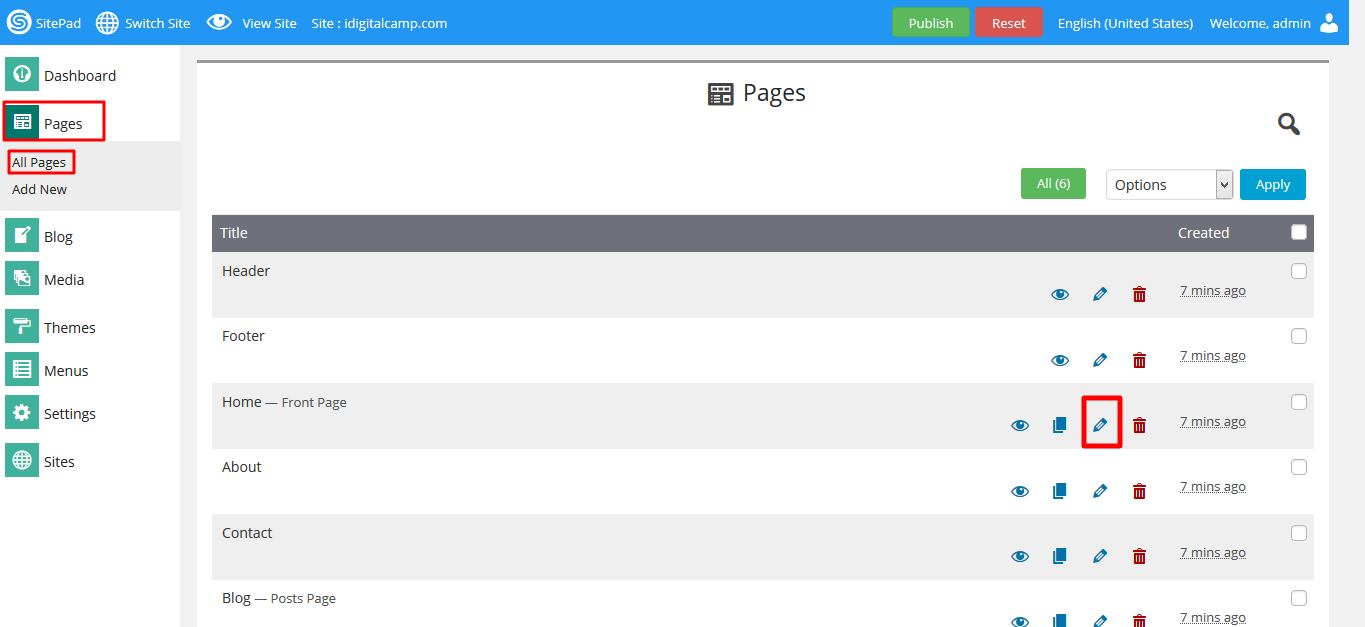
7. To edit the contents of the page, click on that element and it will allow you to edit it.
For example, if I want to change the below image, I will click on it and it will ask me to select the image of my choice.
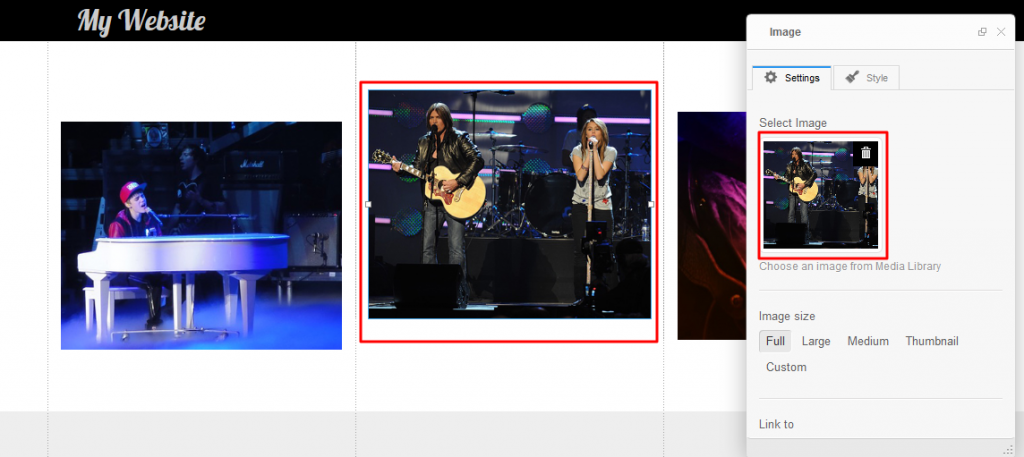
You can upload a picture of your choice and then click on Insert into page. This tool also gives you various other settings that you can apply for your image.
8. To edit the text, click on the text area and click on “Edit Paragraph”.

You can even add a new element using the widgets from this section, simply drag and drop anything you want.

9. To launch the site click on Publish.
10. Click on “Yes Publish” and you will see a progress bar.

Once it is finished click on the visit website to view your site.


