
Watch this video for a step by step process on how to Disable WordPress Plugins
You can disable WordPress plugins with:
- the wp-admin Dashboard
- cPanel File Manager
- FTP Client (FileZilla)
Note: Before you make any changes to your website, we strongly recommend you take a full backup of the website. It will allow you to reassess the changes you are about to bring to the website.
I. To Disable Plugins via WordPress Dashboard
1. Log into your WordPress dashboard.
2. Click on Plugins on the navigation menu and select Installed Plugins.
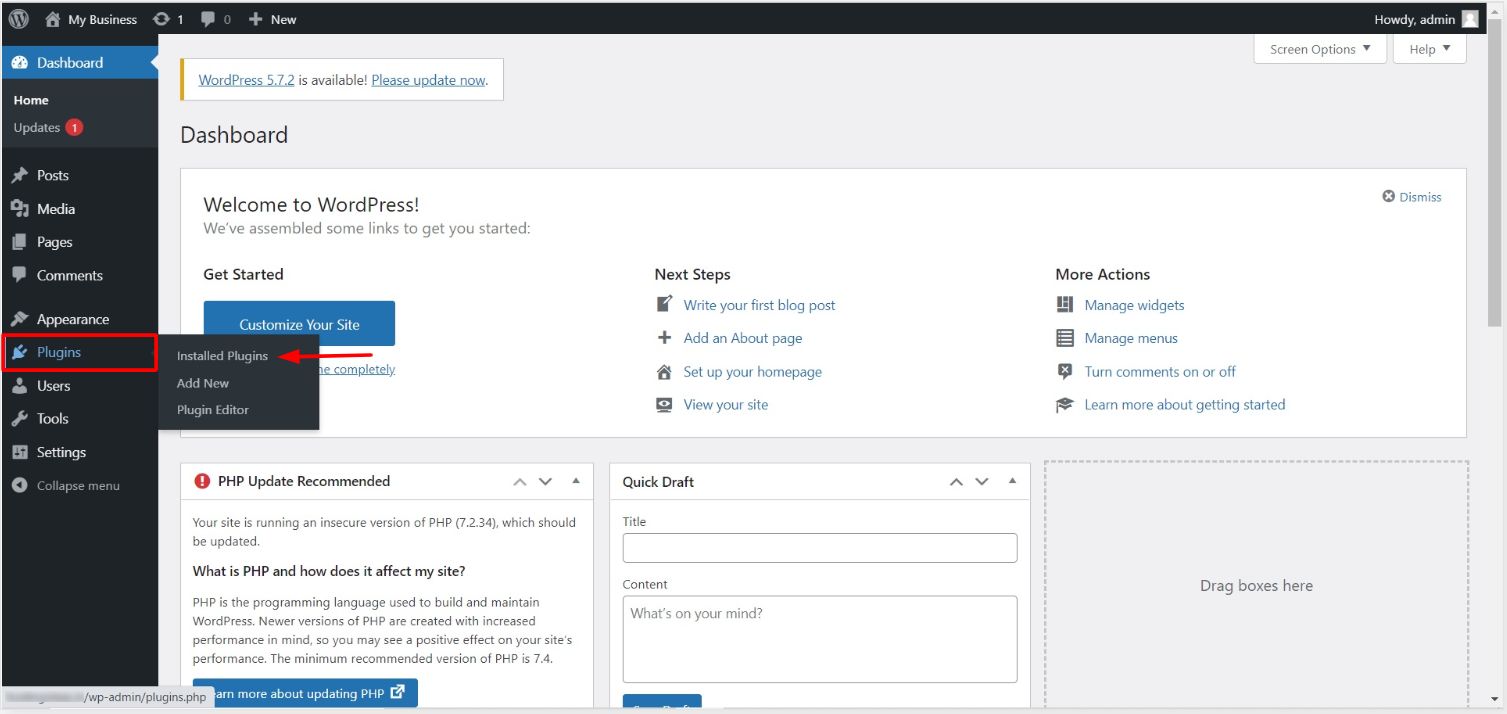
The list of the plugins currently installed on your WordPress account will appear. You can also see their statuses to determine which of them are currently active.
3. You can find the Deactivate button beside the active plugins. Click on it to turn off or disable the plugin.

If you are unable to access the WordPress admin dashboard, you can disable the plugins via cPanel.
II. To Disable plugins via File Manager
1. Log into your cPanel account.
2. Scroll down to the FILES section and click File Manager.
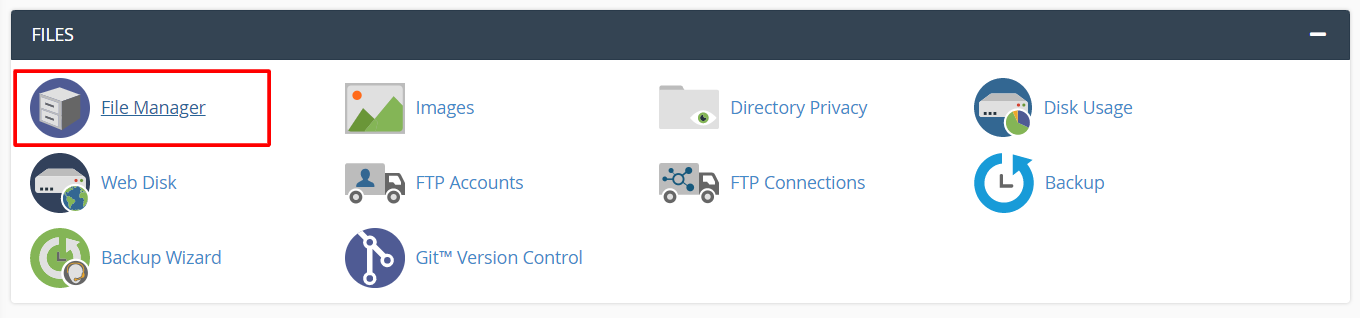 The File Manager window will open.
3. Search and open your WordPress website’s directory root.
4. Open the wp-content folder.
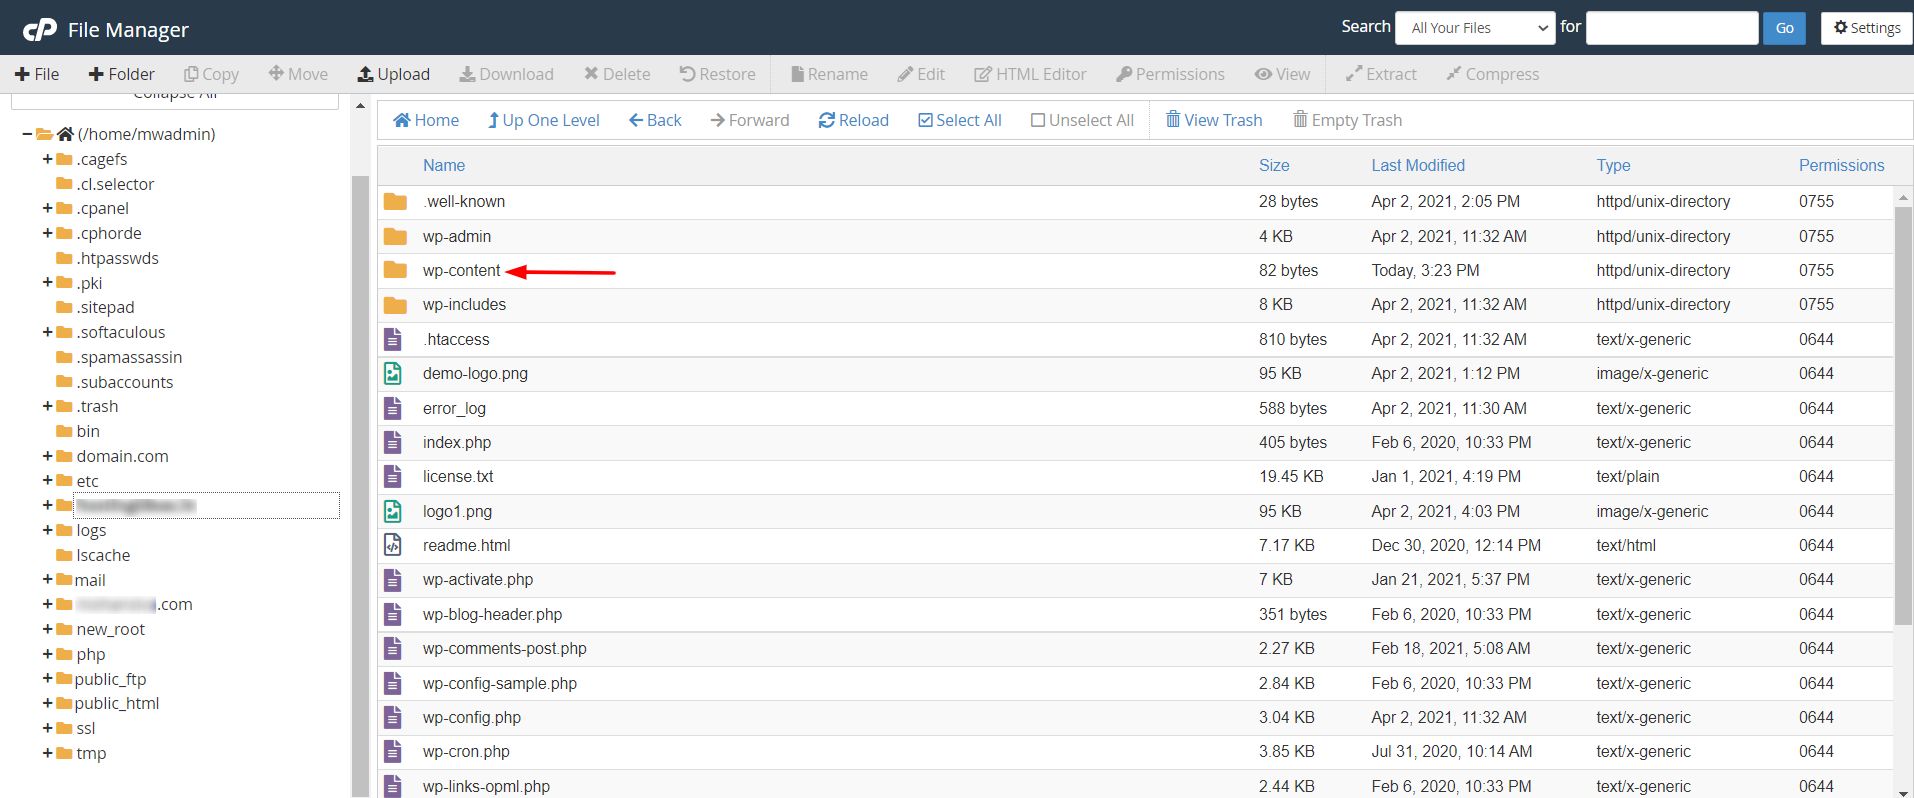
5. Next, open the plugins folder.

Here, you will find all the plugins of your WordPress website.
6. Select the plugin you need to disable and click the Rename option.

7. A window will popup. You will have to change the folder name and click the Rename File button.

Do not forget to make a note or remember the original name of the plugin folder. You will need it if you want to activate the plugin again.
Note: Some plugins that require caching are hard-coded. Renaming the folder will not disable such plugins for the WordPress site.
You can also disable WordPress plugins by connecting your site via free FTP clients like FileZilla.
III. To Disable Plugins via FTP Client(FileZilla)
1. Connect your WordPress website to the FileZilla FTP client.
2. Browse to the plugins folder.
3. Right-click on the plugin you want to disable and select Rename.
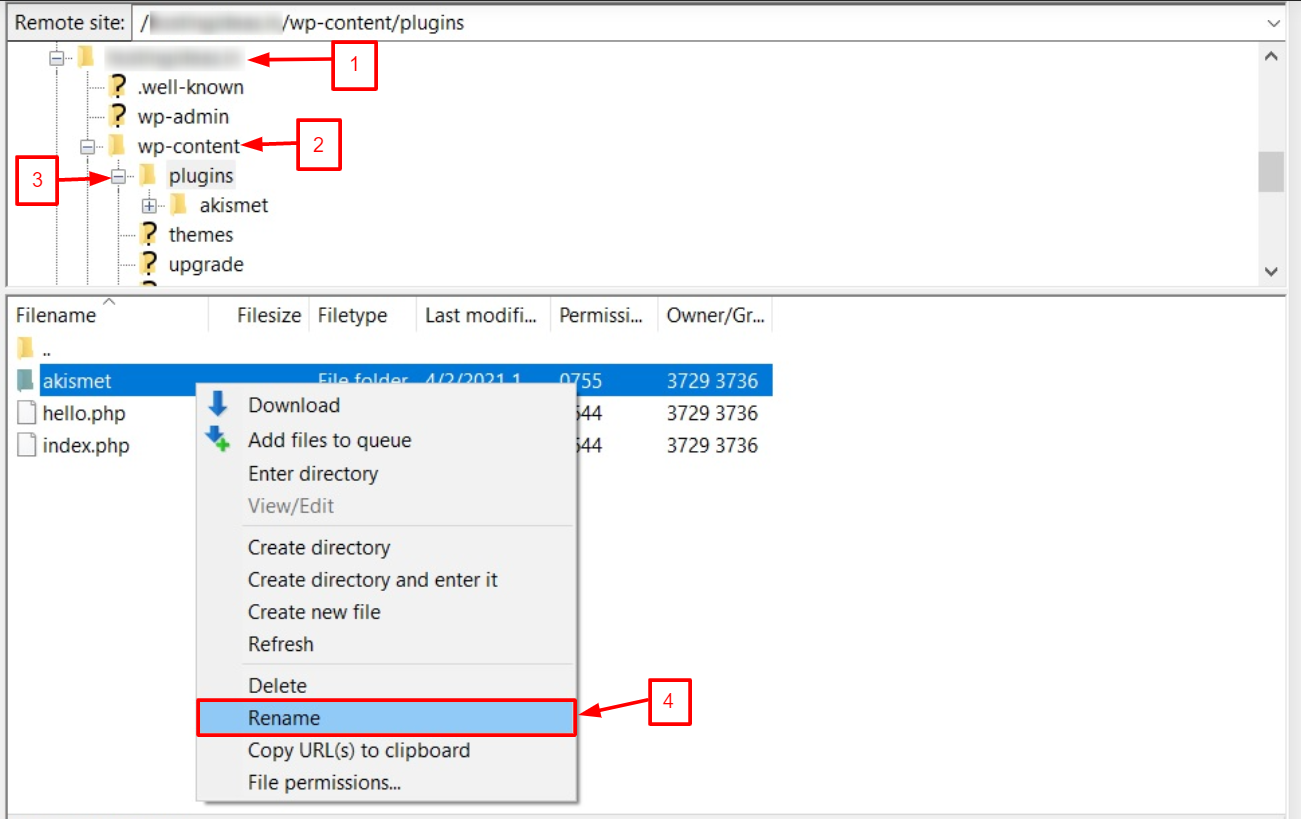
4. Change the name of the plugin and the system will deactivate it on your website.


