
CRON jobs help in scheduling tasks at regular fixed intervals, times, or dates on the WordPress site. In some cases, a WordPress cron job might include scheduling a post for publishing, checking updates or running of a backup plugin on a preset schedule.
WP-Cron handles this scheduling of tasks in WordPress and is used to replicate a system cron. But based on the traffic your website receives, if you use the built-in cron, it can actually start to affect your page load times. In this article, you will learn to disable WP-Cron (wp-cron.php) and instead use a system cron for enhanced performance.
What are the Performance Issues with WP-Cron?
At first understand that WP-Cron is not a real cron job. WordPress has just created to imitate the work of a system cron.
Also, WP-Cron stops running after some time. The wp-cron.php file by default runs on every page load. This means for every single request you get, you generate another one. This indicates that 1000 page views actually make 2000 requests, which sounds insensible.
Actually WordPress was designed as per the ease of the users and this platform was assumed to be used just as plug and play since you didn’t had to worry about this earlier. But it was also assumed that once the traffic starts growing, you will have to take care of it.
So, it would be better to disable WP-Cron and use the system cron instead.
Steps to Disable WP-Cron
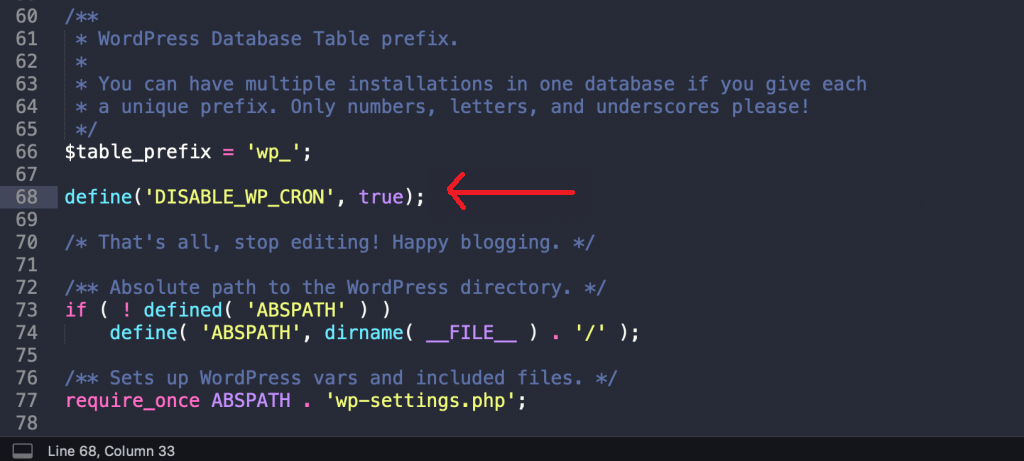
In order to disable WP-Cron, add the below code to your wp-config.php file, prior to the line that says “That’s all, stop editing! Happy blogging.”
Note: With this, it gets disabled and stops running on page load, not when you call it directly via wp-cron.php.
define('DISABLE_WP_CRON', true);
Steps to Schedule System Cron
The next step is to schedule wp-cron.php from your server.
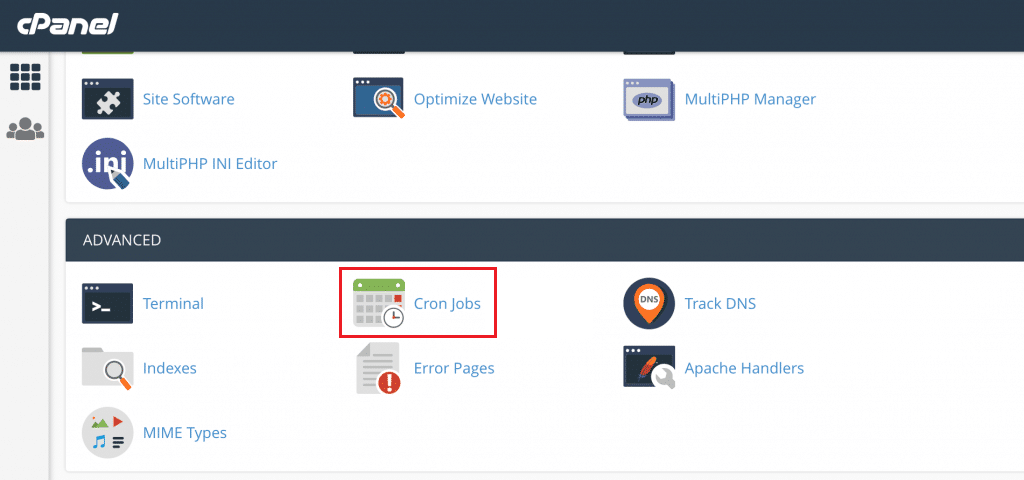
Let’s first check how to create a Cron Job in cPanel.
Creating a Cron Job in cPanel
In case, you are using cPanel, you can create a system cron from control panel.
Note: Ensure that at first you disable the default WP-Cron above.
1. Login to your cPanel account. Go to the Advanced section and click on Cron Jobs.
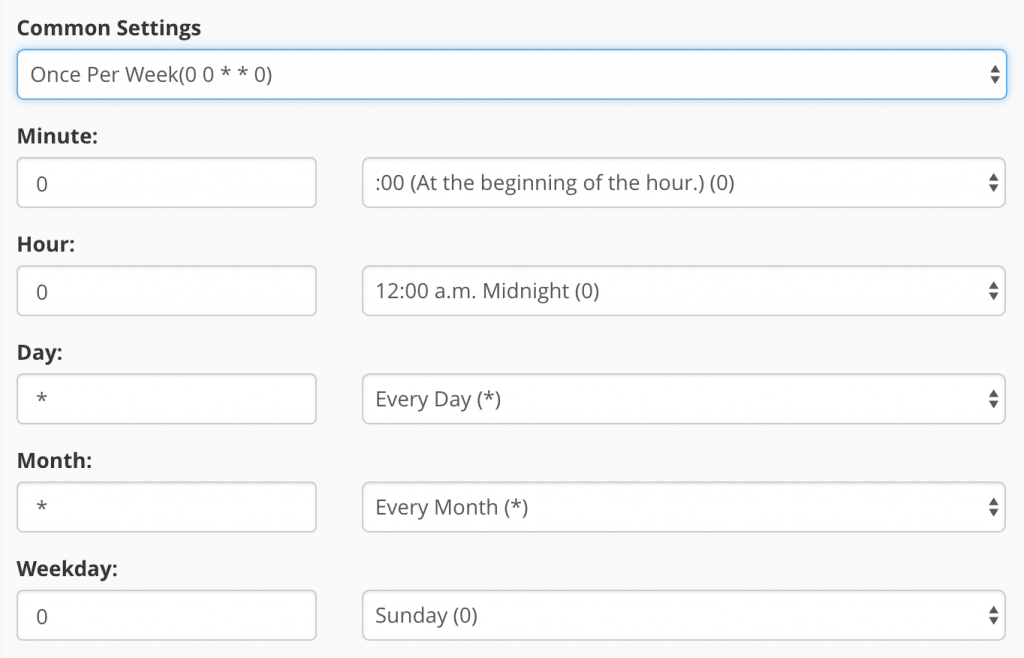
2. Navigate to the Add New Cron Job section where you can select several pre-defined schedules such as once per week or twice per hour. There is a limit on how often it is allowed to run the cron jobs imposed by your hosting provider. For shared hosts, twice per hour is a common setting.
3. Add the below command. Include your domain name instead of https://domain.com. There might be a variation in the command depending on the configuration of your hosting. Next click on Add New Cron Job.
wget -q -O - https://domain.com/wp-cron.php?doing_wp_cron >/dev/null 2>&1

The >/dev/null 2>&1 part of the command above is used to disable email notifications.
Schedule Crons with Third-Party Solution
In case you aren’t comfortable with setting up cron jobs on your server or you have no rights to access, a third-party solution such as EasyCron can help you.
That’s all! You have now learned to disable WP-Cron for boosting your website performance.
Also Read:
How to Take the Cron Job Backups using JetBackup?


