
The article covers the below topics:
-
- What ‘Render-Blocking’ JavaScript and CSS Are?
- How to Monitor Your Website’s Performance?
- How to Eliminate Render-Blocking JavaScript and CSS in Above-the-Fold Content for WordPress (In 2 Ways)?
- Use the Autoptimize Plugin
- Use the W3 Total Cache Plugin
- Eliminate Render-Blocking JavaScript
- Eliminate Render-Blocking CSS
- Conclusion
Loading speed is the key factor for today’s modern website as visitors might change their way to other websites, if speed is the lacking factor. As per statistics, people act impatiently in case of loading time and therefore, you should proactively do the website optimization.
Several things can be done for keeping the loading time low, one of which is learning to deal with render-blocking JavaScript and CSS in above-the-fold content. If you aren’t aware of this, by reading this guide you will surely learn it. Additionally, the loading time to boot will be improved for your website.
This guide will explain you about what JavaScript and CSS are. We will further provide you two different ways to eliminate render-blocking JavaScript and CSS in above-the-fold content for WordPress. So, let’s start.
What ‘Render-Blocking’ JavaScript and CSS Are?
You need to get clarified with several terms that will benefit you a lot in future. This is for both a beginner as well as an expert as you might not know some of them, so let’s check them as below:
JavaScript: JavaScript is a programming language which you can add as an advanced functionality to your website. It is used by most WordPress plugins and themes and this indicates that it adds extra code to your site which results into smooth functioning of your website.
Cascading Stylesheets (CSS): CSS is required for adding complex styles to your website. HTML is used as the foundation by every site and so, CSS can be thought of as the wall paper and paint.
Render-blocking: Render-blocking are the elements that don’t allow your pages to load or ‘render’ immediately in the browser of your visitor. This simply means that if any extra JavaScript or CSS is added to your website, it is considered to be render-blocking.
Above-the-fold content: When a website is loaded using any browser, only a part of it is seen at first. For checking the entire website, it is required to scroll down till the end. Above-the-fold content refers to the part of page that is seen immediately after its loading gets completed.
Hope you are now familiar to these terms and the concept won’t be complicated for you further. When it comes to eliminating render-blocking JavaScript and CSS in above-the-fold content, it indicates the process of website optimization, so that its loading time doesn’t affect those scripts and files.
Remember for giving better experience to your visitors, it is important that your website loads fast. Today, people are quite impatient when a website loads slowly and the site that loads faster alongside takes the visitors away due to frustration, which can affect your website badly.
Clearly speaking, there are several things that can be done for optimizing your website’s loading time. But it can be tricky to eliminate render-blocking JavaScript and CSS in above-the-fold content and hence, you might require some help. Prior to getting to work, let’s see the process of monitoring website’s performance in the first place.
How to Monitor Your Website’s Performance?
Website performance can be monitored via plenty of tools which can accurately give you the time required for loading your pages. GTmetrix is an example that helps you know the detailed speed test results. You simply need to insert the URL to be analyzed and it loads a detailed report in seconds:
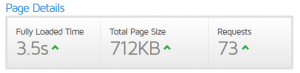
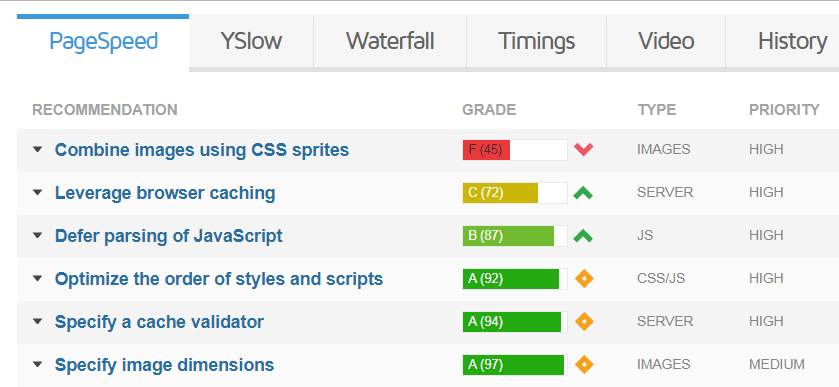
At the left of the GTmetrix dashboard, there are two scores depending on the optimization accuracy of your website. The website might require to be worked on and you can also learn about optimizing it with the PageSpeed tab as you scroll down:
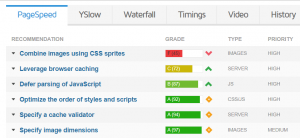
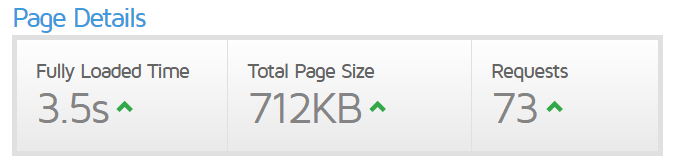
Currently, we are going to check only your overall loading time which needs to be less than two seconds. Though your website loading time is over two seconds, you can reach the target. Don’t miss to check Google PageSpeed Insights for an actionable advice on website optimization:

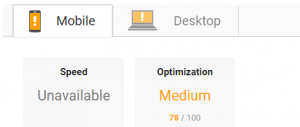
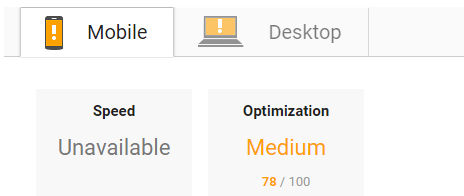
This tool is different from GTmetrix as it assigns two scores for your site – one for mobile and other for desktop experiences:
Exactly below your score, you will find a section called Should Fix. If there’s any JavaScript or CSS that is restricting your website from loading quickly, you will see the message as below:
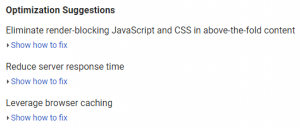
When you click on the Show how to fix button, it will display exactly which scripts are creating problems. Once that information is with you, you can start working to eliminate them.
How to Eliminate Render-Blocking JavaScript and CSS in Above-the-Fold Content for WordPress (In 2 Ways)?
We aren’t going to eliminate your website’s scripts rather we are going to find ways for preventing your JavaScript and CSS from slowing down your site without disturbing its functionality. Let’s get started with the simplest method.
1. Use the Autoptimize Plugin
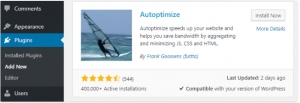
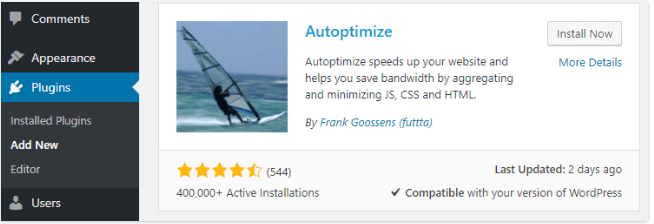
WordPress always has a plugin to fix almost any issue. Here we are going to use the Autoptimize plugin. It helps to decrease the impact of your website’s scripts on its loading time:

The plugin actually plays a magic behind the scenes for doing this. For example, when possible it binds the code of those scripts, so that the visitors won’t require to load several files. Additionally, it ‘minifies’ their code which comprises of eliminating all the empty characters from it such as tabs, breaks, and carriage returns. With this, the code’s reading level becomes difficult but it can minimize the file’s size, leading to faster page loads.
Apart from this, the plugin also takes your JavaScript and CSS and reschedules them. This means the code will load only after your page renders above the fold for your visitors. Practically, it has no effect on your site’s functionality, but can improve its performance.
For plugin installation, go to your WordPress dashboard and click on the Plugins tab. Then click on the Add New button at the top of the window. A screen will appear with a search bar where you can search for Autoptimize. The plugin will pop up in the results below, then click on the Install Now button next to the plugin’s name:
After the installation is complete, a popup with a blue Activate button will appear next to the plugin’s name. Click on it and then you can go to the new Settings > Autoptimize tab on your dashboard:
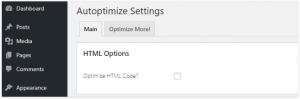
There will be few settings that you will see, but you need to work only on two – Optimize JavaScript Code? and Optimize CSS Code?:
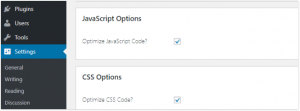
Check both the boxes and save your changes. In several cases, these steps are enough for taking care of any render-blocking JavaScript or CSS in your website. However, you should double-check and therefore, go to Google PageSpeed Insights and analyze your website once again. If the plugin has really worked on those scripts, you won’t see any messages about render-blocking JavaScript and CSS under the Should Fix section:

However, it might happen that the plugin failed at eliminating every single script with just the default settings. If this happens with your website, go to the Settings > Autoptimize tab and click on the Show Advanced Settings button at the top of the screen. Now, tick on both the options – Also Aggregate Inline JS and Also Aggregate Inline CSS and save your changes. This needs to be enough to remove all the scripts that disturb your website loading speed. If it isn’t, you will need to use a more comprehensive plugin.
2. Use the W3 Total Cache Plugin


W3 Total Cache plugin is an alternative to Autoptimize. It’s not only comprehensive but also a one-stop solution for WordPress caching and optimization:

For the unskilled people – ‘caching’ stores some of its files on the computer of your visitors. This means they need to load only some data on consequent visits, leading to improved loading time.
W3 Total Cache not only does excellent caching but also helps in eliminating render-blocking JavaScript and CSS in above-the-fold content. For this, you can install the plugin with the same steps that were used for Autoptimize.
Eliminate Render-Blocking JavaScript
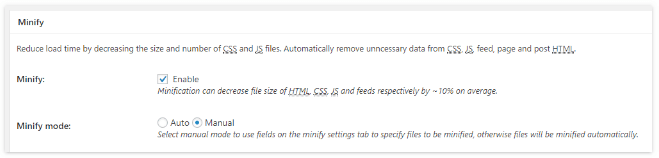
After the plugin is installed and ready to use, go to the Performance > General Settings tab inside the WordPress dashboard. Search for the Minify section, check the Enabled setting box and select the Manual mode:
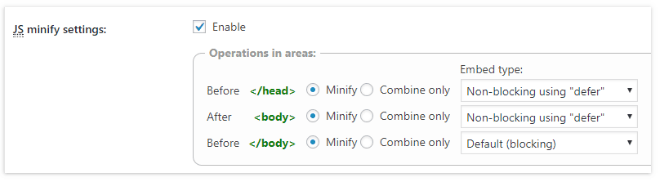
Don’t miss to save your new settings and then navigate to Performance > Minify and search for the JS section. Next use the “defer” setting for choosing the Non-blocking for both the body settings – Before </head> and After <body>:
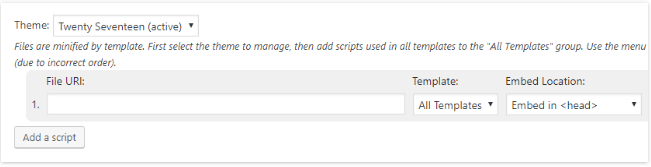
Further, go to the JS file management section and ensure that you select your active theme and then click on the Add a Script button just below:
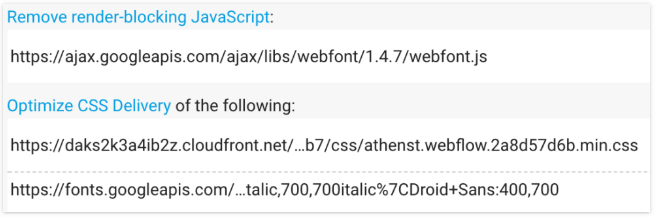
For this section to get completed, you will need to return to Google PageSpeed Insights and re-analyze your website. After getting your results, scroll down to the Should Fix section and click on the Show how to fix button right below. This will display a list of render-blocking JavaScript and CSS files of your website:
Next, copy the complete URL for each of the JavaScript file and paste it in the field that appeared when you click on the Add a Script button on your dashboard:
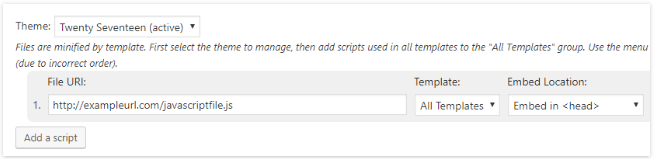
Let the default Template and Embed Location settings be as it is and repeat the process for every JavaScript file that Google suggests you. After you are done, Save all the settings and it’s complete.
Eliminate Render-Blocking CSS
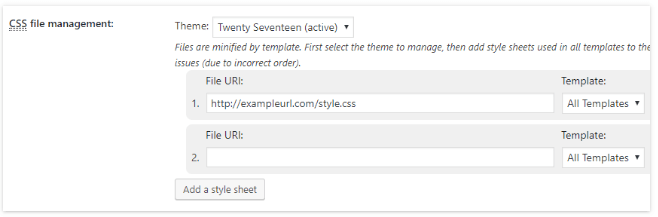
Finally, you need to secure your render-blocking CSS using a similar process. Simply go to the CSS file management section and select your active theme from the list at the right:

You are going to follow the same process used for JavaScript as below:
Click on the Add a style sheet button below the drop-down list that indicates your active theme.
Go back to the Google PageSpeed Insights results and find the list of render-blocking CSS files in your page.
Copy the URL of one of the files and paste it into the File URL field that has appeared after clicking on the Add a style sheet button.
Ensure your Template settings are set to All Templates.
Again click on the Add a style sheet tab and repeat the process for all CSS files that you need to.
When it’s completed, you will have a list of files that appear something as below:
Click on Save all settings button and test your website again with Google PageSpeed Insights. If you have done everything correctly, you won’t see any render-blocking scripts on your page. Also, the Google PageSpeed Insights score will be improved due to those scripts’ elimination. If you are interested in checking how this has affected your loading times, go to GTMetrix and run a new test. You will find that the loading times are lower than the prior website test you ran at the beginning of this guide.
Conclusion
Just a bit of work and your website is optimized for better loading time and yes, the rewards are well worth after that. So, this will make your website navigation easy and your visitors will enjoy their experience to the fullest. It sounds really complicated when it comes to eliminating render-blocking JavaScript and CSS in above-the-fold content. However, after going through this guide, you will find that it’s a very basic process.
In case you have any questions regarding how to eliminate render-blocking JavaScript and CSS in above-the-fold content for WordPress, don’t hesitate to ask in the comments section below!


