
Watch this video for a step by step process on how to Enable sa User for SQL Server 2019 using SSMS
To enable sa user for SQL authentication, follow the below steps:
1. Click on the Windows icon on your desktop and click on SQL Server Management Studio to open it.

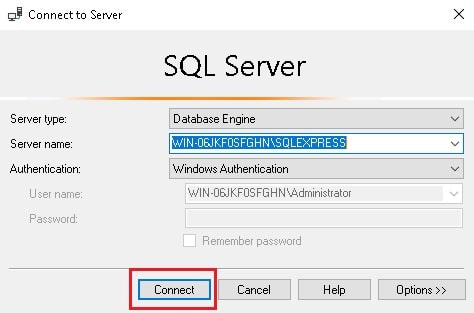
2. Then you will be prompted to connect to the server. Here, click on Connect.
3. Expand the Security option by clicking on the plus icon besides it and again expand Logins option by clicking on the plus icon besides it.


4. Here, right-click on sa and click on Properties.

5. In the Login Properties window, click on Status from the left-panel and select Enabled option under Login. Then click on OK.

6. To confirm if the sa user is enabled for SQL Authentication, you can Disconnect the server by right-clicking on the server and then clicking on Disconnect. From the Connect drop-down under Object Properties click on Database Engine. This will open a dialog for Connect to Server, here click on Connect.


7. Then repeat the third-step. Under Logins, you will see that the red cross on sa has disappeared which was seen earlier. This means that the login is enabled for this user.

Note: You might need to give the system administrator account a password at this time as well.
In this way, you can enable sa user for SQL Authentication.


