
From the time when Gutenberg editor was integrated into WordPress in version 5.0, blocks have become the basis of building posts and pages in the visual editor. For saving your time, the Group block is provided to enable you to group several blocks together. In this way you can maintain related content in a group and move it together if required. Follow the below steps to learn how to add and use the group block in a page or post.
Steps to Add the Group Block
In WordPress, if you want to edit or create a post or page, it is required to be logged into the Administrator Dashboard. Then follow the steps below to find and add the group block:
Create a new or edit an existing page or post.
Click on the + sign for adding a new block.
In case, there aren’t any blocks seen in the Common Blocks area, then go down to the Layout Elements section and click on Group.
Then the group block added with a circled + sign will be seen in the center of the block as in the below image:
![]()
Using the Group Block
As mentioned previously, the group block is used to organized related content together. With this you can create related content groups that you can move around without having to select each individual element that makes up that group.
Steps to Add Content to Group Blocks
After you see the group block, click on the circled + sign for adding content.
Then the block list window will pop up. Select the block that you want to add to your group.
Add the content.
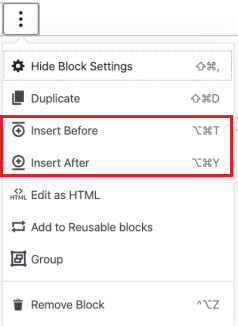
If you want to add another block within the group, click on the block that you just added then navigate to the vertical three-dot menu and click on it.
The options to Insert Before or Insert After will get displayed.
Now the block will start off as a paragraph block, by default. It can be changed by clicking on the circled + sign at the right end of the block.
After selecting the block that you want to use and adding your content, ensure to click on the Save Draft, Publish, or Update button in the top right corner of the screen.
Steps to Select Blocks
After adding a group block, it will be hard to select that block or any other group block. There may be an issue with the WordPress interface, but remember that when you use your mouse directly on the block won’t always give you the block pop-up menu. But, you will find a few interface options in the editor for selecting the blocks as needed.
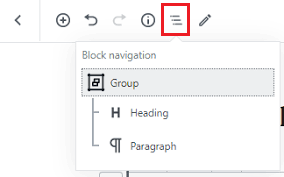
In case you can’t select the block, check the top of the editor. Here you will find a few options which can help. Click on the Block navigation and select the group box from the block structure which is listed in the form of tree. So, just click on “Group” for selecting the group block.
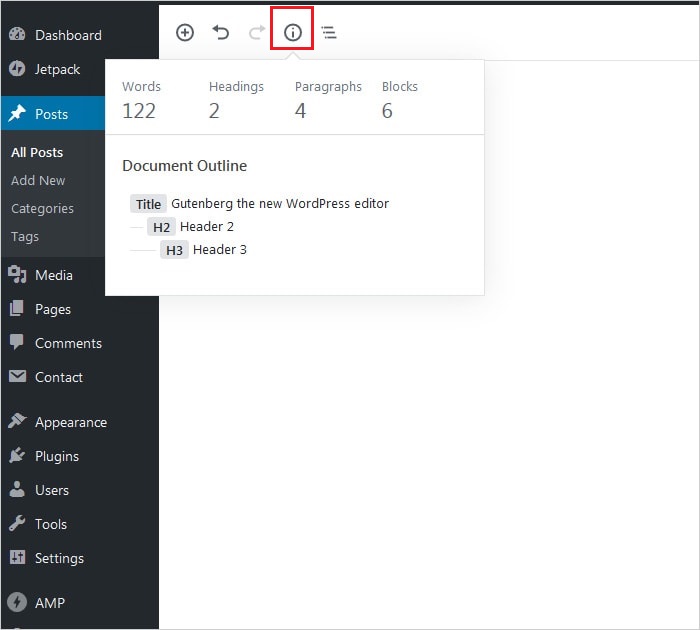
In case you don’t get an access to the group block with Block navigation, then you can use the option called Document Outline to the left of it. In Block navigation, it is possible to click on each item in the outline. With this, you will able to choose the group if there are multiple groups and Block navigation is not displaying them.
Tips to Use the Group Block
For learning what are blocks in a specific group block, just change the background color, once you select the group block. Only the blocks that are part of that group are visible. It is possible to use the Block navigation or the Document Outline option to check what part of your group block is.
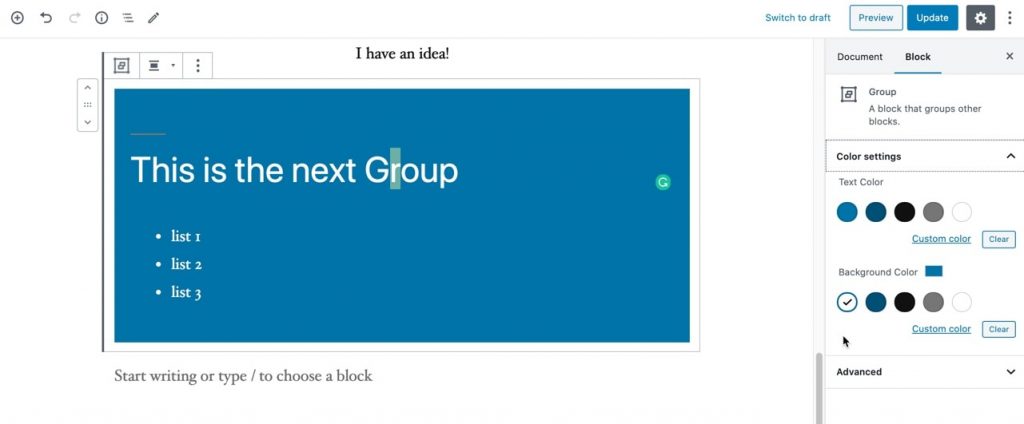
For easily seeing the blocks that make up the group, use the background color.
Congratulations! You can now use group block in the WordPress Editor.
Also Read
How Do I Import/Export My WordPress Gutenberg Blocks?


