
This article guides you on how you can use WordPress Toolkit in Plesk. This toolkit enables you to install, configure and manage multiple WordPress installations from one convenient interface.
# Steps to access frequently-used WordPress Toolkit features :
1. Log in to Plesk.
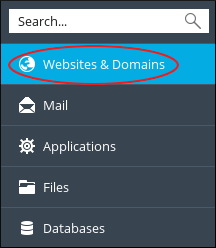
2. On the left sidebar of Plesk panel, click on Websites & Domains.
3. Now scroll up to the management area for the domain where WordPress is installed.
4. Click on any of the options from the toolbar :
![]()
• Click on Log In, to log in to WordPress.
• Click on Check Security, to run a security check on the WordPress installation.
• Click on Plugins, to manage plugins for the WordPress installation.
• Click on Themes, to manage themes for the WordPress installation.
• Click on Clone, to clone the WordPress installation.
• Click on Sync, to synchronize a WordPress instance with another instance.
Complete the access process :
Perform the following steps to access the complete WordPress Toolkit :
1. Log in to Plesk.
2. On the left sidebar for Plesk panel, click on WordPress. The WordPress Toolkit page gets appear.

3. You can manage your WordPress installations through the Installations tab :

To install a new instance of WordPress, click Install, and again click on Install (Quick) or click Install (Custom).
• Click on Scan, inorder to locate all WordPress instances on your account.
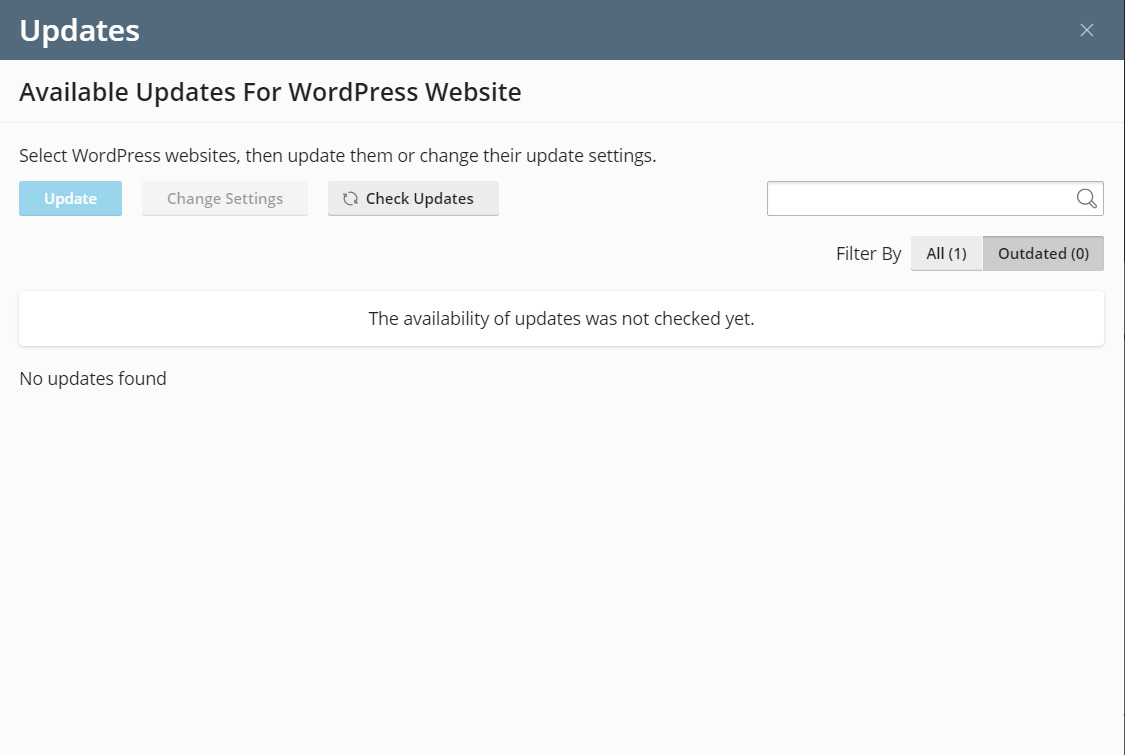
• Click on Updates, inorder to check for WordPress updates.
• Click on Security, inorder to manage security for your WordPress instance.
- Select a website and click the Check Security button. The system will scan the website for any security issues.

- Click the Secure button to select security measures to apply to your website. Once you are done, click the Secure button.

4. You can manage WordPress plugins through the Plugins tab :

• Click on Install, to install a plugin
- Enter the name/category of plugin and search for it.
- Select the plugin you want to install and click the Select websites button.

- Select the website on which you want to install the plugin and click Install.

• Click on Upload Plugin, to upload a plugin.
- Click on Browse to search for the plugin file on the machine to upload.
- Select the website to upload the plugin and click OK.

Note: You can choose to Activate after installation option to immediately activate the plugin operation. Or, you can manually choose the plugins you want to activate later as discussed below.
• Select a plugin and click Activate, to activate the plugin.
• Select a plugin and click Deactivate, to deactivate the plugin.

• Select a plugin and click Uninstall.
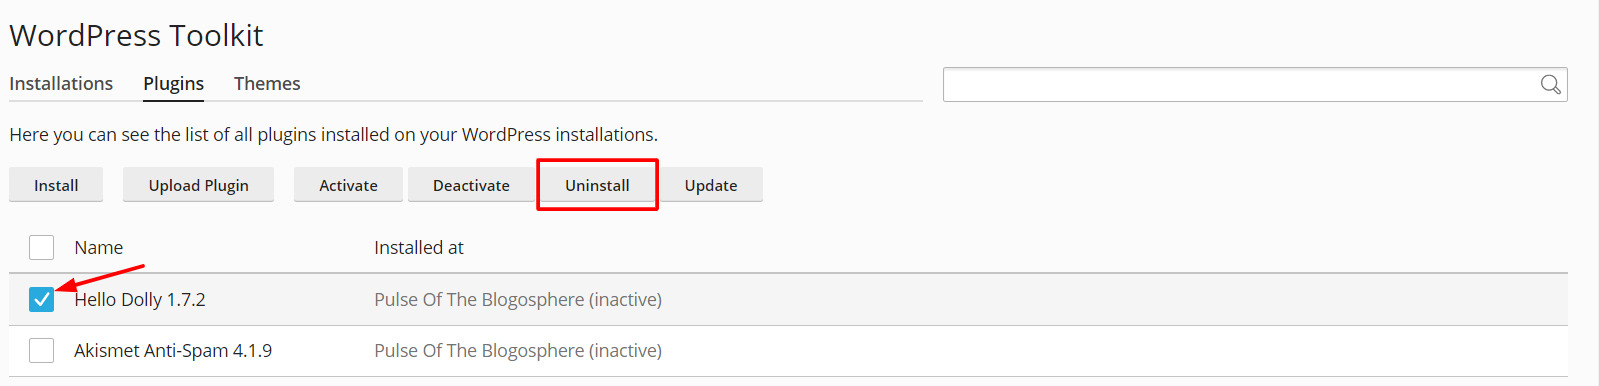
A window will popup asking for your confirmation. Click Yes to uninstall the plugin.

• Select a plugin and click on Update, to update the plugin.

5. You can also manage WordPress themes, through the Themes tab :

• Click Install, to install a theme.
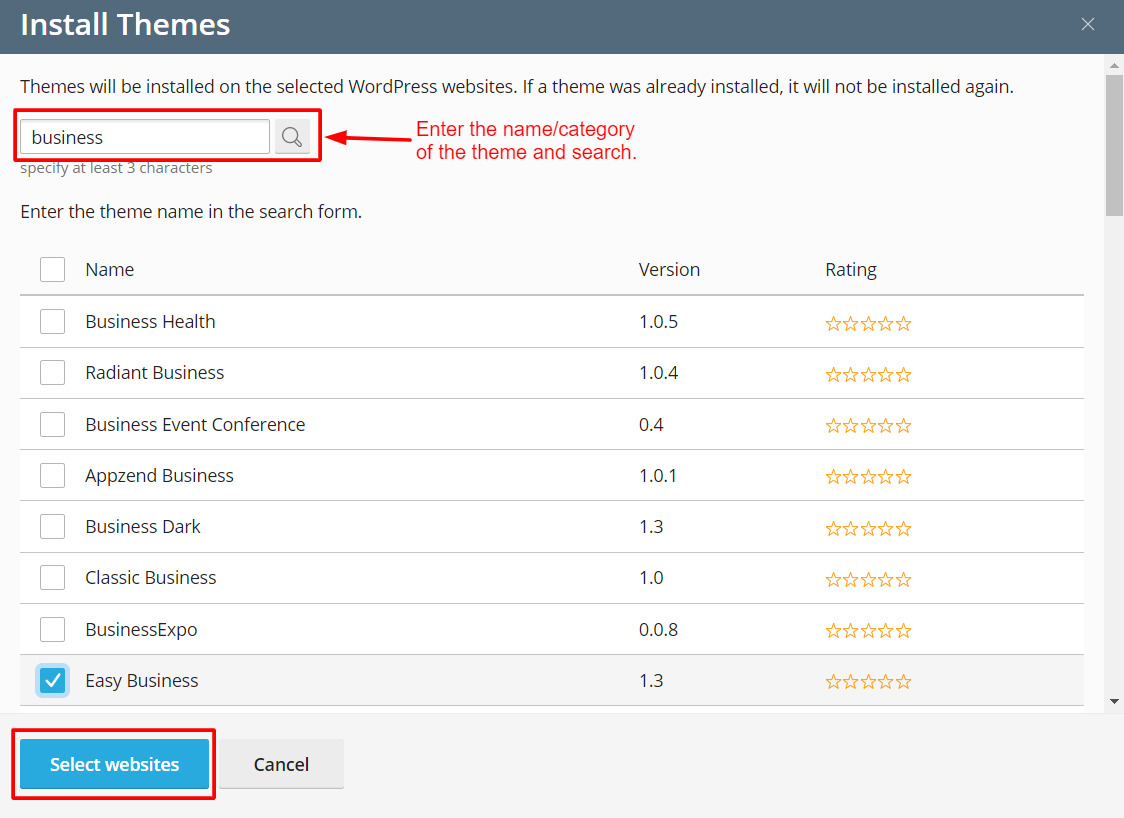
- Enter the name/category of the theme you want to install in the search bar.
- Select a theme from the list and click on Select websites.

- Select the website to install the theme and click the Install button.
• Click on Upload theme, to upload a theme from your machine.
- Click the Browse button and upload the zip file of the theme from the machine.
- Select the website to upload the theme and click the OK button.

• Select the theme and click on Uninstall.
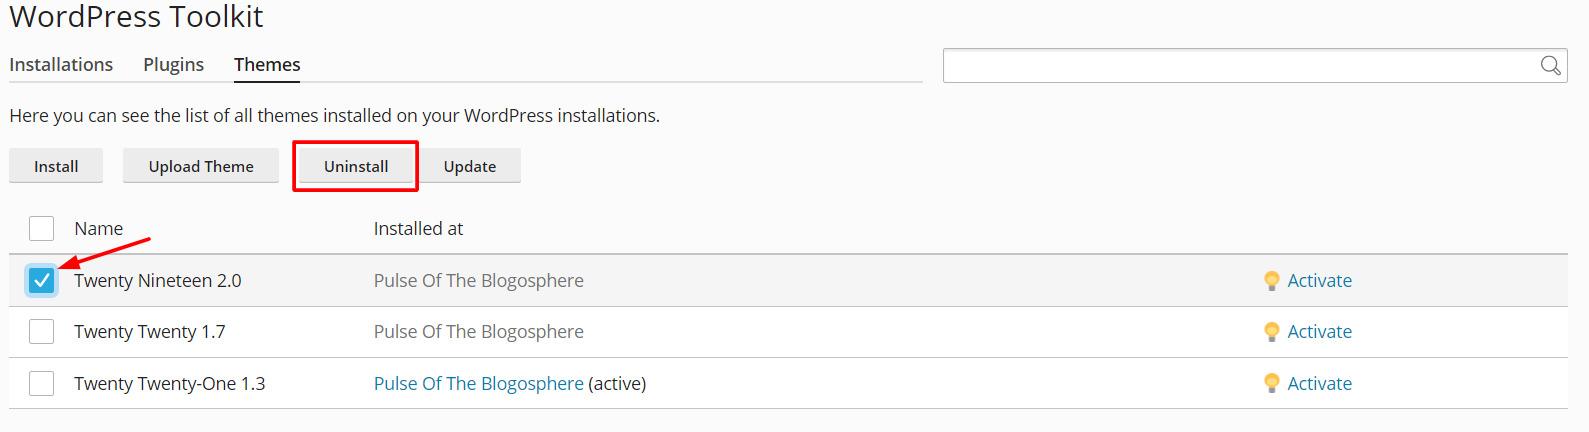
A window will popup asking for your confirmation. Click Yes to uninstall the theme.

• Select the theme and click on Update, to update the theme.

6. You can clone your WordPress website.
• Click Clone, from the toolbar from the management area for the domain where you have installed WordPress.
- Determine the location for the clone in the Target field.
- Choose Create subdomain to stage the clone website on a new subdomain by creating one.
- Choose Use existing domain or subdomain to stage the clone on your existing domain or subdomain.
- A name will be given by default for the clone.
- Once you have done, click the Start button.

The Plesk system will begin the process to clone your WordPress website.
That’s it!
Isn’t it easy to use WordPress Toolkit in Plesk?
For any other information reach out to our support team through chat on website.
Also Read :
1)Steps to Install WordPress with Custom Settings in Plesk
2) {4 Easy Steps} – Enable and Disable Pingbacks and Trackbacks in WordPress


