
Watch this video for a step by step process on how to Install and Configure the IIS(Internet Information Server) on Windows Server
Steps to Install and Configure the IIS(Internet Information Server) on Windows Server
Go to the Server Manager dashboard..
From the Manage menu, click on Add Roles and Features or click on the Add Roles and Features from the Quick Start menu.

In the Before You Begin section, click on Next.

In the Installation Type, select Role-based or Feature-based Installation and click Next.

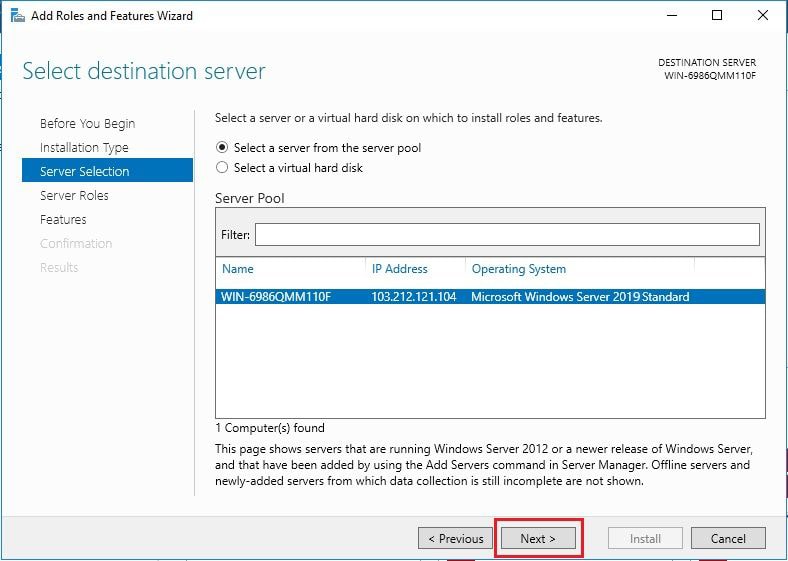
In Server Selection, select the appropriate server (local is selected by default) and click Next.
Now you will be prompted to select the Server Roles. Here click on the Web Server IIS checkbox. This will open its Add Roles and Features Wizard, here click on Add Features. This will tick Web Server IIS checkbox.


There is no need to select additional features for IIS so, click Next
On the Web Server Role (IIS) window, click on Next.

On Role Services, click on Next.

Now the final Confirmation window will open, click Install.

The wizard displays the installation status when the IIS installation completes.

As you have successfully installed and configured the IIS, click Close to exit the wizard.

In this way, you have successfully installed and configured the IIS(Internet Information Server) on Windows Server.


