
Taking a WordPress website from one domain or server to another may seem like a lot of work at first glance. The All-in-One WP Migration plugin simplifies this considerably. It bundles your website into a single file that you carry over to the new server and restore in just a few clicks.
Follow the steps below to migrate your WordPress website using the All-in-One WP Migration plugin:
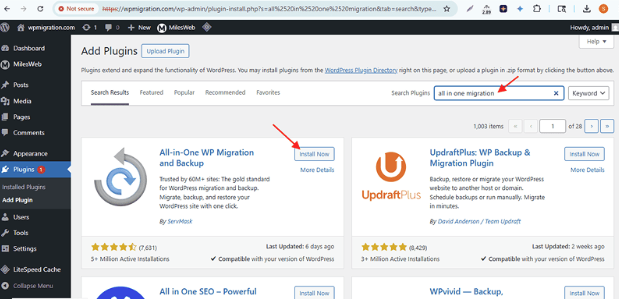
Step 1: Install the Plugin on Your Source Site
- Log in to the WordPress admin panel of your site.
- From the sidebar, go to Plugins → Add Plugin and search for All-in-One WP Migration.

- When it shows up in the results, click Install Now and wait for it to finish. Then click Activate to get it running.
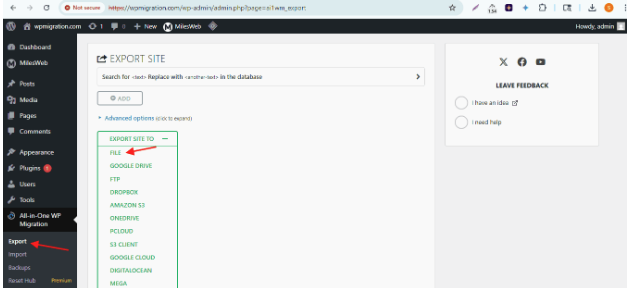
Step 2: Export Your Website
- Go to All-in-One WP Migration → Export → Export Site To → File. The plugin will begin packaging your site into a backup file.
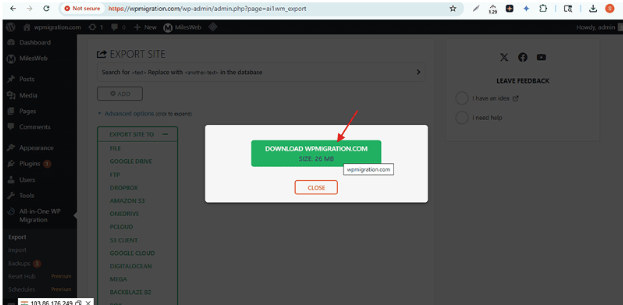
- Wait for the process to complete. This may take a few minutes depending on your site size.
- Click the Download button and save the .wpress file to your computer.
Step 3: Set Up the Destination Site
Ensure the new domain points to the destination server via DNS; otherwise, you cannot access the wp-admin panel.
For same domain migration
Backup from source server (check step 2), then point domain to destination server to access the new wp-admin panel.
For different domains
Each domain must point to its respective server to access its wp-admin panel.
- On your new domain or server, do a fresh WordPress installation.
- Log in to that admin dashboard, then install and activate the All-in-One WP Migration plugin the same way you did on the source site.
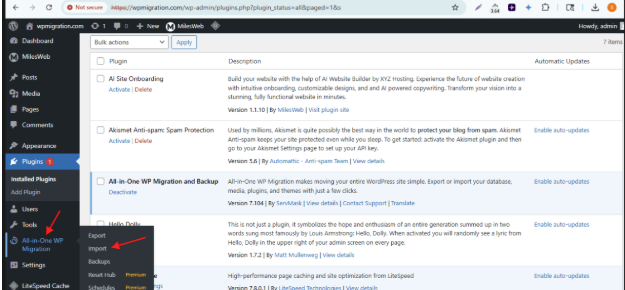
Step 4: Import Your Website
- Go to All-in-One WP Migration → Import on the new site.
- Pick Import From → File, select the .wpress file from your computer, and confirm when the plugin asks you to overwrite existing data.
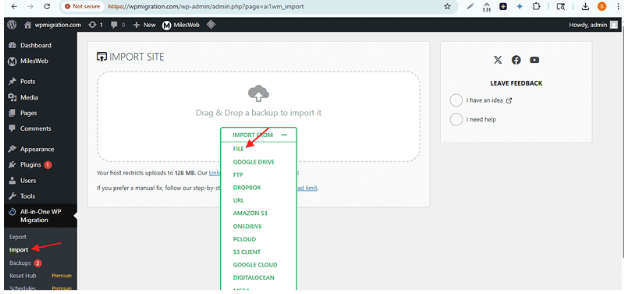
- Click on Proceed
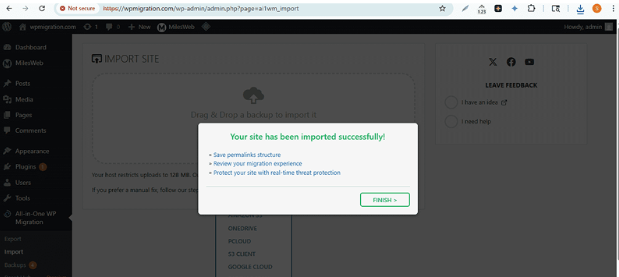
- Let the import get completed. You will see a message as “Your site has been imported successfully.”
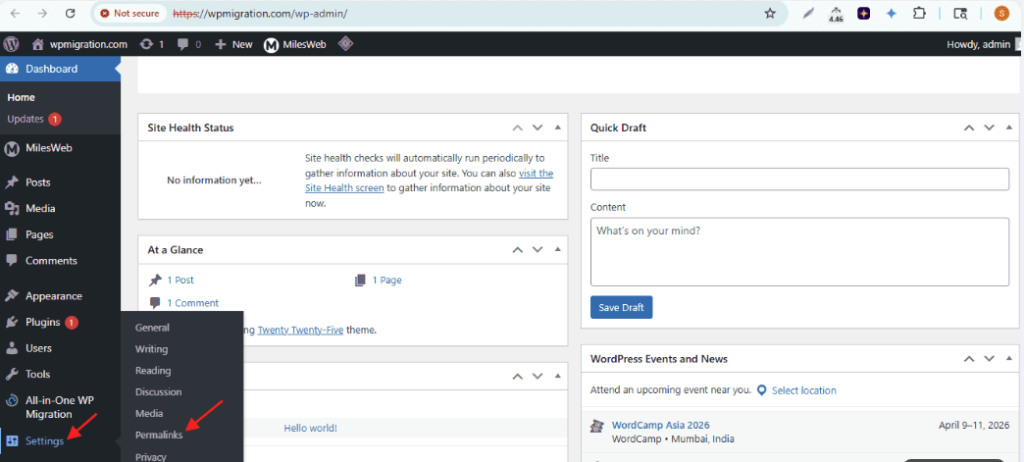
Step 5: Save Permalinks
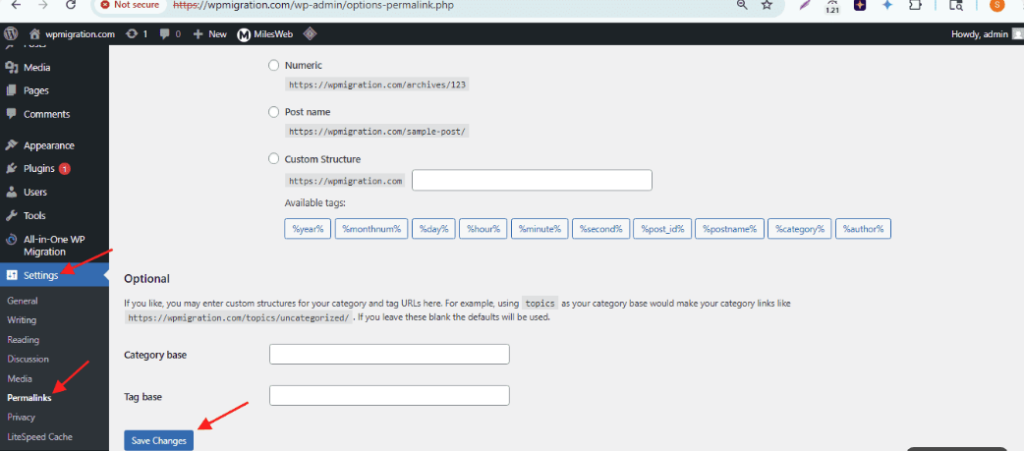
- Head to Settings → Permalinks once the import wraps up.
- Hit Save Changes without touching any of the existing settings.
Step 6: Final Checks
- If source and destination domains differ: The migrated site will retain old domain URLs. To replace them with the new domain, follow this guide: Changing Old URL’s in Website Database After Migration
- If you find yourself on the login screen after the import, enter your WordPress admin username and password to get back in.
- Once the migration is done, visit your new domain in a browser and go through the site manually.
- Click on some pages and fill out a contact form to make sure submissions go through.
Your WordPress Site Has Been Successfully Migrated!


