
Watch this video for a step by step process on how to replace the WHMCS logo with your own company logo
Branding is the most essential attribute for every online business. If your brand appears at several places online, the chances are more of customers selecting it without overthinking.
WHMCS stands for WebHost Manager Complete Solution. It is a full-fledged client management, billing, and support system that is popularly known for hosting reseller businesses. The client area of WHMCS is created in a way through which the user can change the look and feel of everything. WHMCS works on the powerful smart template system that enables easy customization of the layout.
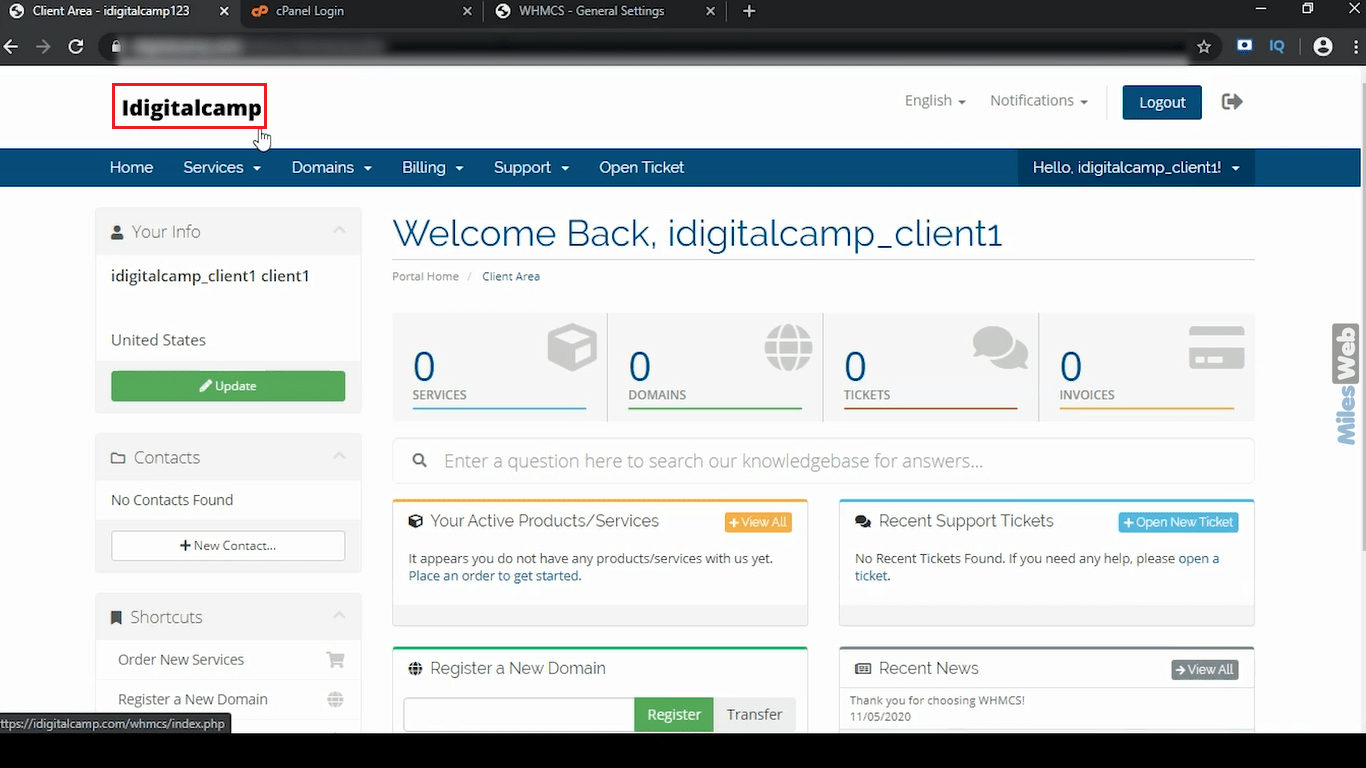
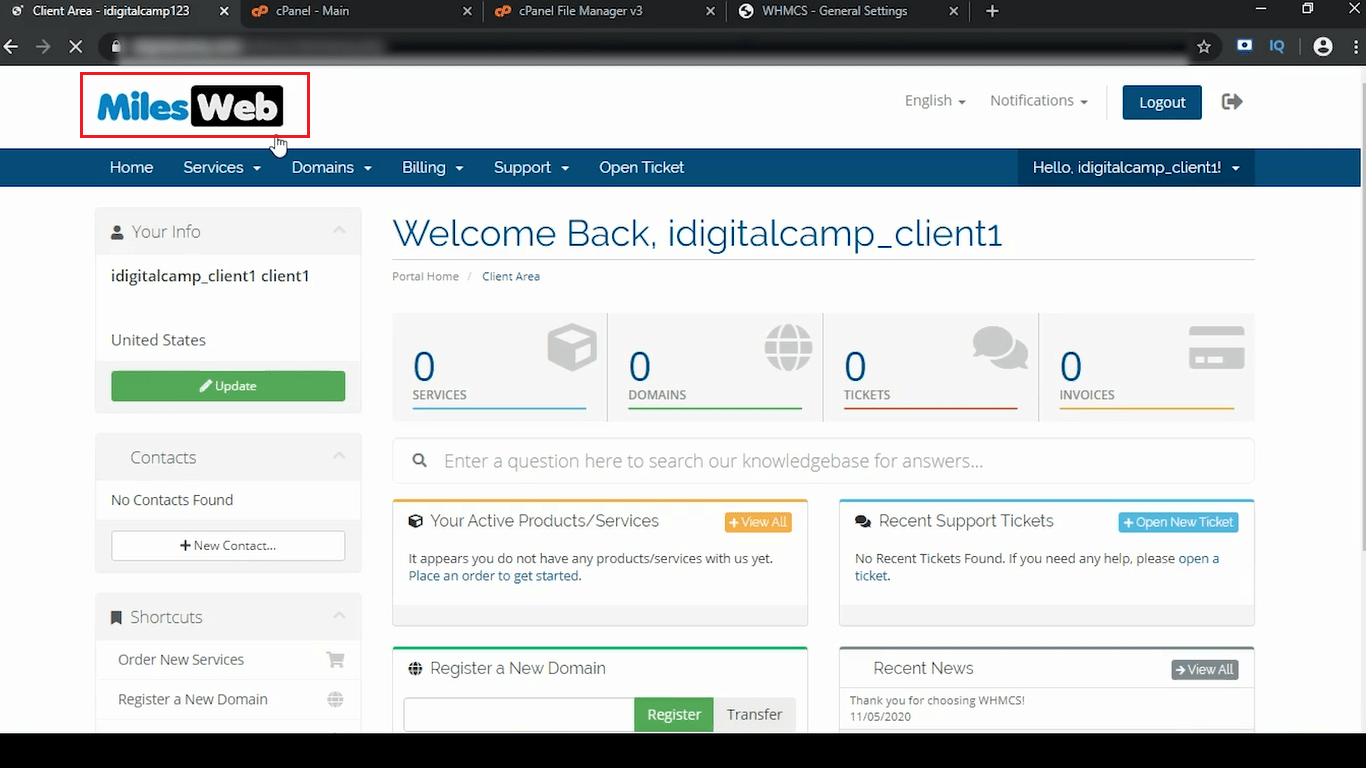
Here, I am logged into the client area of my WHMCS panel. This is the logo that I want to replace.
Let’s see how to change the WHMCS logo:
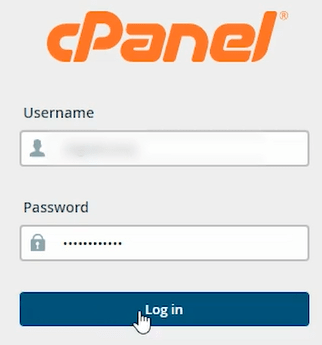
1. Login to the cPanel.
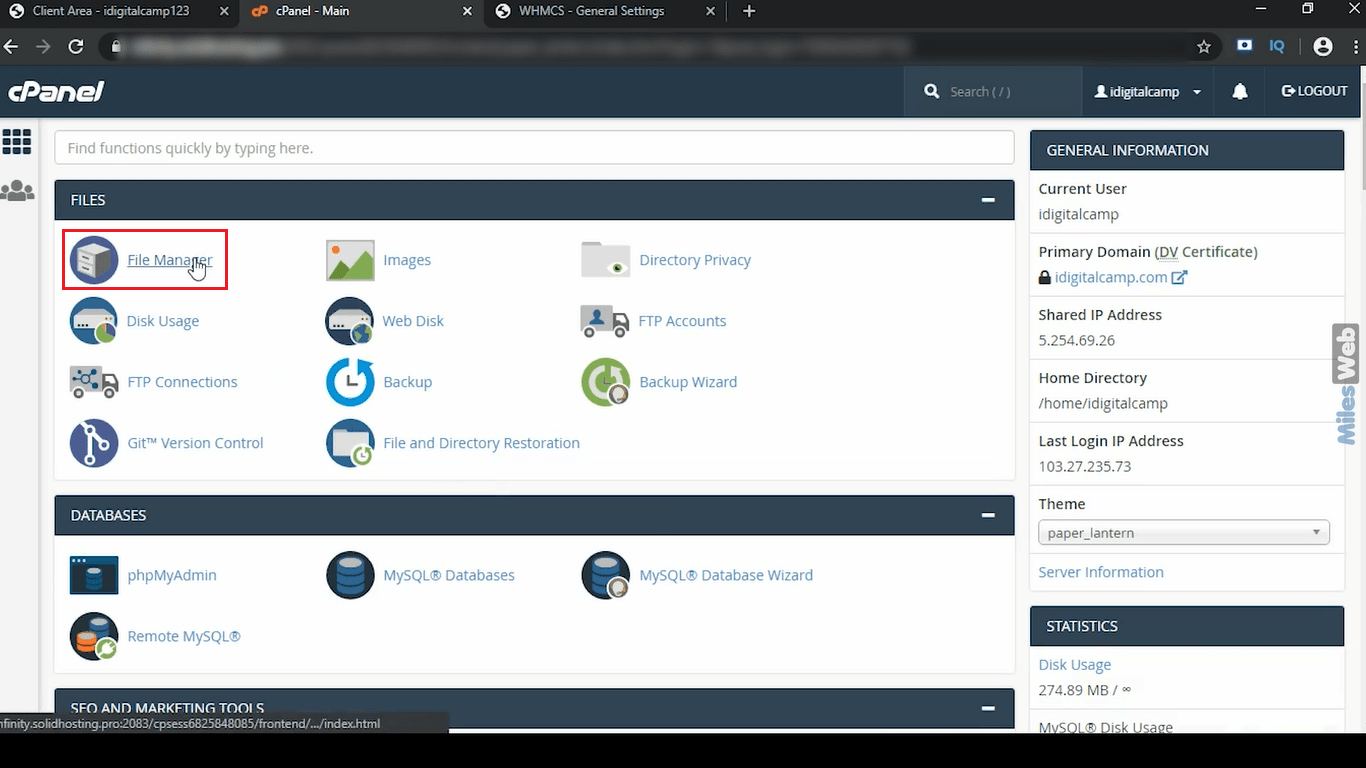
2. Under the Files section, click on File Manager.
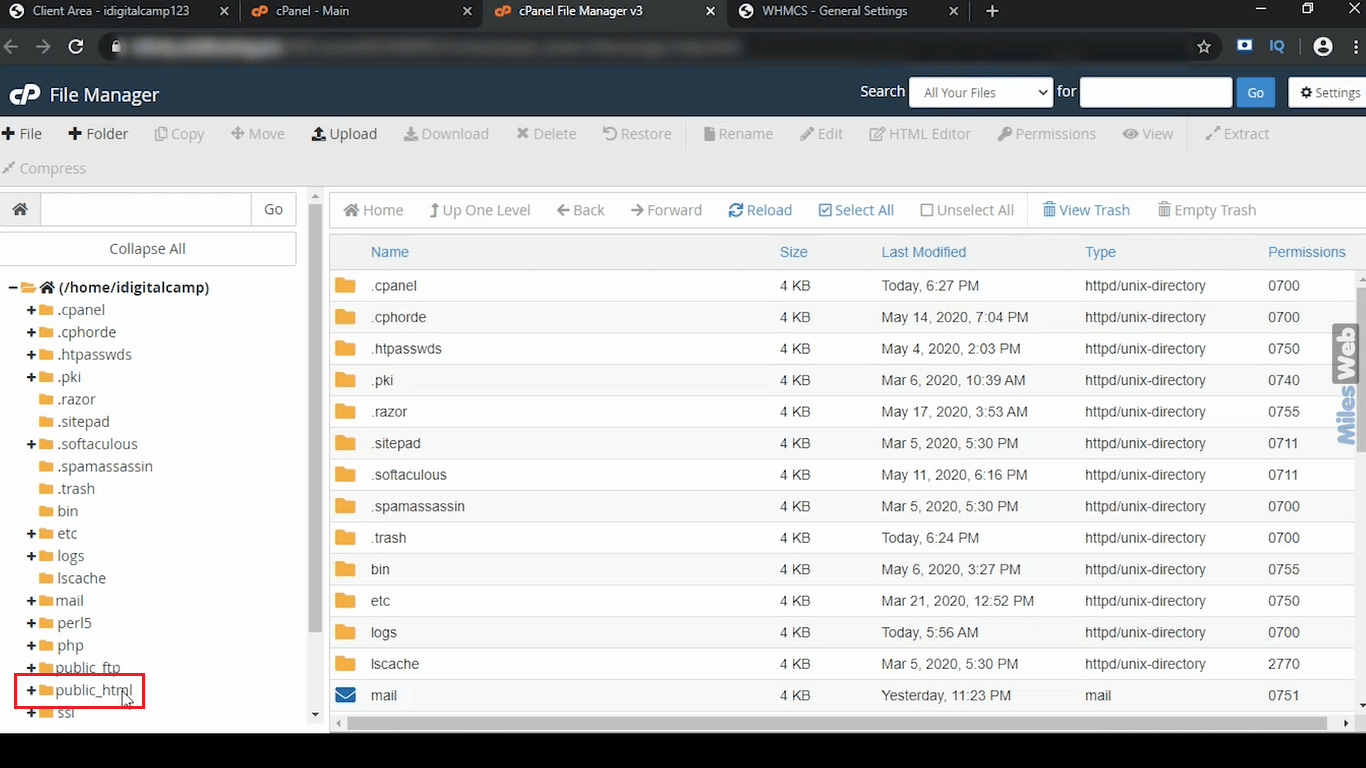
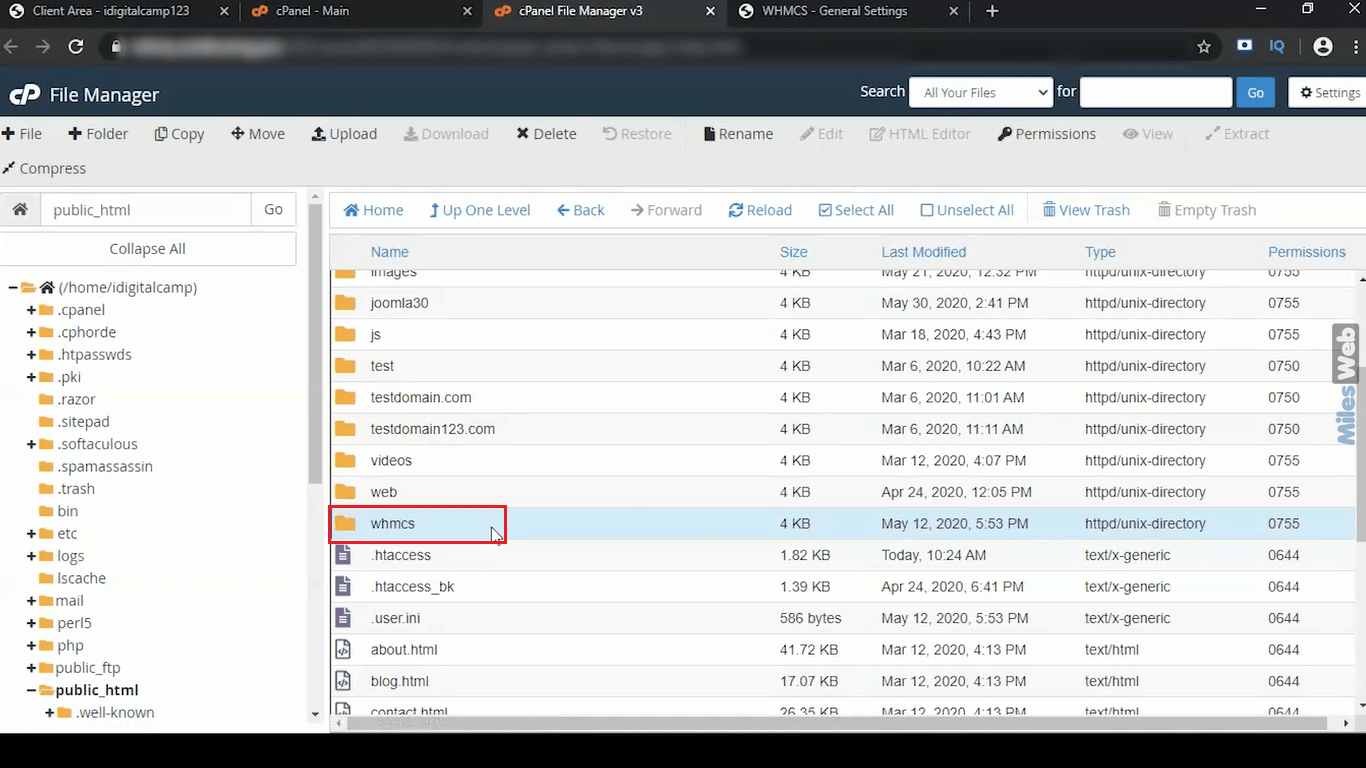
3. On the left side, click on the public_html directory.
4. Here you will see the files and folders.
5. Choose the appropriate directory where you have installed WHMCS. In my case, I have installed WHMCS in the WHMCS folder. Open it.
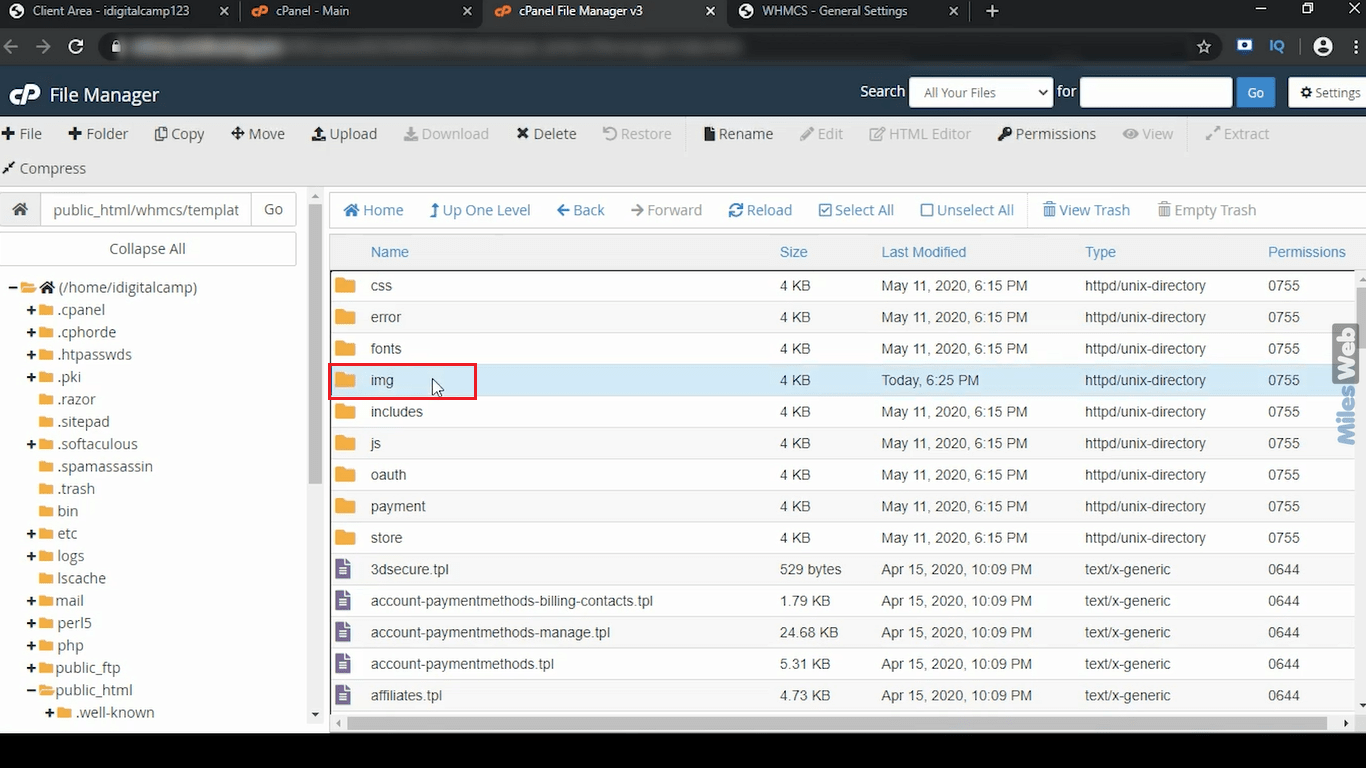
6. Go to templates.
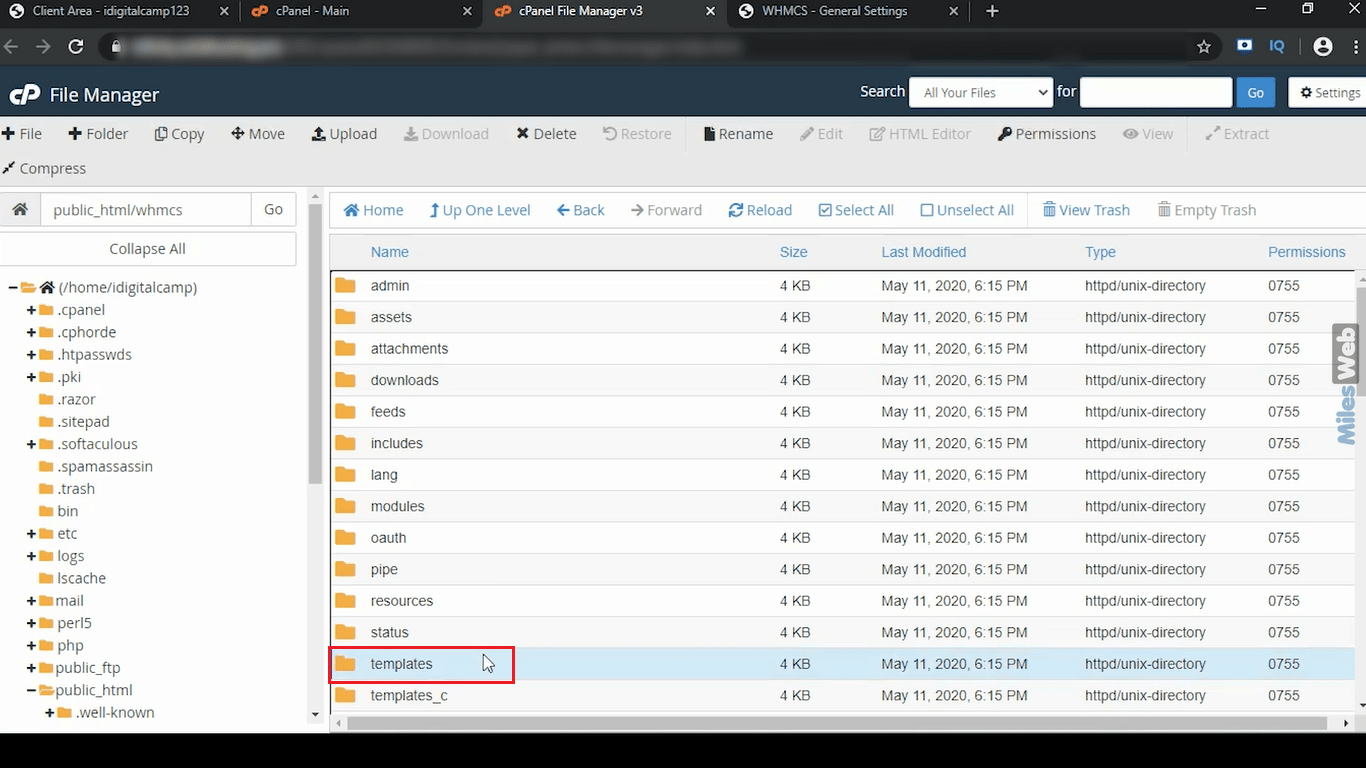
7. Open the folder named as six which is the default WHMCS template I am using. If you’re using a different template then use the appropriate directory.
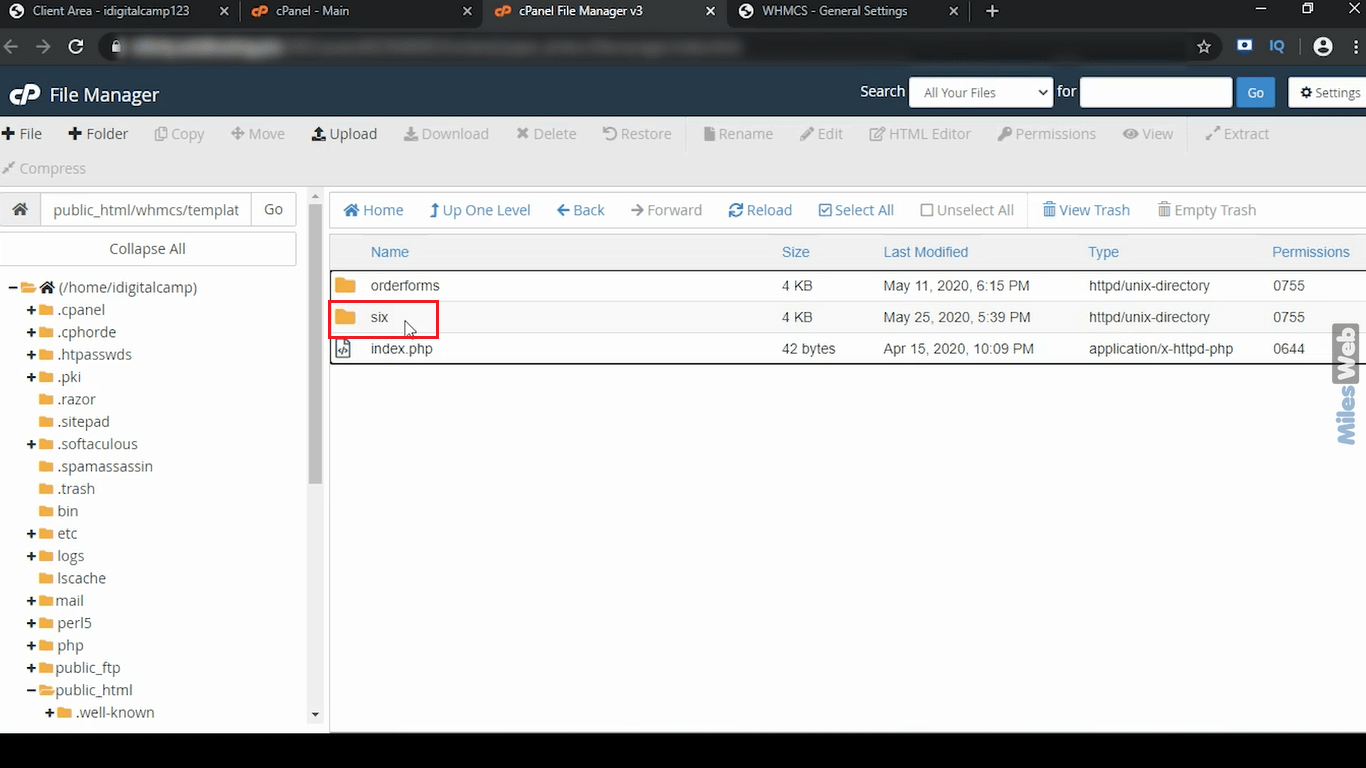
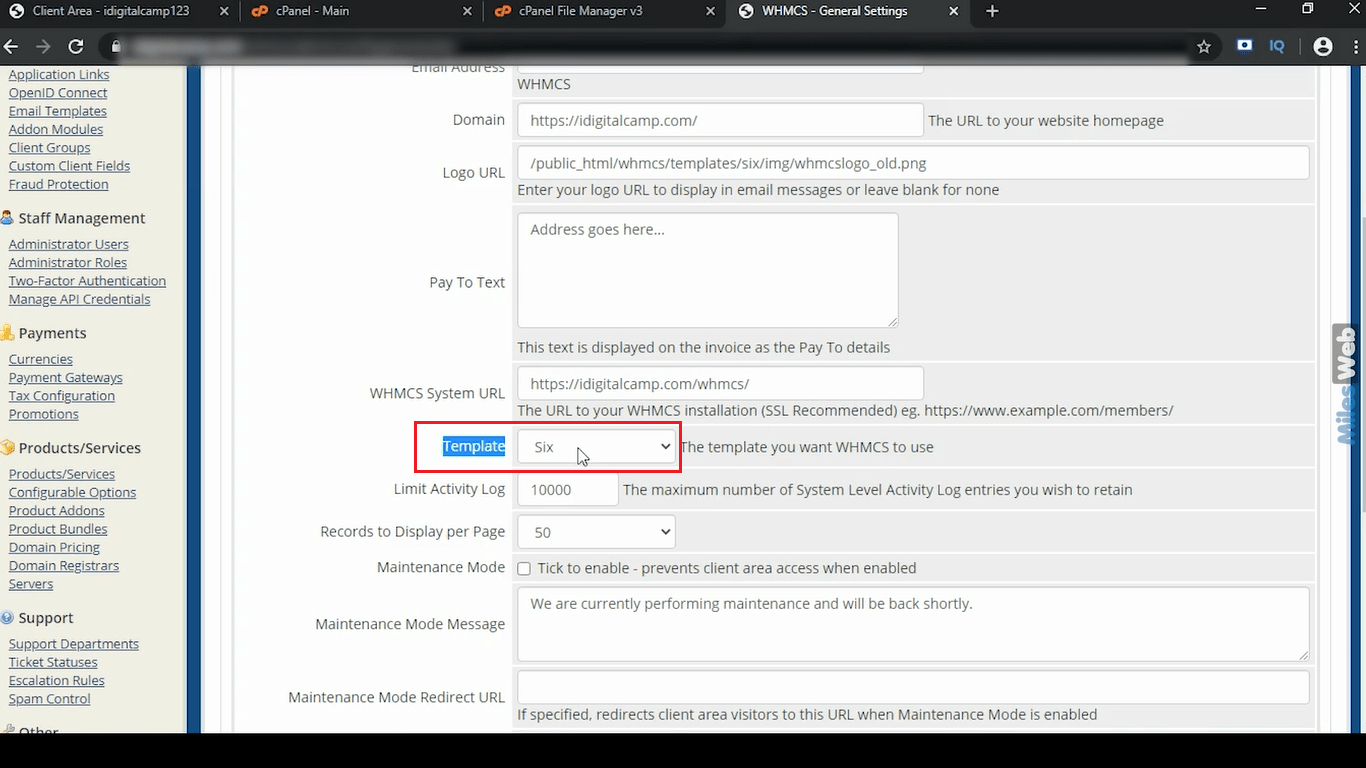
8. To check your current WHMCS template log into the admin panel and access the option Setup>>General Settings.
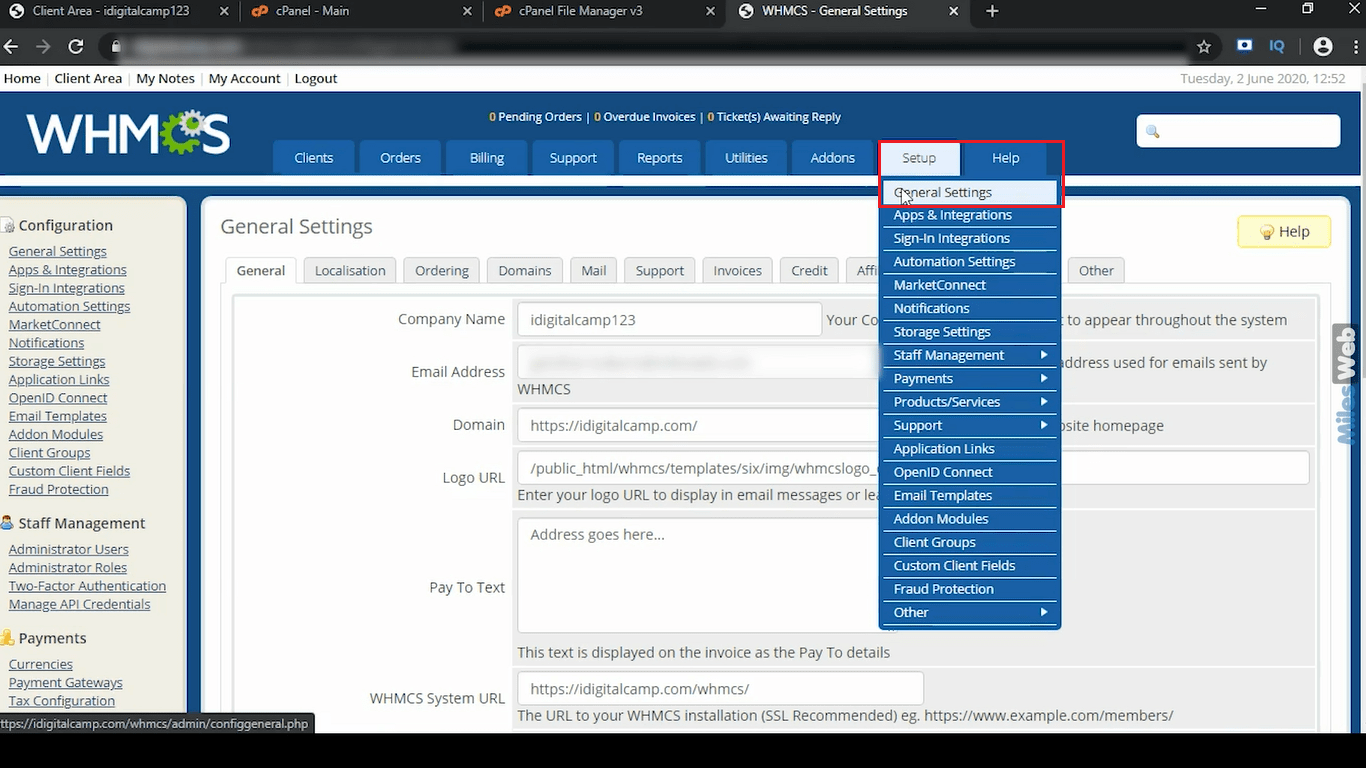
9. The General Settings dashboard will appear. Under that go to Template and here check if you have selected the appropriate directory.
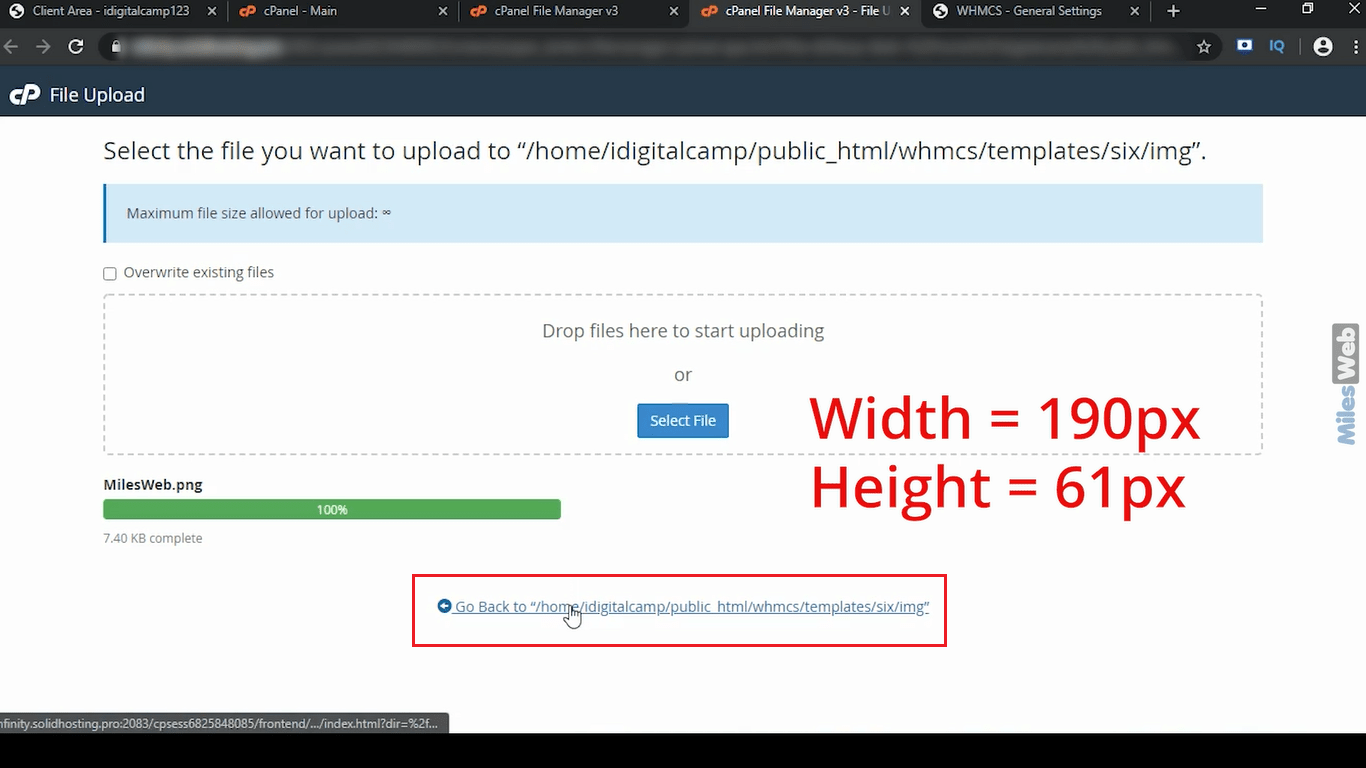
10. Go back to File Manager and open img folder.
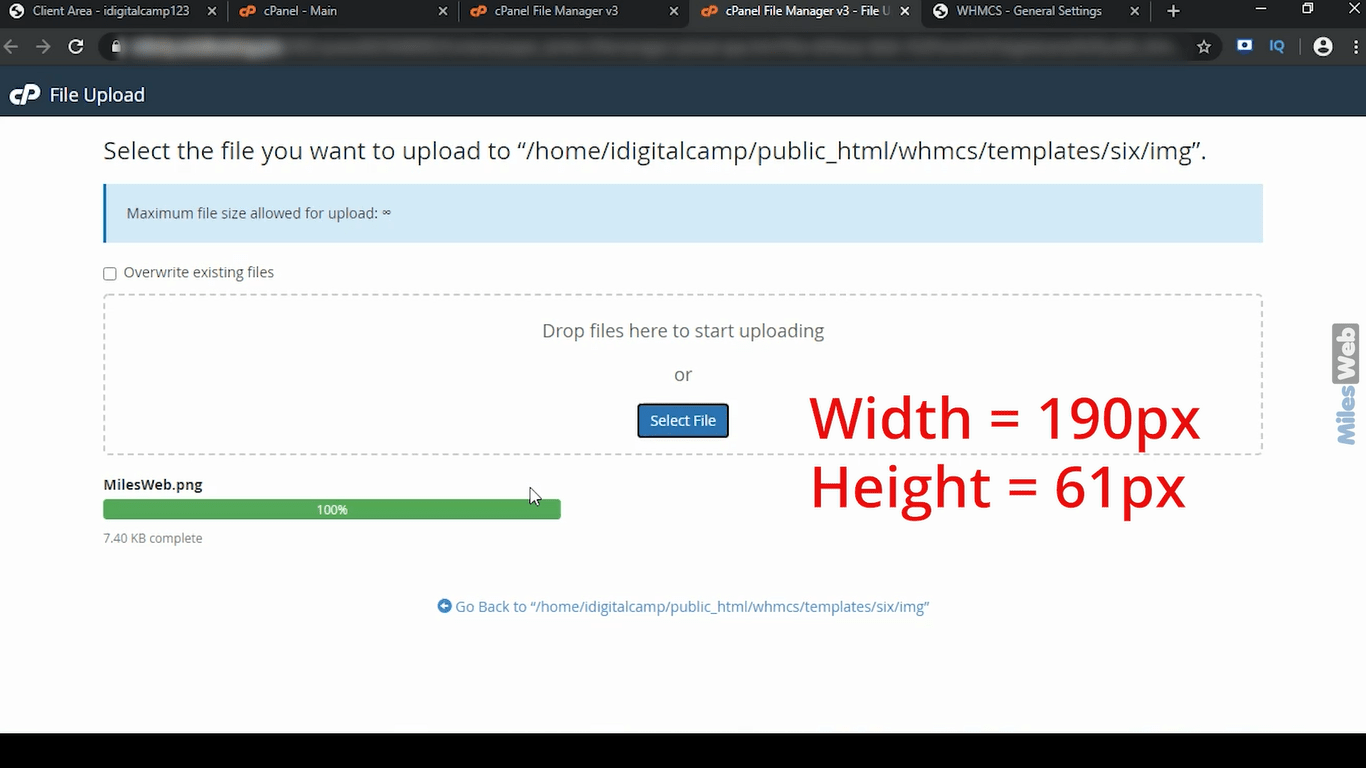
11. Now, click on Upload.
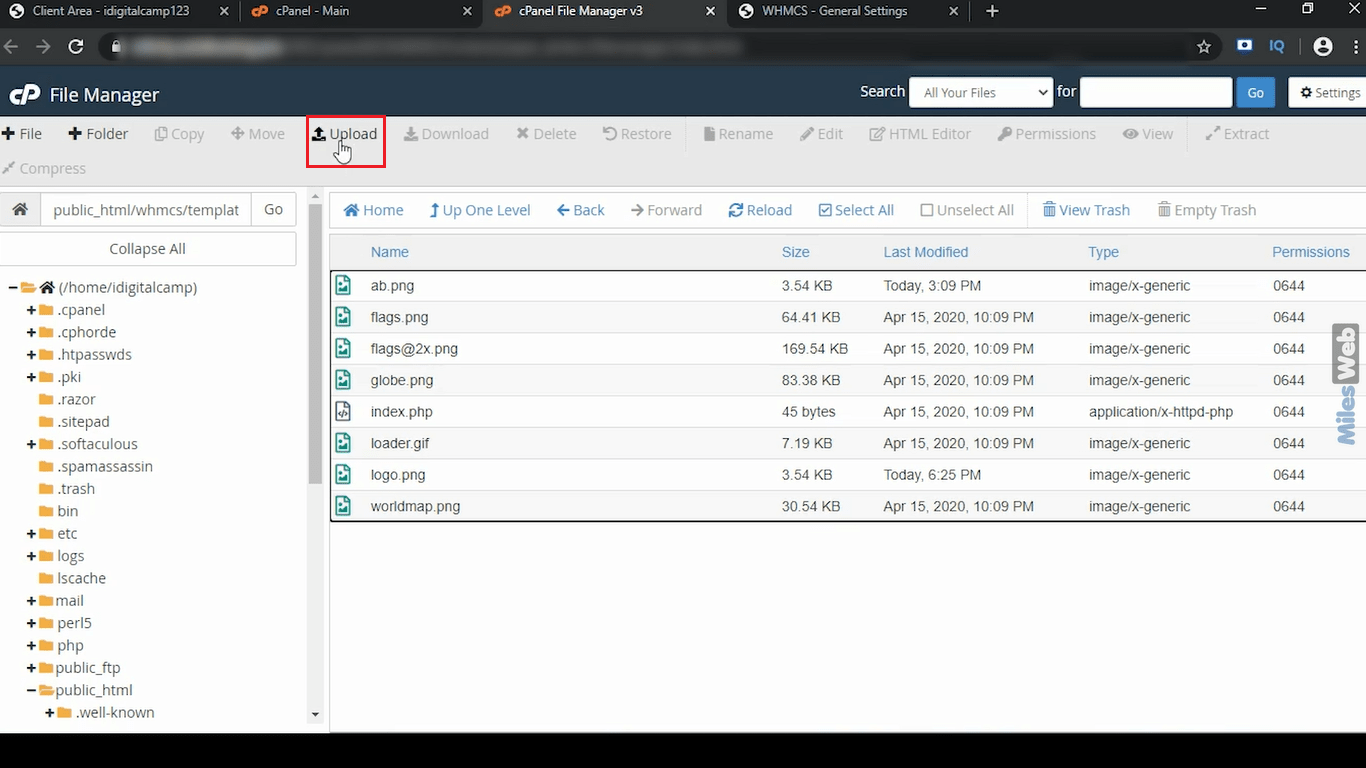
12. Here, you can either select your logo file or drag and drop it.
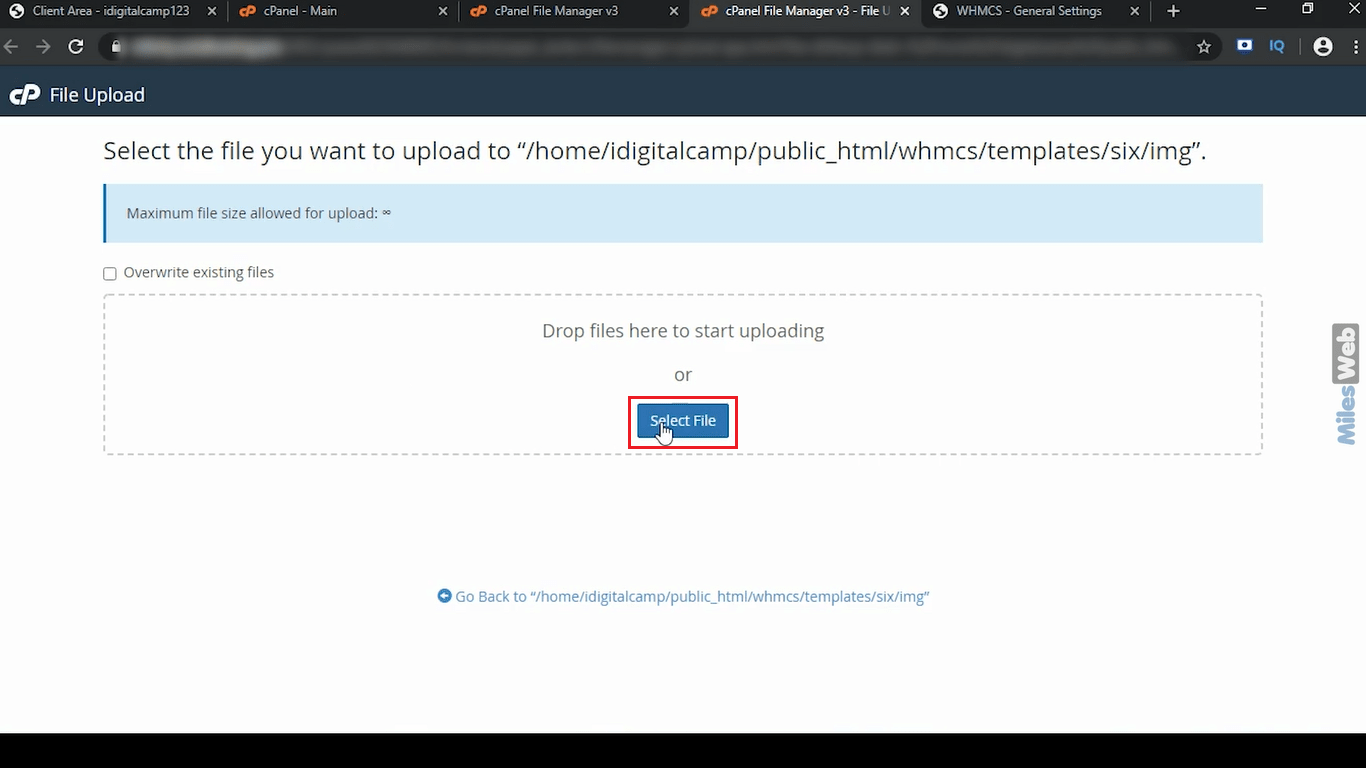
Make sure the file type is png and the background is transparent. The recommended dimension for the logo is 190*61 pixels.
13. Let’s go back to the previous section.
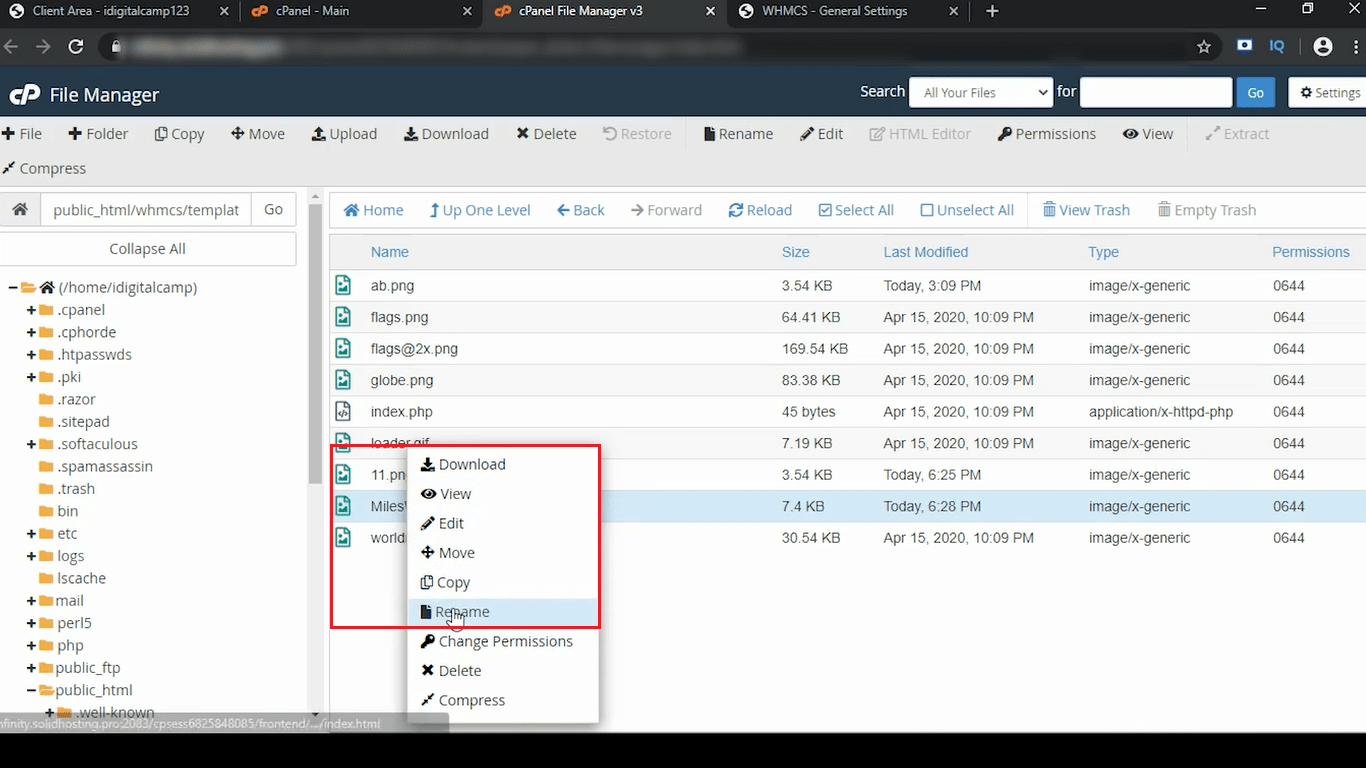
14. If you already have a logo.png file in your folder then rename it to something else.
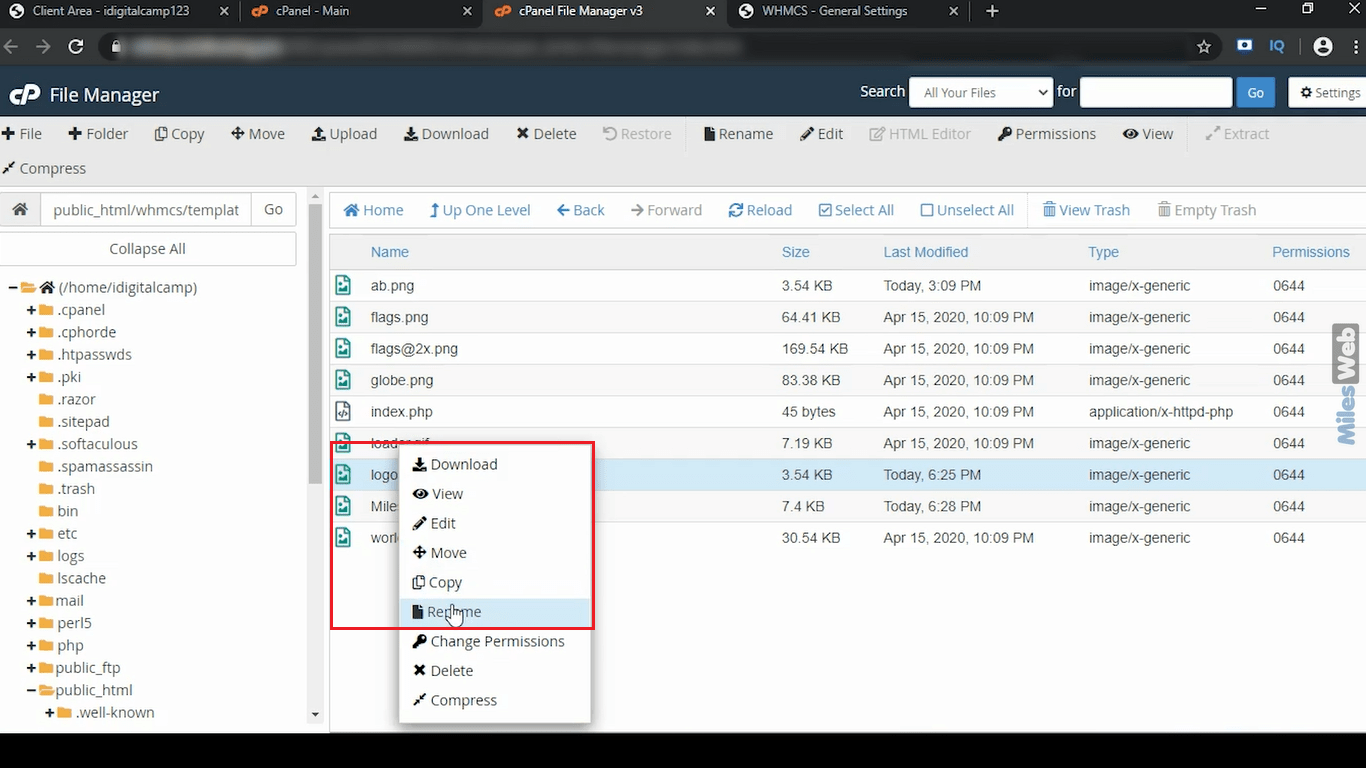
Now, rename your new logo file to logo.png
15. Let’s go to the client area of WHMCS and refresh it.
As you can see our logo has now been replaced.


