
In case you have a VPS server or Dedicated server, you might want to find the status of that server without the need to wait at a terminal window. For this, you can just run a script that emails you information about the status of your server.
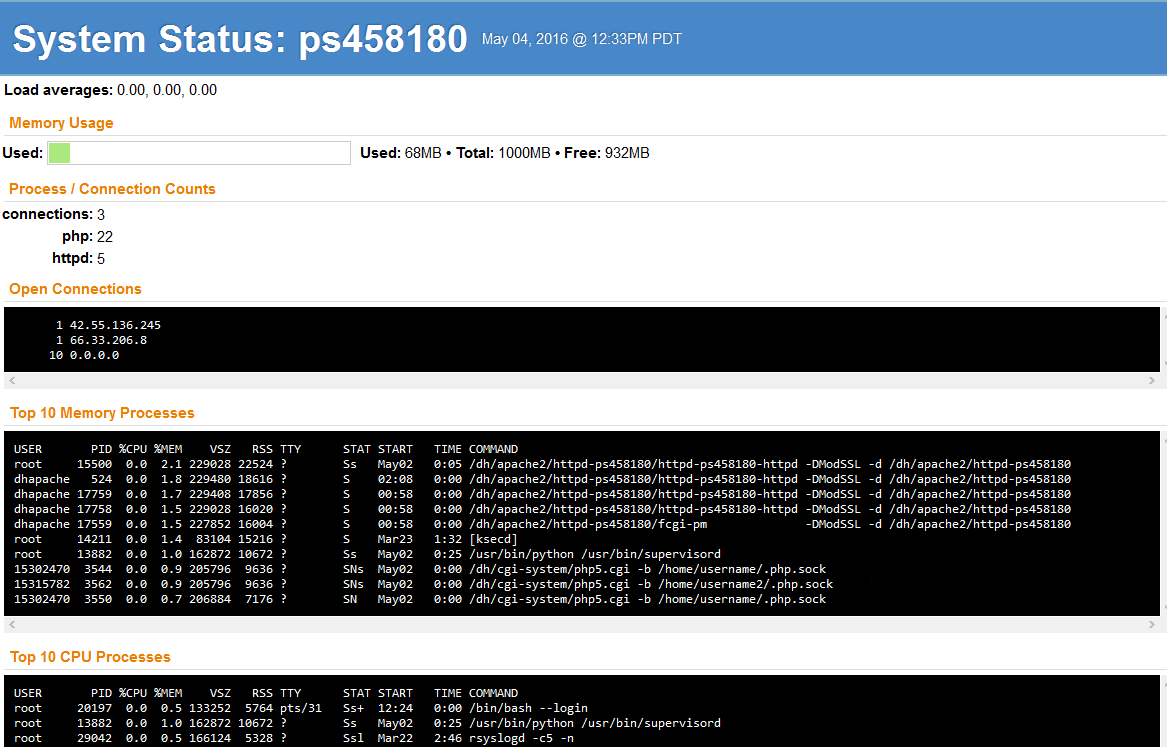
In this process, HTML 4.01 Strict compliant content containing information on your server is given as output, including:
• load average
• memory usage
• open network connections
• top 10 memory processes
• top 10 CPU processes
• netstat output
• top snapshot of all running processes
Installing a Server Script
You can download a copy of the script in one of below ways:
• Browse the URL of the script and then download it in your browser:
https://cdn.rawgit.com/watsonian/server-status-report/master/status.rb
Though you download the file via the URL, you will need to upload the file via FTP.
• In case you have the SSH access into your VPS, simply run:
[server]$ curl -s -o status.rb https://cdn.rawgit.com/watsonian/server-status-report/master/status.rb
The script’s name is status.rb, and it is written in Ruby so that you can produce the HTML content by using the ERB templating system.
Confirming If mailx is Installed
After downloading the script successfully, make sure that the mailx package is installed on your PS.
To check this out, execute this command:
[server]$ dpkg -l | grep mailx
If your output is similar to the below one, it means it’s installed:
ii bsd-mailx 8.1.2-0.20100314cvs-1 simple mail user agent
But, if you get the below output, it means you need to install it:
rc mailx 8.1.2-0.20050715cvs-1 A simple mail user agent
Note: It is possible to install mailx on a Dedicated server only with an admin user. This is because it needs sudo.
After logging in, run the following command:
[server]$ sudo apt-get install mailx
Creating a cron job
While creating a cron job, enter the below command in the panel:
[server]$ /usr/bin/ruby /path/to/script/status.rb | /usr/bin/mail -a "Content-type: text/html;" -s "Status Report: $HOSTNAME" "some@example.com"
In case the above command isn’t working, try to modify ‘/user/bin/ruby’ with ‘/user/bin/ruby1.8’.
• The subject can be changed to anything you like.
• The email too can be changed to any address you want the cron email sent to.
• For adding multiple email addresses in the CC, use the -c flag and pass it a list of email addresses separated with a comma.
• It’s not a bad idea to run it once per hour, but you can run it as frequently or infrequently as per your preference.
Conclusion
If you follow the above steps properly, then you will start getting emails that look roughly like below:
Remember that this script might update as time passes if there is any change with server configurations. So, in case this stops working on your server, make sure to check back to see if the script is updated.


