
With a view to help the influx of account migrations from HostGator, this can be fairly treated as a handy guide to migrate hosting accounts/sites from HostGator to MilesWeb.
The easiest way is to post your hosting account/migration request to our Support Department at support@milesweb.com. Our expert technicians will carry out the transfer free of cost. Or you can opt to do it manually by yourself by following the below given guidelines.
Related: How To Transfer Domain From Godaddy to MilesWeb?
A seamless and hassle-free transfer can be achieved by keeping a few points in mind. Remember, this article is intended for cPanel to cPanel transfer/migration.
a. Get signed up with MilesWeb with a suitable plan.
b. Selected a package higher or equal in size to the disk space of current hosting package at HostGator.
c. Your account with HostGator is in a good standing position or at least won’t be disabled or terminated within 48-72 hours from the time you request us for the migration.
d. Grant us access to your cPanel account with HostGator.
Here is how you manually do it. Please follow each step correctly.
-
Backup Your Account
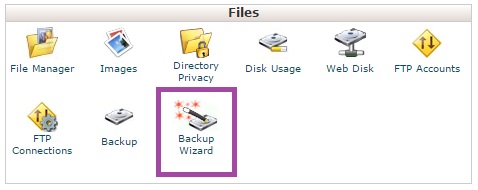
A. On the top of all, firstly you need to fully backup your hosting account at HostGator.
Log in to your HostGator cPanel and navigate to Files >> Backup Wizard.
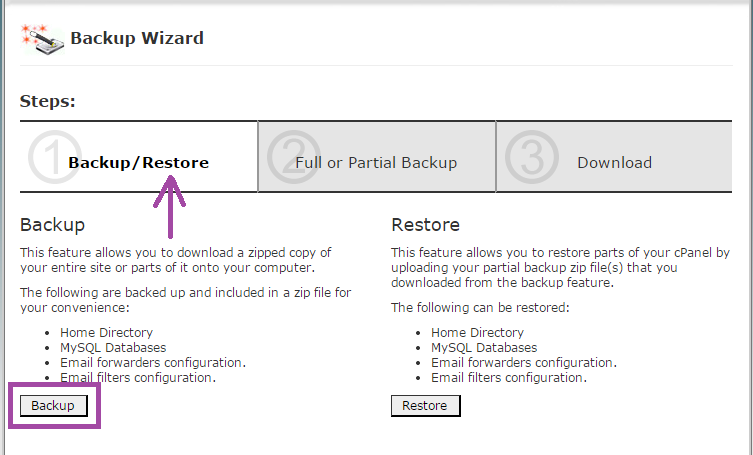
B. It opens up another window, where you need to go with the first option Backup/Restore and then hit the Backup button under it.
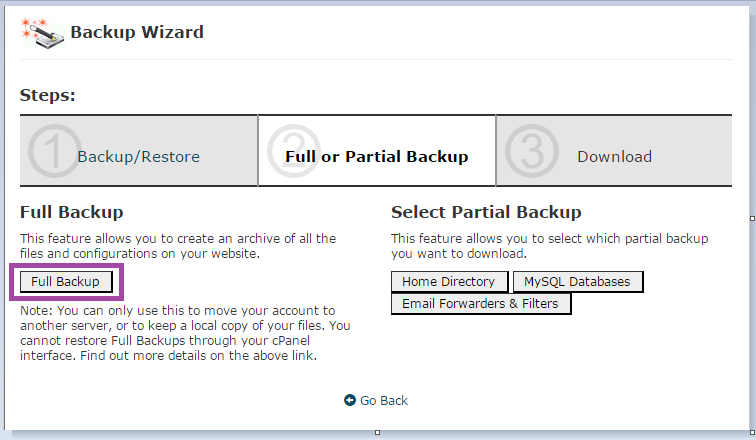
C. On the next window, click Full Backup.
D. Now select Home Directory as backup destination, insert your working email address and click Generate Backup.
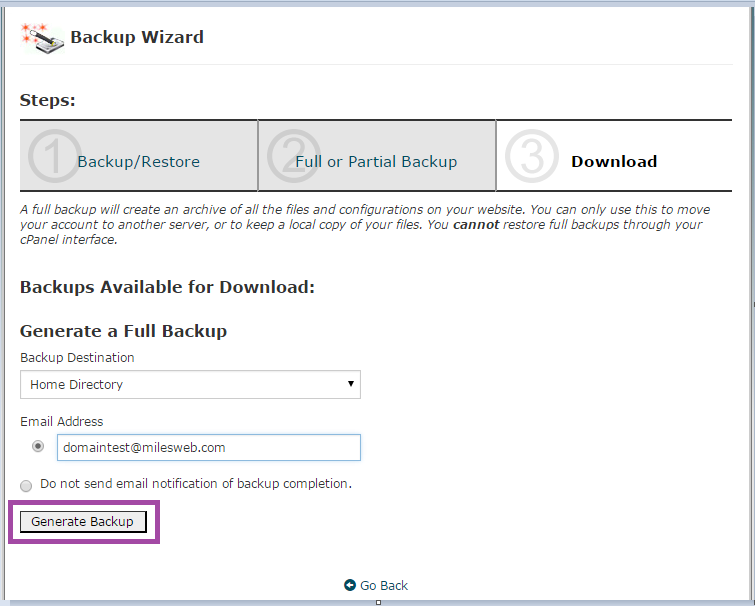
E. cPanel will generate a full backup and once done, you’ll receive an email at the specified address.
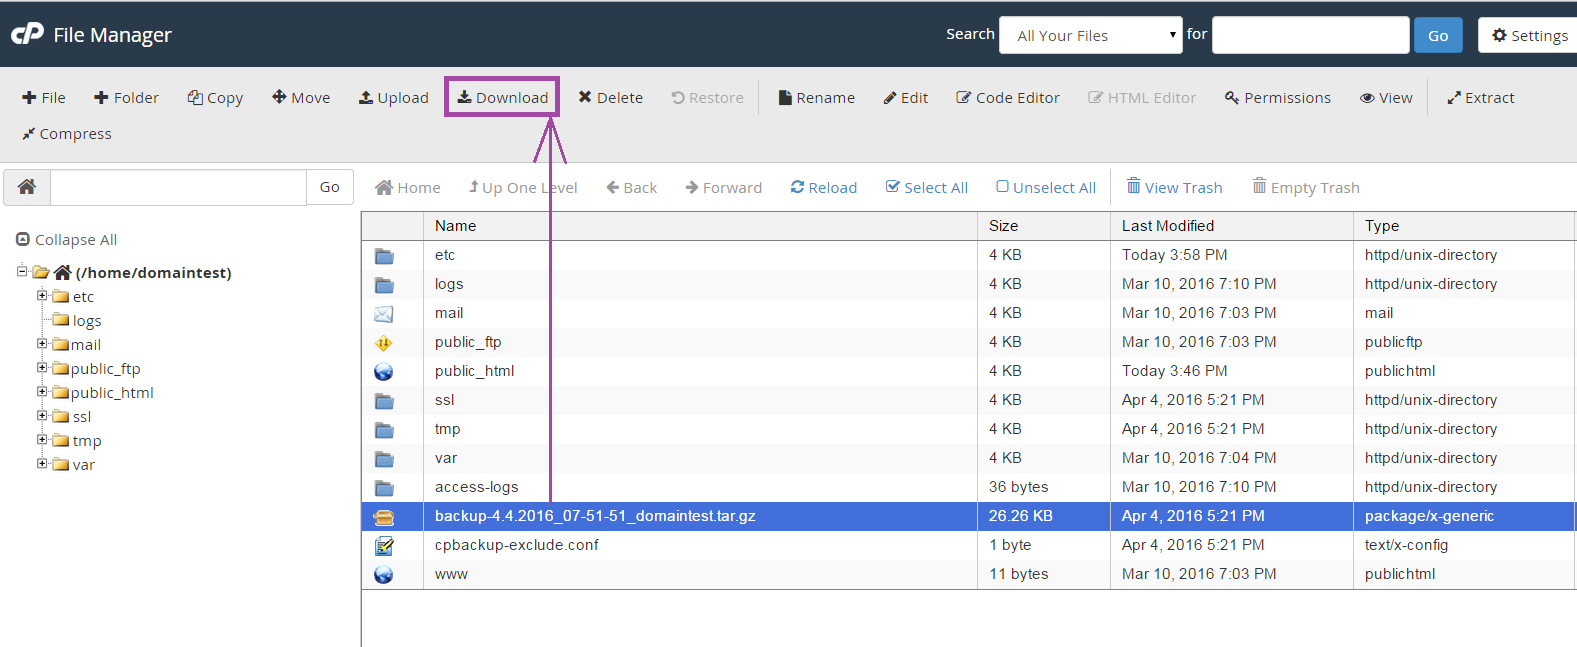
F. Download the created backup file either from File Manager or by FTP.
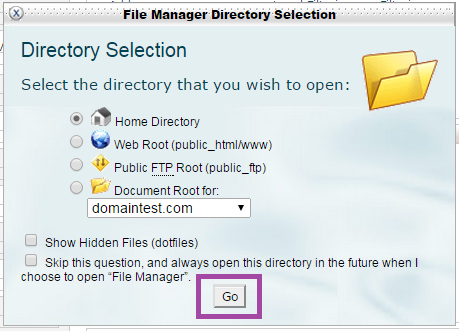
G. The location should be Home Directory and hit GO.
H. Select the backup file from the list and hit Download. The file will be downloaded to your local PC.
-
Upload the Backup.
It’s time to log into your newly created cPanel account with us, and upload the downloaded backup from your PC. You can find the login details in the Welcome Email in your client area and at your registered email address with us.
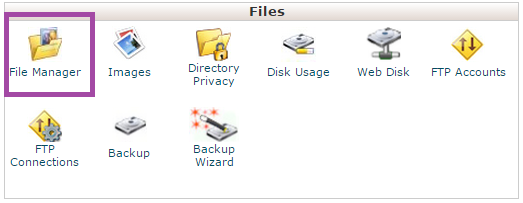
A. Log in and go to Files >> File Manager.
B. You need to select Home Directory and hit the GO button.
C. Now hit the Upload button on the dashboard and upload the backup.
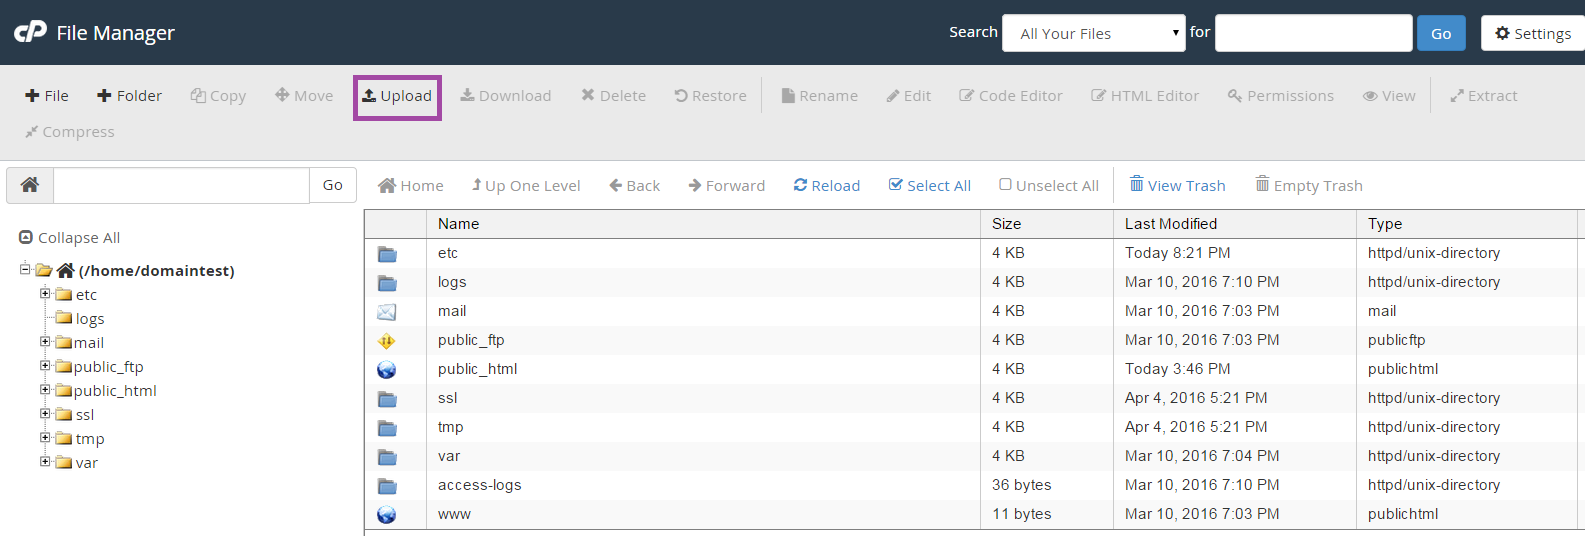
Once done, place a request to our Support Dept to restore the uploaded backup.
For more details you can contact MilesWeb support team.
That’s all folks !


