
 Jyoti Prasad
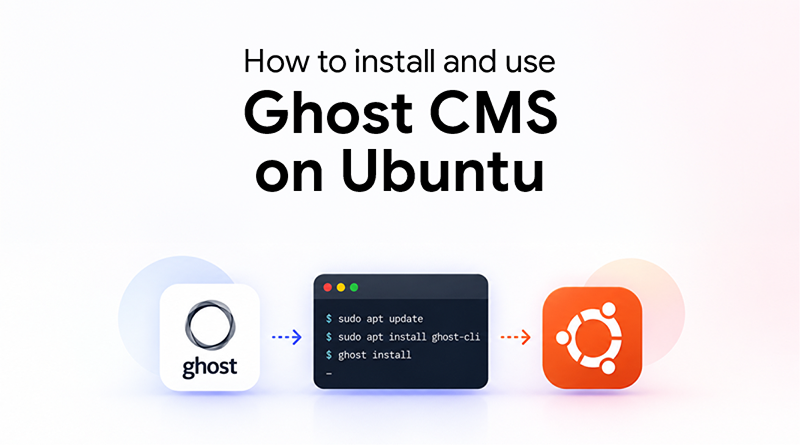
Publishing blogs should be simple and not resemble the process of running a software project. Nonetheless, right now several content teams waste time involved in dealing with plugins, unnecessary features, and all sorts of overhead before they can start publishing.
The Ghost CMS system is another approach to the publishing case. It is an open-source platform for running websites on Node.js, which has been designed to work with slick and rapid website content generation, newsletters, and memberships. Thanks to the light architecture, Markdown-friendly editor, and built-in SEO capabilities of Ghost—it has good chances to become an attractive alternative for feature-heavy CMS systems like WordPress.
However, deciding to use Ghost is just the first step. In case of self-hosting (like n8n self host), the ideal server environment is important.
This detailed MilesWeb guide provides instructions on installing Ghost CMS on an Ubuntu VPS, making use of both automated and manual installation methods. We will also show you how to access and set up the Ghost admin panel, how to edit and manage the themes of your website, and configure Mailgun and optimize Ghost for SEO.
By the end of this read, you will have a thorough understanding of how to set up Ghost CMS on your Linux VPS.
Table Of Content
Appropriate Hosting Environment: MilesWeb VPS for Ghost
While Ghost CMS needs light operation, it does not imply that it can be hosted on any hosting platform. Unlike traditional PHP-based content management systems, Ghost relies on a number of server-level components, such as NGINX, database, and system services, being based on Node.js technology.
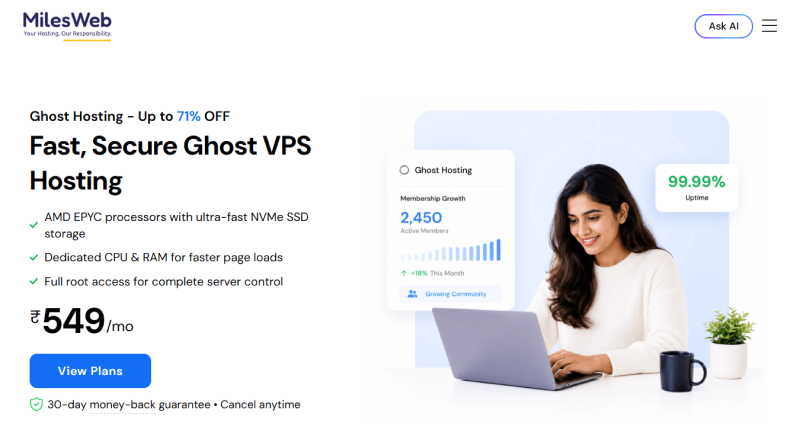
MilesWeb’s NVMe-based Linux VPS offers everything you need to run your Ghost installation. The server uses state-of-the-art AMD EPYC processors and NVMe storage for quick data processing and instant workloads. With the Ghost VPS server, you also have access to your root account, enabling complete freedom to configure your server environment.
If you are looking for an easier option, you can take advantage of MilesWeb’s 1-Click App installer for Ghost and quick OS templates that deploy Ghost installation with minimal effort.
The automated process makes it easier to deploy things faster, but the manual process allows for effective management of the server configuration.
Setting up Ghost on an Ubuntu VPS isn’t just about installing the CMS. For efficient Ghost running on your domain, you also need a Node.js-compatible integration, a database, NGINX, and the Ghost CLI tool.
How to Install Ghost CMS on Ubuntu VPS (Step-by-Step)
Automated Installation From MilesWeb VPS Dashboard
In case you wish to set up Ghost easily without the need for a manual setup of each dependency, it is better to use the MilesWeb VPS dashboard.
- Simply log into your client area of MilesWeb and open the VPS management section.
- Select your Ubuntu VPS with the Ghost App OS template installed.
- Once VPS has been installed, connect to your server using SSH, using the credentials sent to you.
- Run the initial configuration wizard and follow the instructions in successive screens to complete the configuration of the Ghost application, domain names, and other configurations.
This technique works well if you want to minimize the manual server configurations and quickly access the Ghost dashboard.
Manual Installation on Ubuntu
If you want to set your VPS server up in an individualized manner, then install it manually by following the instructions below. The steps that follow assume that you have a supported version of Ubuntu LTS and SSH access to the server.
Step 1: Update Ubuntu and add a non-root user.
Let’s start by updating the system packages:
sudo apt update && sudo apt upgrade -yGhost-CLI shouldn’t be run by the root user. Create a user dedicated to managing Ghost installation:
sudo adduser ghostadmin
sudo usermod -aG sudo ghostadmin
Now switch to the newly created user:
su - ghostadminStep 2: Install the required software stack.
Ghost requires a web server, a database, and a supported version of Node.js to run. Install NGINX using the below code:
sudo apt install nginx -yThen install MySQL:
sudo apt install mysql-server -yGhost also needs to have a compatible version of Node.js installed. Use NodeSource to install Node.js, and make sure that you have Node.js and npm ready:
node -v
npm -v
The Node.js version must be the same as the Ghost version you are going to install.
Step 3: Installing Ghost-CLI
Ghost-CLI is a package used for the installation of Ghost along with its subsequent administration and running. Ghost-CLI can be installed globally using npm:
sudo npm install ghost-cli@latest -gTo make sure that the installation was performed correctly, you can check the installed version:
ghost versionIf the version of Ghost-CLI appears when the command is executed, the output means that the installation was successful.
Step 4: Creating the Ghost directory and launching the installation
Now that Ghost-CLI is installed, you need to create the directory where Ghost will be installed:
sudo mkdir -p /var/www/ghostNext, you need to change the ownership of the directory to the Ghost user you created before. Replace with the username that you used:
sudo chown: /var/www/ghostOnce this is done, navigate into the directory:
cd /var/www/ghostAfter that, you can launch the installation of Ghost:
ghost installGhost-CLI will help you with the configuration process, e.g., the site URL, database connection, NGINX configuration, etc.
Step 5: Set up a secure connection using Let’s Encrypt.
As part of the installation process with Ghost-CLI, Ghost will set up HTTPS and get the Let’s Encrypt SSL certificate for your domain. When prompted to supply the domain and email, allow Ghost-CLI to do the rest.
After setup is done, visit its domain in a web browser to see that the Ghost site is served securely via HTTPS.
Useful advice: Always check if your DNS pointer for your domain is set to your VPS IP before installing Ghost. If the pointer is set incorrectly, you may still experience problems with the SSL even after a successful Ghost installation.
How to Navigate and Set Up the Ghost Admin Dashboard?
Once everything is installed, the Ghost Admin panel is where you access your server control. To access it, add /ghost to your domain.
During your first visit to the Ghost Admin portal, you will be asked to create the primary Administrator/Owner account. Choose a strong account with a unique password, as the Owner role needs to access crucial publication settings, content, members, and integrations.
When you log in, the dashboard shows you the main parts of your Ghost website. You can post in the Posts part. Pages include static pages, such as About and Contact. Tags allow organizing of the content that is published. The Members part manages your newsletter and membership subscribers. The general dashboard gives you an overview of the publication and analytics as well.
Before any content is published, you need to go to General Settings and configure your publication properly. You should set the name and description of your publication so that the visitors and search engines know what your site is about. Furthermore, you can change the accent color of the site, time zone, and publication language accordingly.
How to Customizing Ghost Themes, Brand & Design?
After your Ghost dashboard has been customized, implement its visual identity. Ghost has multiple themes for its visual presentation of the content, including post layout and other elements.
1. Begin with a default Ghost theme
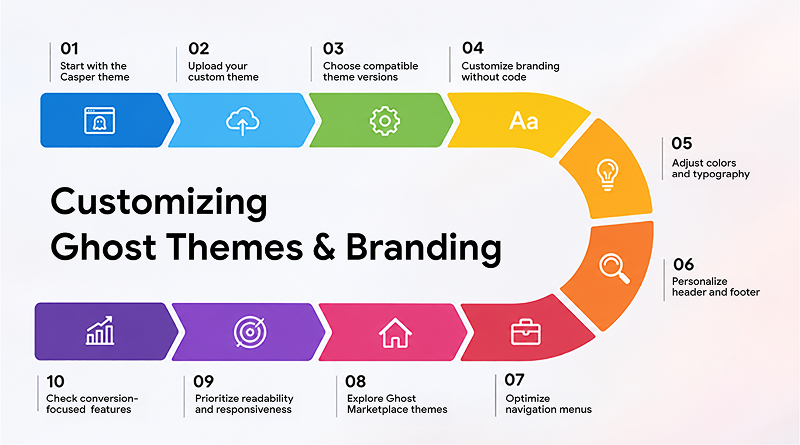
Ghost offers Casper as its default publication theme. It’s beneficial for a new publication to begin with a default theme; doing so allows more focus on the publishing process. The publication can then review its design needs later.
2. Upload a custom theme
If standard design does not suit your business, Ghost also accepts custom themes, giving you more control over how you want your publication to look. .zip files of either premium or open-source designs can be uploaded via the Settings → Location and appearance menu. You won’t have to work from scratch to create the theme yourself.
Make sure that the third-party themes you want to use are compatible with the version of Ghost you are using and check their features before installing them. Just because a theme has beautiful design does not mean that it will work well during the process of operation.
3. Customize your branding without code
Ghost also offers the option for visual adjustment for normal use cases and branding. Depending on the template, one can set basic brand colors, typography, header and footer elements, and navigation menus without making changes in the template files.
The Ghost Marketplace is another source of professionally designed templates for publishers in search of specialized layouts. Make sure to consider not only the appearance of the product but also the readability of content, mobile adaptability, navigation, and conversion-oriented features.
How to Use Ghost for Content Creation?
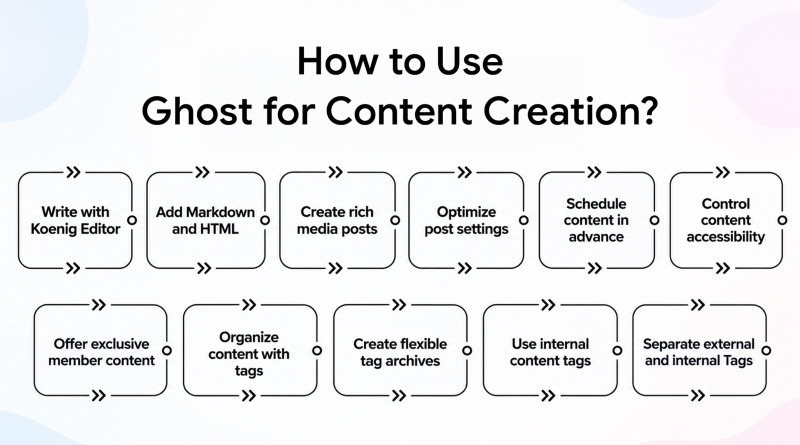
Ghost is an engine for publishing, and thus, it has a content editor to facilitate the writing process while giving users various content presentation possibilities. The Koenig Editor is the in-built block editor that supports Markdown, HTML, dynamic cards, and call-outs. It enables creating articles and rich media posts without installing numerous plugins.
1. Editing your posts
Before publishing posts, you have to navigate your way through the correct options in the Post Settings menu. Choose a URL slug, pick a date for publishing the post, properly attribute the post to its author if there are multiple authors, and write a short excerpt for it.
Make sure you go through all these options carefully to present your content appropriately.
2. Content publishing & scheduling
Ghost allows you to schedule your publications in advance and control the accessibility of certain content. A Ghost publication may determine who can see its posts based on the type of membership it offers. Posts can be made available to the public, to members only, or to paid subscribers, enabling the publication to offer content that is freely available alongside certain exclusive posts.
This array of tools is what makes Ghost distinct from basic blogging platforms, creating an environment in which publications can plan, organize, schedule, and even monetize their posts.
3. Structuring content through tagging
As a Ghost publication grows bigger than just a blog, it adopts some systematic way of organizing posts. Ghost achieves this through tagging. Unlike other platforms that rely on rigid categories, the tagging system is flexible enough to allow grouping of similar materials under a simply defined term.
Tags allow publications to mark their posts as simply as possible. In addition to that, publications can create tags and add essential information about tags, including brief descriptions and cover images. This can help with creating a well-structured tag archive page for readers.
Ghost has an internal tagging system, which is different from a public tagging system. Internal tagging is done with tags that start with “#,” such as “#featured” and “#no-index,” and they are purely used for the organization of the information.
The main idea here is that the publishers receive double tagging systems:
External tagging
for helping readers find the content they are searching for.
Internal tagging
for the management of how content should behave.
How to Set up Mailgun Integration for VPS Ghost?
Ghost offers an opportunity to add multiple members who can deal with different levels of content. You can also connect email features of Ghost to the transactional mail service such as Mailgun.
1. Setting up Mailgun for Ghost
Before using the email features of Ghost, you need to complete the necessary Mailgun setup. The steps are as follows:
- Log in to your Mailgun account and get your required API key and your sending domain.
- From your Ghost Admin dashboard, navigate to Settings → Newsletter.
- In the respective fields, enter your Mailgun API key and domain.
- Choose the Mailgun region that is applicable to you.
- Save your setup and verify if the emails are sent successfully.
Note that the available options may differ between your Ghost version and the email settings.
2. Built-in SEO features and analytics
The major advantage of using Ghost for publishers is that technical issues can be solved by using numerous built-in functions instead of installing different plugins. Ghost comes with essential features like XML sitemaps, canonical tags, and structured schema data.
3. Optimize SEO parameters
The search and social parameters can be controlled directly from the settings of the article. You can customize the meta title and description for each article by using available tools. Moreover, it is possible to set up the information for the Open Graph and Twitter/X cards for your article.
4. Add analytics and verification tools
The Code Injection option of Ghost’s Settings allows third-party scripts or verification codes to be added without editing theme files. An example is adding the site verification tag from Google Search Console for establishing ownership of your website.
In the same window, you can also set up the analytics tools like Google Analytics 4 (GA4) or Plausible by adding their tracking scripts.
Once you have added your tracking or verification code, check your website to make sure it is functioning as it should and confirm your integration in the relevant third-party dashboard. Such a combination of Ghost’s built-in SEO features and external analytics gives you the basis for search-friendly technical aspects on your website.
Concluding Note
Ghost CMS gives publishers a lightweight compared to other content management platforms, but the hosting environment is equally important for the smooth functioning of the website.
To run a self-hosted Ghost publication, you must undergo the entire procedure, starting from setting up the Node.js stack and configuring NGINX, along with managing members and doing SEO optimizations, down to troubleshooting any issues that might emerge on your server.
The best way to go about running Ghost is to host it with the VPS as a single entity—you have to keep updating the software, monitoring server resources, making regular backups, and securing the underlying system.
With the right VPS infrastructure, there will be more control over the entire process, ensuring fast and stable service for your readers.
FAQs
1. What is Ghost CMS?
Ghost refers to an open-source, headless CMS backed by Node.js, which has been developed for professional bloggers and publishers. The aim of Ghost is making content delivery fast and incorporating membership and subscription features.
2. Why is it better to run Ghost CMS on a VPS rather than a shared hosting account?
Ghost CMS requires the Node.js environment, a systemd service, and an NGINX reverse proxy server. Such requirements make it very difficult for shared hosting to provide those features. A Linux VPS comes with dedicated CPU and RAM resources and root access so that you can have the whole environment to yourself.
3. Is the Ghost CMS free?
Yes. Ghost CMS is open-source software and published under the MIT license. So you don’t need to pay for the software itself. But with the self-hosted solution, you will have to pay for the underlying infrastructure, like the Ubuntu VPS, domain name, and other external services.
4. What is the method for upgrading Ghost CMS on Ubuntu?
First, connect to your Ubuntu VPS via SSH as your Ghost user (not root), and go to your Ghost installation directory.
cd /var/www/ghost
After that, execute the Ghost upgrade command:
ghost update
Ensure that you back up your database and Ghost files. This is vital to ensure that in the event of anything going wrong everything can be restored.
5. Is migration from WordPress CMS to Ghost possible?
Yes. Ghost CMS is able to migrate websites, which means that it supports WordPress migration. You can export all your WordPress content and then follow Ghost’s export/import process and convert it into a format that will enable all the posts, authors, and tags to be imported. Prior to the actual migration, it is recommended to check the screenshots, URLs, metadata, and redirects.