
This article guides you on how you can set-up FTP for Windows.
What is FTP?
FTP stands for File Transfer Protocol which is a standard network protocol that is used to transfer computer files between a client and server on a computer network. FTP is a quick way to connect a project, without having full access to RDP into the server. FTP users can access the folders that are designated to them only and limit their environment so that they don’t change accidentally other user’s files and file structure on their project.
# Installing FTP server on Windows 10
Windows 10 also contains all the necessary components like previous versions, and those components enable it to run an FTP server. Perform following steps to install an FTP server on your Windows 10 :
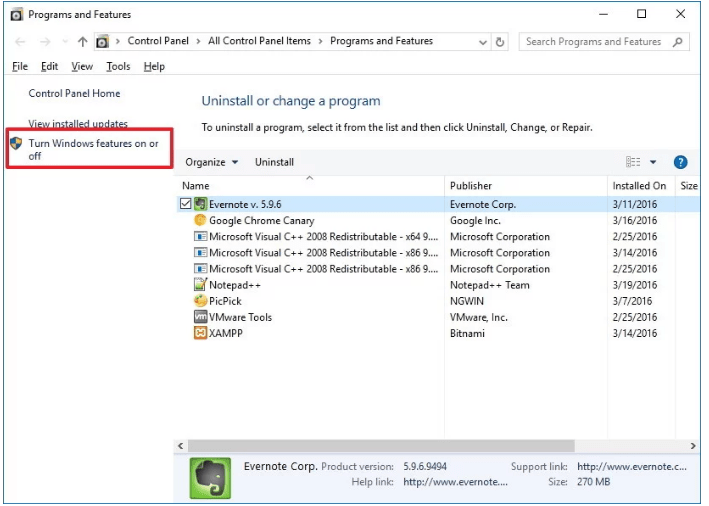
1. Press the Windows key + X keyboard shortcut to open the Power User menu and then select Programs and Features.
2. Click on the link – Turn Windows features on or off.
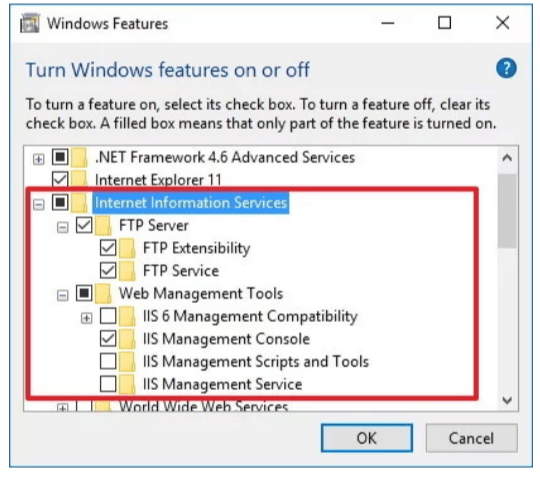
3. Expand the Internet Information Services option, and check the FTP Server option.
4. Now expand the FTP Server and then check the FTP Extensibility option.
5. Check the Web Management Tools with all the default selections.
6. Click on OK. The installation process will begin.
7. Click on Close.
# Configuring an FTP site on Windows 10
Once the component installation is done, the next step comes is to create an FTP site to run FTP server on Windows 10. Perform the following instructions to do so :
1. Press the Windows key + X keyboard shortcut to open the Power User menu and then select Control Panel option.
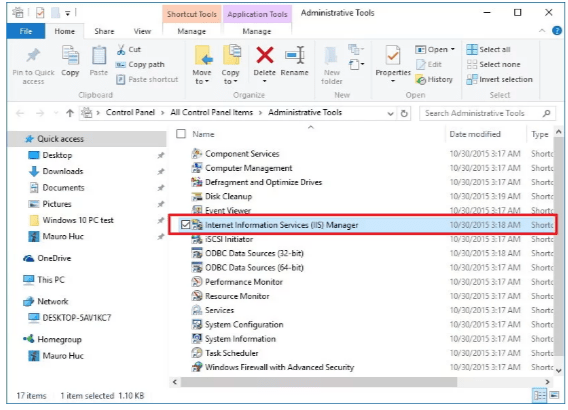
2. Open the Administrative Tools.
3. Now double click on Internet Information Services (IIS) Manager.
4. Right-click on Sites on the Connections pane so that it will expand the options.
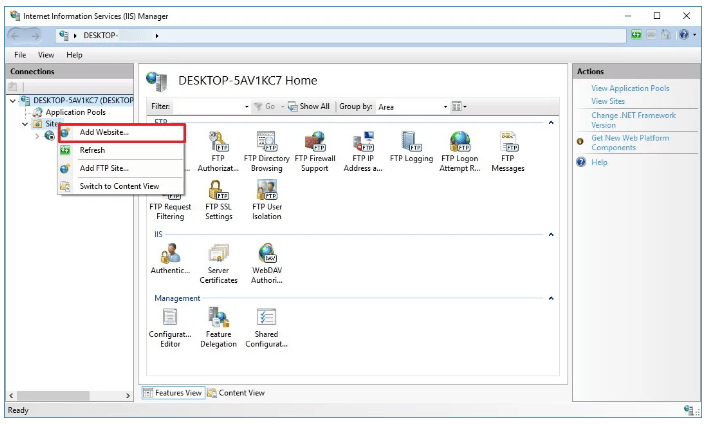
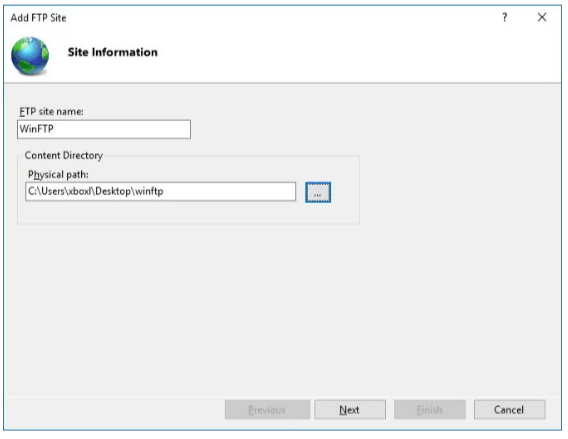
5. On Add FTP Site section :
Enter the new FTP site name and the path to the FTP folder that you want to use to send and receive files in the FTP site name and Physical path sections respectively.
Note: You can create a specific folder to store your FTP files by using the Make New Folder button.
6. Click on Next.
7. In the Binding and SSL Settings section, select No SSL option.
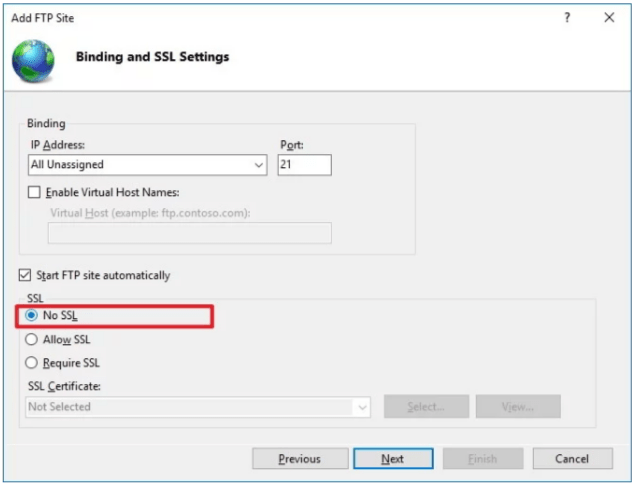
Note: It is best practice to configure the site to require SSL in a business environment or an FTP server that hosts sensitive data.
8. Click on Next.
9. In the Authentication and Authorization Information section, under Authentication check the Basic option.
10. Under Authorization, select the Specific users from the drop-down menu.

Also Read : How to Create and Edit a File via FTP?
11. Enter the email address of your Windows 10 account or local account name so that it will allow you access the FTP server.
12. Under Permissions check both Read and Write options.
13. Click on Finish.
That’s it!


