For many years, cloud hosting storage solutions have made people think the only way to keep devices in sync is to upload files to someone else’s infrastructure. Therefore, photos have moved across cloud accounts, work documents have sat on remote storage systems, and personal backups have typically been stored in ecosystems controlled by large tech companies.
Using someone else’s infrastructure can certainly be convenient, but it also means that your data is ultimately dependent on someone else’s infrastructure, policies, pricing, and privacy standards.
Therefore, it is no surprise that Syncthing has grown dramatically in popularity recently.
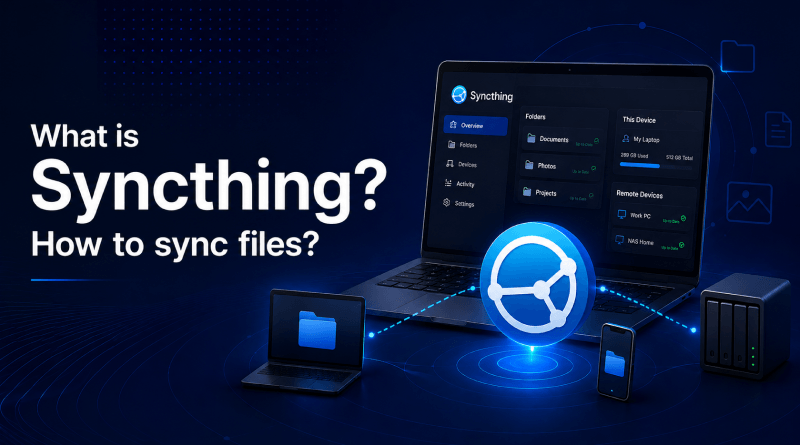
Put simply, Syncthing is a free, peer-to-peer file sync application that allows you to sync files between multiple devices without an intermediary. Instead of keeping your files in a third-party cloud, Syncthing creates a direct, encrypted connection between your devices. This allows you to sync files on your laptop to a desktop, Android phone, home or VPS server (classless address space or virtual private server) without using a cloud storage service.
Key Summary — Syncthing Docker Setup
- 1 Syncthing is an open-source file synchronization tool that securely transfers files between devices across multiple operating systems without relying on centralized cloud storage.
- 2 Running Syncthing inside Docker simplifies deployment, migration, updates, and ongoing management while keeping your configuration portable and consistent.
- 3 A Docker-based setup creates a lightweight, serverless, and persistent file-syncing environment that works on both local machines and VPS hosting providers.
- 4 Because Syncthing transfers files directly between your devices, no third-party storage provider controls your data—your files remain fully under your ownership.
- 5 Common use cases include syncing files between phones and desktops, creating personal backups, synchronizing Obsidian notes, and sharing files between remote workstations.
- 6 Following Docker best practices helps ensure easier maintenance, better scalability, and consistent configurations across environments.
- 7 Once configured, Syncthing provides a fully automated, user-controlled file synchronization system that keeps your devices continuously in sync.
💡
This guide walks you through deploying and configuring Syncthing with Docker for secure, self-hosted file synchronization.
Table Of Content
What Is Syncthing?
Syncthing is a free, open-source program that provides a peer-to-peer file sync solution for people who need to back up their files across devices without relying on a centralized cloud storage service. When you sync files with Syncthing, you do not upload files to a remote server first; instead, there’s a direct connection between your devices, and data transmission is secured with encryption.
More generally stated, building on this direct device-to-device approach, Syncthing allows the devices you own to communicate directly with each other.
For example, Syncthing is an excellent solution for syncing files between:
- A Windows computer and an Android mobile phone
- Windows computer to Android mobile phone
- Laptop to your home file server
- VPS to your home computer
- NAS storage unit to your desktop
- Multiple Linux machines
In addition to desktop and Android devices, you can connect your iPhone to your computer using Syncthing-compatible apps that are available for iOS. This makes Syncthing one of the most popular self-hosted Dropbox alternative solutions available today.
Unlike other file-syncing solutions like Dropbox and Google Drive, which store permanent copies of your data in a third-party cloud, Syncthing lets you sync files between devices you own and can access at all times. For this reason, many privacy-conscious consumers, developers, hobbyists, and small businesses are increasingly deploying Syncthing Docker to set up secure file sync processes.
What Are the Syncthing Features?
Since Syncthing is among the leading file sync tools available, here are its top features:
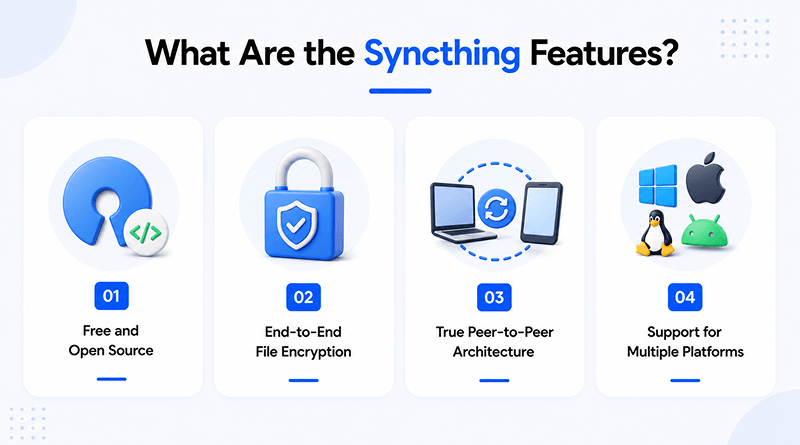
1. Free and Open Source
Syncthing is completely open-source, meaning anyone can browse the source code, contribute to the project, or verify the security protocols utilized by the Syncthing team. Syncthing continues to be actively maintained on its GitHub repository, establishing a high level of trust among self-hosted file sync users.
There are no fees, limits on the number of files synchronized, or hidden charges for using Syncthing.
2. End-to-End File Encryption
Users frequently ask the question, “Is Syncthing safe?” The answer is yes. Syncthing employs TLS to use secure communications between devices and to keep data safeguarded while transferred over the Internet, with no possibility of eavesdropping.
A unique Device ID is automatically assigned to each device for authentication and trust purposes.
3. True Peer-to-Peer Architecture
While most cloud platforms work by uploading files to the cloud, Syncthing does things differently. In Syncthing’s peer-to-peer file sync technology, devices communicate directly with each other whenever possible.
This means that the result will be the following:
- Faster file sync on local area networks (LANs)
- Reduced costs for bandwidth
- Enhanced privacy of your data
- Reduced dependency on remote servers
Using Syncthing to sync files without using any cloud services is a great benefit for users who want to have complete control over their file syncing and storage.
4. Support for Multiple Platforms
Syncthing works on multiple operating systems and platforms, including:
- Syncthing for Windows
- Syncthing for Linux
- Syncthing for Android
- Syncthing for iOS-compatible devices (macOS, Docker, NAS systems, Raspberry Pi)
By using Syncthing, users can build a fully self-hosted file syncing system on almost any hardware platform they choose.
How to Deploy Syncthing Using Docker?
The extreme popularity of Syncthing deployed using Docker is largely due to the ease of deployment provided by Docker.
With Docker, users can run Syncthing inside isolated containers with just a few configuration settings rather than installing each service and dependency manually. This has greatly simplified tasks such as upgrading Syncthing, performing backups and moving to another server, as well as deploying containers on VPS servers.
A Syncthing Docker Compose setup can usually be deployed in just a few minutes and is ideal for:
- Home servers
- VPS hosting servers
- Raspberry Pi
- NAS systems
- Development environments
- Permanent sync points
How Syncthing Works? P2P Architecture Explained
To comprehend how Syncthing can be so fast, private, and reliable, we must look at the underlying architecture. It has rationalized the approach to synchronising files by using a peer-to-peer (P2P) model.
Traditional storage solutions, like Google Drive and Dropbox, rely on a single upload point. They must store files on a central server to enable exchange over the Internet. This creates reliance on the central point and its services.
In contrast, Syncthing lets your devices connect with each other and exchange information without using a central server. This small architectural shift creates a whole new way to synchronise files.
1. Devices Connect Directly: No Cloud Storage Layer
In the architecture of Syncthing, every device that you connect to is a part of the network.
For example:
- Your Laptop = Node A
- Your Mobile = Node B
- Your VPS = Node C
Once these devices are connected, they can securely communicate through encryption. This allows any file you create or edit on your laptop to sync automatically when saved.
Syncthing checks for changes:
- It knows that there are connected devices that require the new version of the file.
- It transfers only what has changed from the modified file.
- The connected device will then receive the data that has been modified via the Syncthing connection, and it will store that modified file on the connected device locally.
This is both more efficient than uploading your modified file to cloud storage systems and creating a storage layer for the file before sharing the new version of the file with another device.
2. Sync by Block Rather than Entire Files
Syncthing’s peer-to-peer file synchronization solution offers one of the most efficient means of transferring data.
When a file changes, rather than transferring the entire file each time:
- Files are divided into many blocks.
- The system compares each of the block hashes across devices.
- Only the blocks with modified data are transferred.
As a result, if a 1GB file is edited and only 5MB in size is changed, only the modified 5MB is synchronized with the device.
Syncthing is efficient with the following:
- Large project files
- Source code repositories
- Obsidian vault files
- Media files
- Development environments
3. Continuous Monitoring (Real-time Synchronization)
The Syncthing application runs as a service in the background and monitors selected directories continuously.
When an updated file is detected:
- The update is immediately flagged within the system.
- The file index is updated.
- Synchronization between systems will occur.
Because of these reasons, Syncthing provides the ability to perform live synchronization rather than scheduled backup.
4. Device Discovery: How do Devices Find Each Other?
Before devices can sync files using Syncthing, they must first locate each other.
There are three main ways for devices to locate one another:
- Local discovery (LAN): Devices that are connected to the same Wi-Fi/network will discover one another automatically.
- Global discovery servers: Devices will use these servers (located on the Internet) to connect to one another.
- Relay servers (fallback): This will be used to connect devices to one another when a direct connection cannot be established due to a NAT/firewall.
While Syncthing does use relay servers, they do not store your data; they only serve as a connection mode.
5. Encryption and Trust Between Devices
Each connection made in Syncthing is secured by using TLS encryption. Here, every device has a unique Device ID, and the file syncing between devices will only occur after the trusted device is manually approved by you.
In other words:
- You will have no unauthorized devices accessing your files.
- All file transfers will be end-to-end encrypted.
- You have complete control over what devices are allowed to sync.
6. Why Does Syncthing Feel Faster than Cloud Sync?
Because of the way that Syncthing was designed, it generally performs better than traditional cloud storage services in local environments.
For instance, the following aspects of Syncthing contribute to its speed:
- Devices that are in the same network/LAN.
- Minimal file changes made between different devices
- Large data sets can be partially updated.
We can simply say that, instead of uploading –> processing –> downloading, Syncthing performs the transfer between the devices directly.
7. How Docker Is Used In The Architecture?
When you create and run a Docker container with Syncthing within that container (VPS/server), Syncthing is installed within a closed, configured environment where you can control and access Syncthing directly from that environment without worrying about interference from other systems on your computer.
This allows you to:
- Keep Syncthing isolated from any other application.
- Run multiple always-on sync nodes on multiple virtual private servers (VPS) or dedicated physical servers.
- Easily migrate or replicate your system with Docker containers.
- Easily manage updates using basic Docker commands.
As a result, many people are using Docker to run Syncthing in their home or self-hosted setups.
Detailed Comparison: Syncthing vs. Nextcloud vs. Seafile vs. ResilioSync vs. GoogleDrive
There are three ways to compare file synchronization solutions to decide which software synchronizes files: complete control, cloud convenience, or a combination of both. Below is a list of popular peer-to-peer synchronization, self-hosted storage, and cloud file sync software to help you make a decision.
| Platform | Type | Data Storage | Internet Dependency | Encryption | Setup Complexity | Self-Hosting | Sync Speed | Collaboration | Best For |
|---|---|---|---|---|---|---|---|---|---|
| Syncthing | Peer-to-Peer Sync | On your devices only | Optional (LAN works offline) | End-to-end TLS | Low–Medium | Yes | Very fast on LAN | No | Private file sync, Docker setups, developer workflows |
| Nextcloud | Self-Hosted Cloud | On your server | Required for remote access | Server-side + optional E2E | Medium–High | Yes | Depends on server | Yes | Teams, document collaboration, full cloud replacement |
| Seafile | File Sync Server | On your server | Required for remote access | Server-side + optional encryption | Medium | Yes | High performance | Limited | Enterprise file hosting and large-scale storage |
| Resilio Sync | Peer-to-Peer Sync | On your devices | Optional | End-to-end encrypted | Low | No | Fast (BitTorrent-based) | No | Fast P2P sync without complex setup |
| Google Drive | Cloud Storage | Stored on Google servers | Required | Encrypted in transit and at rest | Very Easy | No | Depends on internet | Yes | General cloud storage and collaboration users |
Features, performance, and security capabilities may vary depending on deployment configuration, network environment, and selected settings.
Prerequisites: What’s Needed Before Starting Syncthing?
Before you start setting up Syncthing with Docker, make sure your environment allows for a smooth installation. Since Syncthing is a lightweight application, it doesn’t require high-end hardware or complex infrastructure. You can easily run it on a laptop, desktop, VPS, or small home server.
As the foundation of the application, you need a machine that you can install and run Docker on. Once the Docker is installed, the rest of the project is easy to manage, specifically when it comes to updating, backing up data, and changing your setup that requires moving it to a different location with another device.
To fully experience the real-time synchronization of files, you need at least two devices ready to go (for example, one phone and one laptop or one PC and one VPS). The entire concept of how Syncthing synchronizes files is based on connecting the devices together in a peer-to-peer fashion. Therefore, Syncthing references the synchronization of files based on more than one device coming together to communicate with each other.
From a practical standpoint, pre-select folders you would like to synchronize with Syncthing. You can select folders containing your documents, downloads, project files, or even an Obsidian vault, etc., to link from one device to another rather than have Syncthing take over all the files on your device.
That’s really all you need to get started.
Quick Setup: How to Install Docker & Docker Compose?
To deploy Syncthing reliably and efficiently, we need a container-based platform. Docker provides this by packaging Syncthing into small, portable, recurring containers that work the same regardless of Linux, Windows, macOS, or VPS-based systems.
Once you have Docker installed, your Syncthing installation should be complete in less than 10 minutes. For server-based systems, use your Linux distribution’s packaged version of Docker. After that, you enable Docker Compose as part of Docker’s new command-line interface. With all of this in place, you can perform a simple version check and confirm that everything is working as expected.
In contrast, on both Windows and macOS systems, Docker Desktop provides a complete installation in a single step. You install Docker Desktop like any other application, enable the back-end feature (for example, Windows), and you have a complete package installed, with everything configured for immediate use without any further configuration.
Docker Compose, which is installed after Docker, is your primary management tool for your Syncthing setup. It lets you create an entire Syncthing implementation in one file (YAML) that defines all ports, volume mounts, etc. This helps you establish and retain a repeatable Syncthing Docker implementation that remains easy to update later.
Once you reach this point, you can execute a few simple Docker commands and verify that Docker and Docker Compose are installed and operational prior to proceeding with the actual deployment of Syncthing.
Syncthing Docker Compose File: How To Perform The Complete Setup?
We are now at the part of the setup process that builds the actual Syncthing setup in Docker. This is where everything begins to fall into place, from your container, your sync folders, your ports, and how devices will sync files peer-to-peer without cloud storage.
Rather than executing multiple commands or installing Syncthing manually, we define everything in a single Docker Compose file. This keeps the setup clean and repeatable and makes it easy to move from one system or VPS to another.
At a high level, the configuration tells Docker three things:
- What Syncthing image to use?
- Where to store data for the long term?
- Which ports are exposed for syncing and web access?
Typically, you can map one local folder for configuration and another local folder for synced data. This way, your settings and files stay intact even if the container restarts or moves. It’s among the primary benefits of using the Syncthing Docker setup vs. a traditional installation.
From the networking side, Syncthing requires several ports for performing some basic functions like:
- Access the web interface
- Synchronize files
- Locate other devices remotely
At this stage, when you have placed your files into production, you essentially have a completely self-contained and mobile syncing engine that can be deployed anywhere. No matter whether you are deploying to your own home computer or to a VPS hosted in a data center, it will behave practically identically. It will always be lightweight, reliable, and completely under your control.
Step by Step Guide: How to Run Syncthing with Docker?
Step 1: Go To Your Project Directory
At the terminal prompt, type in cd path_to_docker_compose, where path_to_docker_compose refers to where the Docker Compose file is located, and hit enter.
Step 2: Start Syncthing Container
Run docker-compose up (you should see Docker download the image/create the container and start it in the background).
Step 3: Let Syncthing Initialize
When you run docker-compose up, Syncthing automatically loads configuration files, initializes the sync engine, and prepares your environment to work without any additional manual setup.
Step 4: Verify the Container Configurations
Running “docker ps” will show all currently running containers, including the Syncthing container with an “up” status message and any ports you’ve mapped for GUI/sync purposes.
Step 5: Review Container Logs
Running “docker logs” will show the output for that specific container; the output will include information about auto-initialization, discovery service, GUI listener, etc., giving you enough information to confirm if everything is operating correctly.
Step 6: Access Web Interface
You can now open the web interface for Syncthing via the web UI port specified in the docker-compose file. Then, you can begin adding devices and configuring file sharing settings.
Step 7: Start Syncing Peer Devices
Once everything has been set up, you can securely synchronize files between multiple devices using the peer-to-peer model without having to depend on other third-party solutions based in the cloud.
Adding Devices and Folders: How to Use Syncthing?
| Step | What Happens in Syncthing | Purpose | Result |
|---|---|---|---|
| Add a Device | Each device receives a unique Device ID used to securely connect phones, PCs, and servers within the synchronization network. | Secure Identification | Creates trusted peer-to-peer connections |
| Connect Devices | Add the remote Device ID, assign a device name, and approve the connection request on the second device. | Device Linking | Devices join the same synchronization network |
| Create Shared Folder | Add a folder path, assign a Folder ID, and choose which connected devices can access it. | Folder Selection | Selected folders become available across devices |
| Select Devices for Sync | Choose which devices can access the shared folder and participate in synchronization. | Access Control | Only approved devices receive synced files |
| Initial File Scan | Syncthing scans files, compares hashes, and identifies existing or modified content before transferring data. | File Detection | Prevents unnecessary file transfers |
| Start Synchronization | Devices communicate directly and transfer only new or changed files without relying on centralized cloud storage. | Efficient Sync | New changes appear almost instantly across devices |
| Real-World Usage | Synchronize photos, Downloads, Documents, Obsidian vaults, project files, and backups across multiple devices. | Daily Workflow | Creates a private cloud-like experience |
| Main Benefit | Provides secure, self-hosted file synchronization with complete ownership and control of your data. | Privacy & Control | Avoids third-party cloud dependency and protects data ownership |
Syncthing operates using direct device-to-device communication, making it a private and decentralized alternative to traditional cloud storage platforms.
– How Apple iOS Device Works?
Due to Apple’s restrictive operating system, Syncthing does not function similarly to how it does on Android. However, mobile sync can be achieved using compatible apps such as Mobius Sync (or similar programs that work with Syncthing).
Here’s the simple setup:
- You install a compatible iOS Syncthing app.
- Obtain your Device_ID provided by the app.
- Add the Device ID to your PC Syncthing instance.
- Approve the sync request on both devices.
Because iOS runs background processes more strictly, sync may not be fully real-time, but manual or scheduled sync still works reliably.
– How Does VPS-Based Syncthing Sync Work?
Syncthing allows adding a VPS-based Syncthing node to your synchronisation network; the VPS here serves as a continuously available relay node for your private synchronisation network. So if one of your devices becomes disconnected, when it reconnects to the network at a later time, Syncthing will automatically continue syncing to the disconnected device using the VPS node as the sync point.
Here’s the simple setup:
- Deploy a VPS (a server in the VPS host’s data centre) that has Docker installed or that has an operating system on which you can install Docker.
- Configure and run Syncthing inside a Docker container.
- Access the Syncthing web user interface via the VPS.
- Connect your phone, PC, or other devices to the VPS using your Device IDs.
- Then share folders between devices and approve synchronisation requests.
After you have completed this configuration, the VPS will be a persistent synchronisation point between devices connected by different networks and in different locations.
What are Ignore Patterns?
When using Syncthing, not every file in a folder needs to be synced. This slows down the process and costs you storage space on all of your connected devices. For instance, you may have log files, cache files, temporary build files, or system files that will affect your sync from working efficiently.
Ignore patterns are very straightforward, rule-based filters that tell Syncthing not to include certain files or folders in synchronization.
Without Ignore Patterns, you have to go through your folders and delete or adjust folders to exclude unwanted files every time you create a new folder. Instead, once you set the Ignore Pattern rules, Syncthing will follow it on every connected device.
This is especially important with Syncthing Docker installations, where there may be several systems (PC, VPS, phone), given that not all systems need the same temporary files. Therefore, you can define ignore patterns that tell Syncthing what files it should not include in your synchronization. This setup makes syncing streamlined and efficient and contains only the important data.
– How To Set Up Ignore Patterns?
- If you want to sync data from one computer to another, you can set up ignore patterns.
- You can create your ignore patterns in either of the following ways:
- Through the Syncthing Web UI > Folder Settings > Ignore Patterns
OR
- Directly by editing a .stignore file located in the synced folder.
- Both of these methods perform the same function, but the recommended one is using the Web UI. It’s quite easy for beginners.
– Which Are The Common Ignored Patterns?
System and operating system files
- .DS_Store
- Thumbs.db
- desktop.ini
Development and build files
- node_modules/
- dist/
- build/
- *.log
- *.tmp
Cache and temporary data
- .cache/
- *.cache
- temp/
- tmp/
App-specific noise
- *.swp
- *.bak
- *.part
Using these ignore patterns helps to avoid syncing unintended files between devices. In addition to that, it also reduces the amount of bandwidth needed for syncing.
How to Update Syncthing in Docker?
In addition to the security of the Syncthing dashboard, keeping it up to date is vital for optimal performance and a successful user experience. The following are some of the key reasons that updating your Syncthing instance is important.
- Performance improvements that will provide better/faster file synchronization
- Security fixes that can affect the security of your encrypted connection to another device
- Better overall stability and device discovery
- Corrections related to synchronization conflicts and other edge-case bugs
By using Docker to host your Syncthing instance, the process of updating your server becomes relatively easy. You won’t need to reinstall your Syncthing application or make any changes to configuration files; with one command, you will update your entire peer-to-peer file synchronization environment.
– The One-Command Update Method
When using Docker Compose for Syncthing, the easiest way to update the application is via a single command:
docker compose pull && docker compose up -dExecuting this command will:
- Download the latest version of the Syncthing Docker image.
- Build and start up the Syncthing container using the new image.
- Maintain your existing configuration and data that are already synced.
With these options available, maintaining a self-hosted Syncthing Docker setup is quick and dependable, with minimal ongoing maintenance work involved.
– The Alternate Manual Update Method
An alternative update approach is to execute the update process in the following sequential order:
docker-compose down
docker-compose pull
docker-compose up -d
Using this method, you will accomplish the same goals as above; however, you will get a cleaner restart cycle and control during maintenance.
Closing Note
Syncthing with Docker creates a free-standing synchronization system without the need for traditional cloud storage at a cost to you. Your devices use a secure peer-to-peer connection to synchronize their contents, giving you full control over your data, storage options, and architecture.
This setup works perfectly for synchronizing files across multiple devices and maintaining private backups or managing disparate data between multiple systems without being subject to third-party storage restrictions or becoming locked into an ecosystem. Using Docker makes the whole self-hosted setup portable, scalable, and easy to manage on servers, VPSs, and personal computers.
In summary, Syncthing offers you benefits that many cloud service providers do not—complete control, privacy, and flexibility of how your files move about your devices.
FAQs
1. Is Syncthing free to use?
Yes. Syncthing is completely open source and therefore free of charge. There are no subscription plans, paid tiers, or hidden limits associated with using Syncthing to synchronize files across as many devices as you want for personal or business purposes.
2. Does Syncthing need a central server or cloud account?
Syncthing is not a cloud service or centralized server. Syncthing operates by providing two devices that are directly connected to each other in a peer-to-peer setup. All you have to do is download the software onto your device; there is no need for an account, additional storage service, or external dependency.
3. Syncthing vs. Nextcloud: What installation will I choose?
If you want an extremely fast, simple, and private way to sync files across devices, Syncthing is the best option. If you are looking for a complete cloud service and collaboration tools like calendars, contacts, and document editing, then Nextcloud is a better fit for you. Specifically, Syncthing is for pure syncing; Nextcloud is to replace a full cloud.
4. Can I sync my Android or PC using Syncthing?
Certainly. Sync your phone and computer successfully with Syncthing. After pairing devices through the software, items you modify on one device will change visually on another device, regardless of whether the other device’s item was stored in Cloud Drive.
5. How secure is Syncthing?
Syncthing is very secure. All data sent is encrypted with TLS, and each device must be approved with a unique Device ID for it to be able to sync to a network. Therefore, all devices in your sync network are trusted, and the use of Syncthing is safe whether for personal or professional reasons.
6. What happens if a device goes offline? Will syncing still take place?
If a device goes offline, all Syncthing does is wait. All changes are stored on active devices until the offline device comes back online to allow the syncing of previously made changes. If one of your computers is always on, such as a VPS, then it can temporarily store your updates until it is connected back to the other devices so that you will not lose any data.