WordPress is a highly flexible CMS that offers countless customization options to create the website or blog you need quickly and easily.
As it is one of the best open source platform that offers countless plugins, themes and constant development, the number of tricks and tips, improvements and all kinds of things that you can do is very large and varied and the list keeps growing.
Some tips and tricks are universal and others vary depending on the industry, niche and type of page you need.
Check them out, put them into practice and share your views in the comments section!
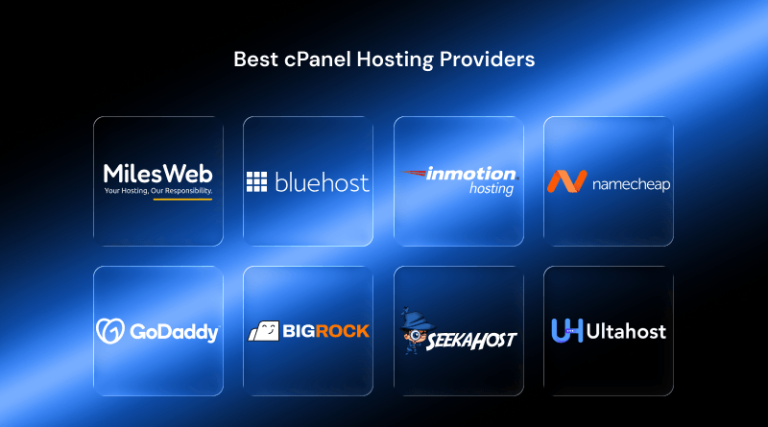
- Choose a quality and adequate hosting
Having a suitable WordPress Hosting Service is the equivalent of building a building with quality materials and a solid foundation.
If poor quality building material is used, the building will suffer and perhaps might collapse if some major quake happens.
The same applies to a Web page, if you have a poor quality server without proper support, you will suffer a lot.
When choosing a hosting service, make a good research on what you need (memory, bandwidth, email, etc.) and what kind of hosting would be enough for optimal performance.
Remember that if you need more power, most hosting providers offer a VPS hosting or dedicated server.
Related – Check MilesWeb WordPress Hosting
The most important thing is to choose a quality service.
Remember that cheap is expensive.
- Use Plugins you really need

No matter how many plugins you have installed, what matters is the quality.
It is better to have four good quality plugins rather than having twenty plugins out of which a couple of them are poorly programmed and have problems that can cause major setbacks for any webmaster.
Still, it is highly recommended to use only the plugins you really need and which are going to be useful.
Check the list of installed plugins and remove what you don’t use and only keep the one that are of use. Inactive or unused plugins can lead to vulnerability and a means by which hackers attack and infect sites.
Besides this, always use plugins of the highest possible quality. A basic tip for all users.
- Sucuri and other security issues
Safety should be a top priority for any Webmaster of WordPress.
In addition to installing the iThemes Security plugin, which offers more than 30 solutions to protect WordPress in every way, we recommend a service that we discovered recently.
- Protect yourself from SPAM
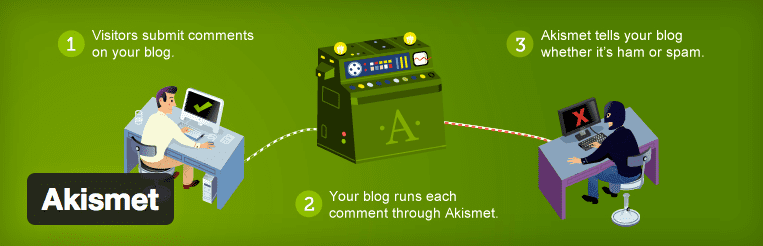
As security is very important, avoiding SPAM in blog comments is also something that we must fight with from day one.
If nothing is done, your inbox and comments section will be quickly invaded by unnecessary junk comments which only increase the level of irritation.
To avoid this, install Akismet plugin to eliminate and combat SPAM on WordPress.
- Use an extra layer of security

To prevent hackers or other malicious people trying to enter your WordPress website, do his thing to add an extra layer of security when logging in.
This tip is very useful if you have some or more registered users who log continuously on your site.
To add this extra layer of security, install: Duo Two-Factor Authentication plugin
- Protects files from your Dashboard and area manager
So that no one has access to the files you have on your WordPress and the administrator area, add this simple code to the .htaccess file:
order deny, allow Deny from all Allow from xx.xxx.xxx.xxx
Where it says “Allow from” replaces “X” for your IP address, so you can only login from your computer.
- Allows multiple authors for the same input
If you have more than one author on your blog, it is very likely that an entry have collaborated more than one user to create and publish information.
To add credit to co-authors, install Co-Authors plus plugin. With it, who worked on updating or writing articles, will appear.
- Disqus Comment System

Although WordPress offers a very good feedback system, a more advanced and social way to facilitate interaction with the readers of your blog is to install Disqus, a plugin to add comments, sync with social networks and improve discussions within the blog in the same ecosystem.
It is easy to set up and within minutes you can be getting the first comment on your entries.
It also offers a promotion system so that your content is present on other blogs with Disqus installed.
- Sticky Posts
Did you just publish great content for which you want to have the most possible exposure?
Perfect.
It’s easy to highlight your newly published post for a longer duration on your homepage using sticky option. Sticky post is displayed first regardless if the public check before or after entries.
To do this, go to your desktop and click WordPress Entries> All entries.
Then select Quick Edit the entry that you want to be sticky and click on the option “Make this post sticky “.
- Publish your own podcast via WordPress
Podcasts are a great way to interact with your audience and give a variety of formats to inform public.
In addition to creating and publishing a podcast in iTunes, Soundcloud or any other platform, you can post it on WordPress.
The first is to choose a service to store your podcast files. You can do it on your own server.
After installing the Blubrry PowerPress Podcasting plugin, perform configuration and post your podcast.
- Use shortcodes
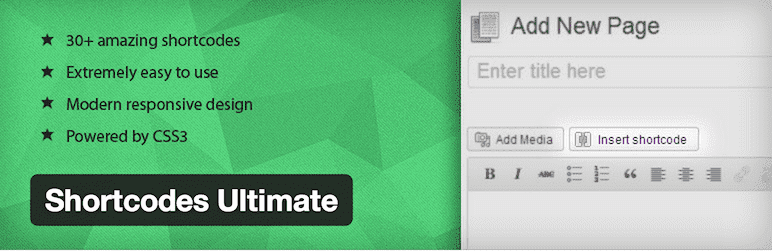
The shortcodes are small codes that are written in brackets [shortcode here] to add a twist of style, design and structure your content in WordPress.
Depending on the theme or template you use, you can utilize different shortcodes. Go and check which ones you should use in the WordPress editor!
To add more shortocodes, install the plugin: Ultimate Shortcodes. It offers more than 30 different shortcodes that will improve the appearance and will be easy to read on your site.
- Custom Home Session
If you have a membership site or a page where users or authors have username and password to log in, do not offer the typical login page that has default WordPress!
You can customize it, change the colors, text and background effectively and thus give a more professional and personalized image.
To learn how to customize it, follow this link: How to Create a Stunning Custom WordPress Login Page
Your users will thank you
- Create fixed widgets
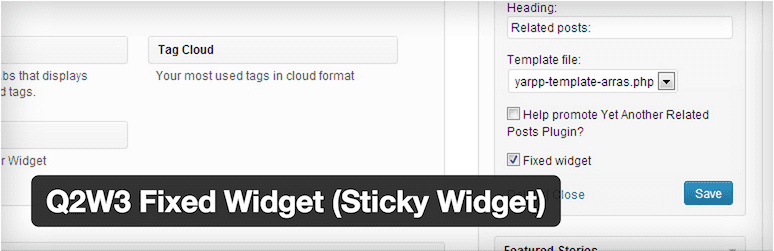
Fixed widgets are mostly preferred in the world of blogging. You may notice this on many blog, because when you go down using the cursor in an article, you will notice that you are always accompanied by a banner.
This is a great way to increase clicks and conversions on any content, image or banner you want to be seen more.
To create your own preset widgets, install the plugin: Q2W3 Fixed Widget
- Add user image in your comments
Have you seen some users that comment on your blog or other WordPress blogs that have their own custom image?
This helps people get to know and can be identified in WordPress blog network.
To put your own photo in the comments section of your blog and other bloggers, go to Gravatar.com, create your account and add your photo.
- Use a responsive theme
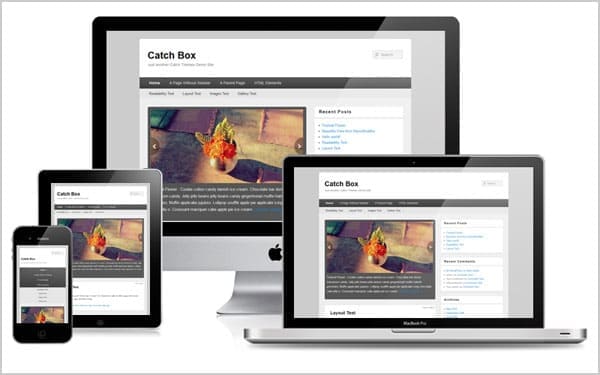
Today large percentage of the websites traffic comes from mobile devices.
To provide optimal navigation for users who come from Android or iOS phones or tablets, uses a responsive theme.
This refers to a design and structure that automatically adapts to different screen sizes and resolutions.
Most providers offer responsive premium themes templates in full.
Check your theme and if you do not have this feature or your website looks bad on other mobile devices, install a responsive theme or use a plugin to make your mobile site in minutes: WPTouch Mobile Plugin.
In these cases we recommend you to use a responsive theme that does not change your design and colors when a user visits your site from a mobile device, laptop or a computer.
- SEO Optimization

SEO is one of the main ways to generate traffic to your WordPress blog or website. We can divide the SEO in two main factors for getting success and achieving top rankings in search engines:
- Internal optimization within the site
- External optimization (links and authority)
Post quality content and receive links is most important, but it is also crucial to have your WordPress site well optimized.
To learn WordPress SEO, you must first install WordPress SEO by Yoast.
- Disable comments on all pages

If you’re using Disqus or do not want to have comments on your posts or pages for some reason, instead of going one by one by disabling this option, install Disable Comments plugin.
With one click you can disable comments on posts, pages or any combination you need.
- Widgets with WYSIWYG editor
When you need to insert an image, link or other media file, you need to use HTML code. This is a disadvantage for users who do not know how to program, as they have to be looking for what code to use and how to use it.
If you want to add a WYSIWYG (What You See Is What You Get) Widgets menu so you can edit and add content much more easily, install the plugin: Black Studio TinyMCE Widget.
- Custom Homepage

WordPress default home pages are blog posts. However, as you probably already know, with this platform you can create all kinds of Web sites, not just blogs.
To create a personalized home page, all you have to do first is create the page that you want to be at the start in Pages> Add new.
Add all the information, formatting, images or multimedia you want to show on your homepage and then post.
Finally, go to Settings> and select “static page” front page where it says show. On home page, select the page that you created and select other page entries you have created (that is called Blog (with URL / blog)).
In this way you will have your personalized homepage list.
- Automate your social networks with Buffer
Publishing the content on social networks is one of the best ways to generate traffic and branding on the web.
To save time and be more effective, a great option is to automate and schedule Facebook and Twitter posts.
A very good tool for doing this is Buffer app, which also allows to program publications that gives us very good analytics and to optimize our social networking strategy.
Start now with BufferApp.com
- Use a pop up to capture more subscribers
Email marketing is one of the best strategies to generate traffic, presence and confidence in any niche market. To start using it and make the most, an auto responder is needed, the software that allows to “capture” emails, send them messages and manage the various lists that are available.
If we want more subscribers with WordPress, use a plugin that displays pop up (or a popup to subscribe) that allows us to grow our list much faster.
There are different plugins you can use to put different types of pop ups on your WordPress blog or site.
The most recommended you are:
- SumoMe
- Pop Up Domination
- OptinMonster
Review them and select the option that you like and fit in your needs.
Among the auto responders that are most recommend are Aweber and Mailchimp.
- Choosing the theme or a template
The template or theme used in WordPress is the face of your blog or a Web page. As you probably already know, there are free and premium themes available for all the topics, which cost varies depending on the provider.
Choosing a premium theme is always recommended, as these themes provide much more security, stability and customization options.
If you decide to use a premium template, it is very important to choose a provider that is good, has excellent reputation and comply with everything that is needed.
Before making the decision, review comments on the Internet about their service, their designs and how it has worked for other users.
Always remember that design is one of the pillars of any website and it is very important to give the priority it deserves.
The recommended providers are:
- StudioPress
- Woothemes
- ElegantThemes
- net
- OptimizePress
There are endless possibilities in design of WordPress, the choice can obviously change as your site grows, so always keep in mind and be very clear about what you want and the direction in which your design will evolve.
- Google Webmaster Tools and Analytics

Measurement and optimization is something that every Webmaster and WordPress user should keep in mind.
If the performance of a blog or Web site is not known, it is impossible to set goals, be clear and know how much progress is being made.
To measure and optimize the website, Google offers two tools with many functions:
- Google Analytics
- Google Webmaster Tools
Analytics works to know how many visitors we have, where they come from, how long they stay on the site, what devices they use and more. All this information helps us to measure site performance and behavior of the users.
With Google Webmaster Tools you can follow up with the security status and indexing of your website in Google. You’ll also know the positions of keywords that can help you to optimize your SEO strategy.
- Use modern sources
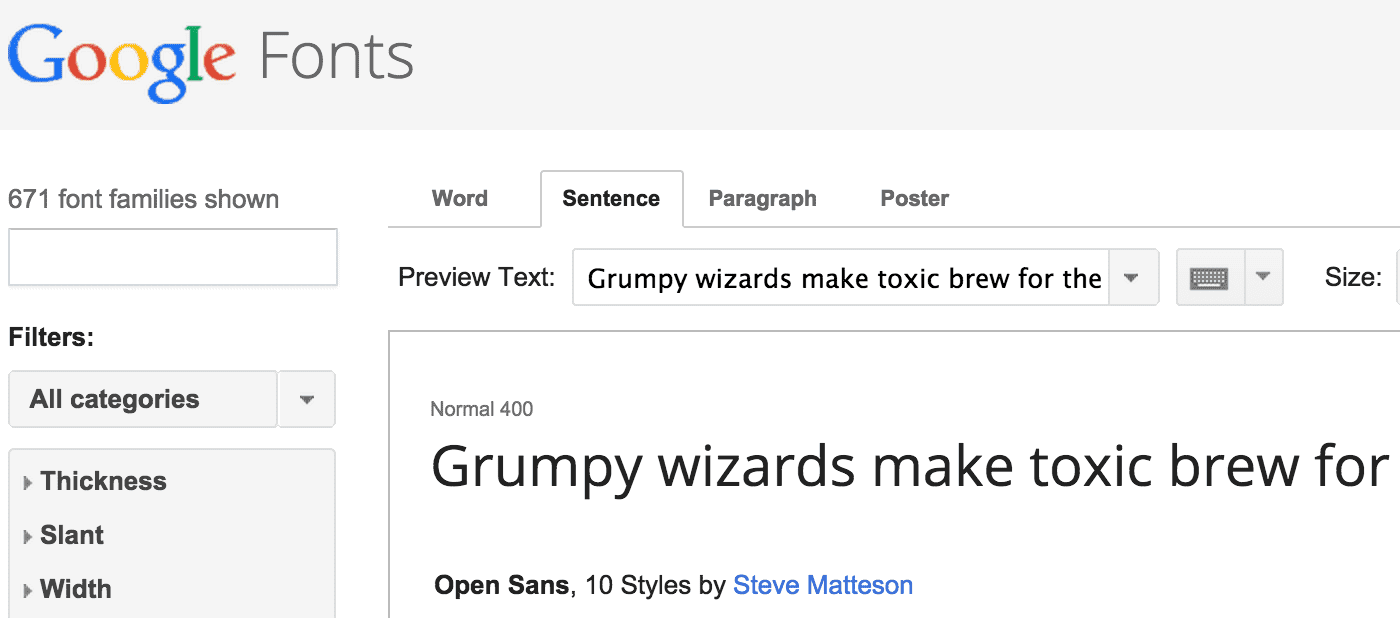
Comic Sans, Arial, Times New Roman?
Forget that! Today there are many typefaces and fonts that are best for Web sites and blogs.
Google Fonts reviews the most used fonts and you can analyze the designs that you like to use in your headers, widgets and logos entries.
My favorite fonts for posts are:
- Roboto
- Lato
- Droid Serif
- Droid Sans
- Open Sans
Here is the link to Google Fonts: https://fonts.google.com
Check Easy Google Fonts plugin to add fonts to your WordPress site in a couple of clicks.
- MailChimp Integrates with WordPress

If you chose Mailchimp as an auto-responder for your email marketing strategy, it can be integrated easily and quickly. A plugin that offers the option of adding subscription forms, monitor campaigns and subscribers much more quickly and easily.
- Secure Passwords
A simple tip but not all apply on security issues is to create secure passwords for registered users.
The best option is to have at least upper and lower case letters, and a symbol ($% -!?) to increase the security level much higher so that hackers cannot access your WordPress dashboard.
A somewhat common tip but it’s worth mentioning.
- Create a site with multiple members
In many cases, it is necessary to create a portal where users have access to a member’s area where you offer content, information or any kind of exclusive multimedia.
These cases are much considered when digital products such as eBooks, audio or video courses or any other product that requires security clearance to enter and where they can be downloaded or easily sold.
With WordPress it is very easy to create a membership site by using plugins and create designs that facilitate all the necessary structure.
Most recommend Membership Plugins are:
- OptimizePress (via OptimizeMember plugin)
- Wishlist
- Memberpress
- S2 Member
Each offers different options, functions and ways to manage and create the members area.
Evaluate each and choose the one that suits you.
- Cobra for your digital products
Digital products or information products like eBooks, audio books, video courses, plugins or software are one of the best ways to monetize a blog and create a business with great potential.
Creating a product is the first step. Once you get it ready, what’s next?
Obviously you have to upload all the files either to a video platform or a server where it can be consumed and seen.
This is where the tip of creating WordPress membership website comes in.
To get operated successfully, it is also necessary to establish a payment infrastructure where customers can pay for access to your product.
This can be done in different ways by adding payment methods like Paypal.
Still, I recommend:
- WordPress Simple Paypal Shopping Cart
- Simple Credit Card Payments plugin
There are many options we have to process payments and charge for our digital products.
- Essential first Pages
When you install WordPress, one of the first steps is to add and create content for different sections that are on the blog or Website you create.
Before you start posting on the blog, set up widgets or add plugins. It is important to create the essential pages. By this, I mean all typical web pages. Example:
- About us
- Contact
- Privacy policies
Depending on your site, you will need to create other more specific pages according to your industry or niche.
Always keep in mind to make basic content available from the first day on all important pages and add them to your site structure.
- Allow your readers to register on your site

Depending on the site you are going to create, you may need users to register and create their own usernames and passwords. By this I mean a free registration and not one where users pay (as we saw in the part of creating a membership site).
To enable the free registration for your users. Login to Settings> General on your WordPress desktop.
Then enable the box that says “Anyone can register” and select the default profile that will have members.
- Schedule your posts
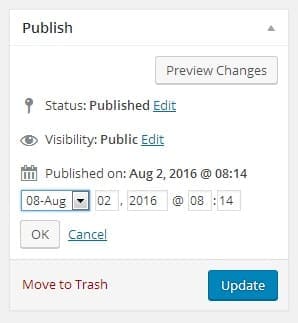
Did you know that with WordPress you can program your posts in advance so that they can be published automatically? This saves time and allows us to focus on other tasks equally or that are more important in our strategy.
To schedule an entry, entering posts > All entries. Click where you want to program and part of the right where comes the publishing options, where it says “Post immediately” click Edit and select the date on which you want to be published.
Finally click Schedule and you are done! Your entry will be online on the date you have chosen.
- Facilitates virality in social networks

The more your posts and links are shared on social networks, the more they generate traffic and better positioning for your blog.
Facilitates your readers the option to share your posts on their Twitter, Facebook and other social networking profiles with the following plugins:
- SumoMe Share
- Monarch Social Media Sharing
These plugins can let you add buttons through which your readers can share content on major social networks with a few clicks.
Easy and effective!
- Manage your calendar entries with an editorial
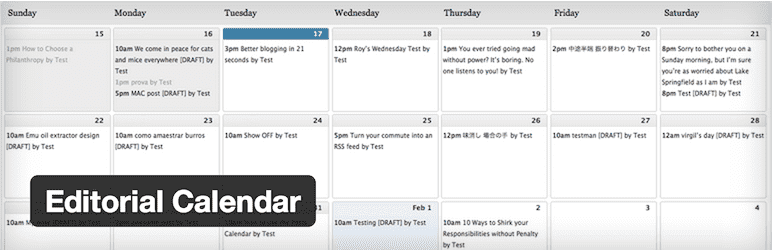
Do you have a blog where you publish posts on a regular basis?
For better management and organization of your articles and publications, use Editorial Calendar plugin, which can let you order and give you a broad view of your publication calendar frequency, topics every day and know how to handle any kind of change when necessary.
If you have more than one author on your blog, this plugin becomes essential, especially for cases where there are 3, 5 or more bloggers contributing regularly.
- Make internal redirects in WordPress

Redirections may become necessary in many cases when handling a blog or a website.
If we need to redirect an old content to any new page, create a redirect for a special promotion or any other similar case.
When you find yourself in these situations, use the Redirection plugin, which offers many options to create different types of redirections for your WordPress site.
- Create email accounts with your domain
It’s good to have a Gmail or Yahoo email, but having a personalized email with your own domain is even better. It creates a more professional image i.e. focused on branding and helps in gaining trust of the people with whom you exchange emails.
To create an email from your domain, login to your cPanel hosting server you have hired, go to the option of emails and create the mail ID.
Then you can add the account to your Gmail account so you can send emails with your new mail and you receive all messages in your inbox of Gmail.
So you save time and not have to enter your server every time you want to check the mail.
- Translate WordPress to preferred language
You want to use WordPress in any other language apart from English? Excellent!
Login to your wordPress Blog, Click on General> under settings tab, at the bottom in General tab, you will find Language option. Select the Language you want, Save changes and you are done.
The whole process can be completed quickly.
- Turn WordPress in a virtual store
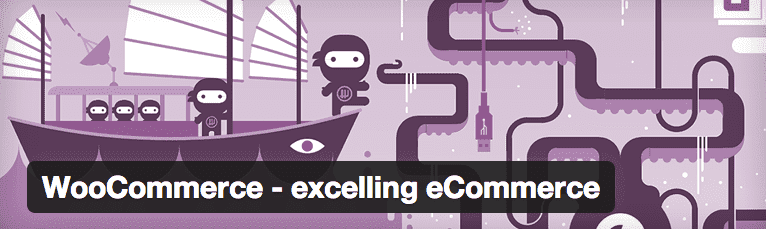
WordPress was originally created for blogs and provides incredible resources for bloggers.
However, it is such a flexible and comprehensive platform with which you can also create any type of virtual website, amongst which are the virtual stores or eCommerce sites.
E-commerce has grown a lot in recent years and solutions to create an online store quickly and effectively are excellent.
WordPress is one of the best that can be considered because of its plugins, themes, widgets and the entire infrastructure that distinguishes the platform, we can find all the necessary tools to create a virtual store literally in a few hours.
Best plugin for WordPress eCommerce websites in my opinion is WooCommerce.
- What to do after installing WordPress?

You already installed WordPress, but what’s next? There are so many things you can do that often can overwhelm us and let the days pass without making significant progress.
To avoid this, check the following guide where you can see some of the most important things to be understood and considered after installing WordPress on your domain tasks.
Guide: What to do after installing WordPress.
- Checklist before you build an online store

Building an online store is a big step; however, it is not everything. To publish it in the best way and have a great design, layout, optimization and options to be seen in Google and social networks, have to meet a series of steps that allow us to leave the entry to be read by our readers.
What are these steps?
Here we present this checklist of tasks to perform before you build an online store
- Disable automatic updates
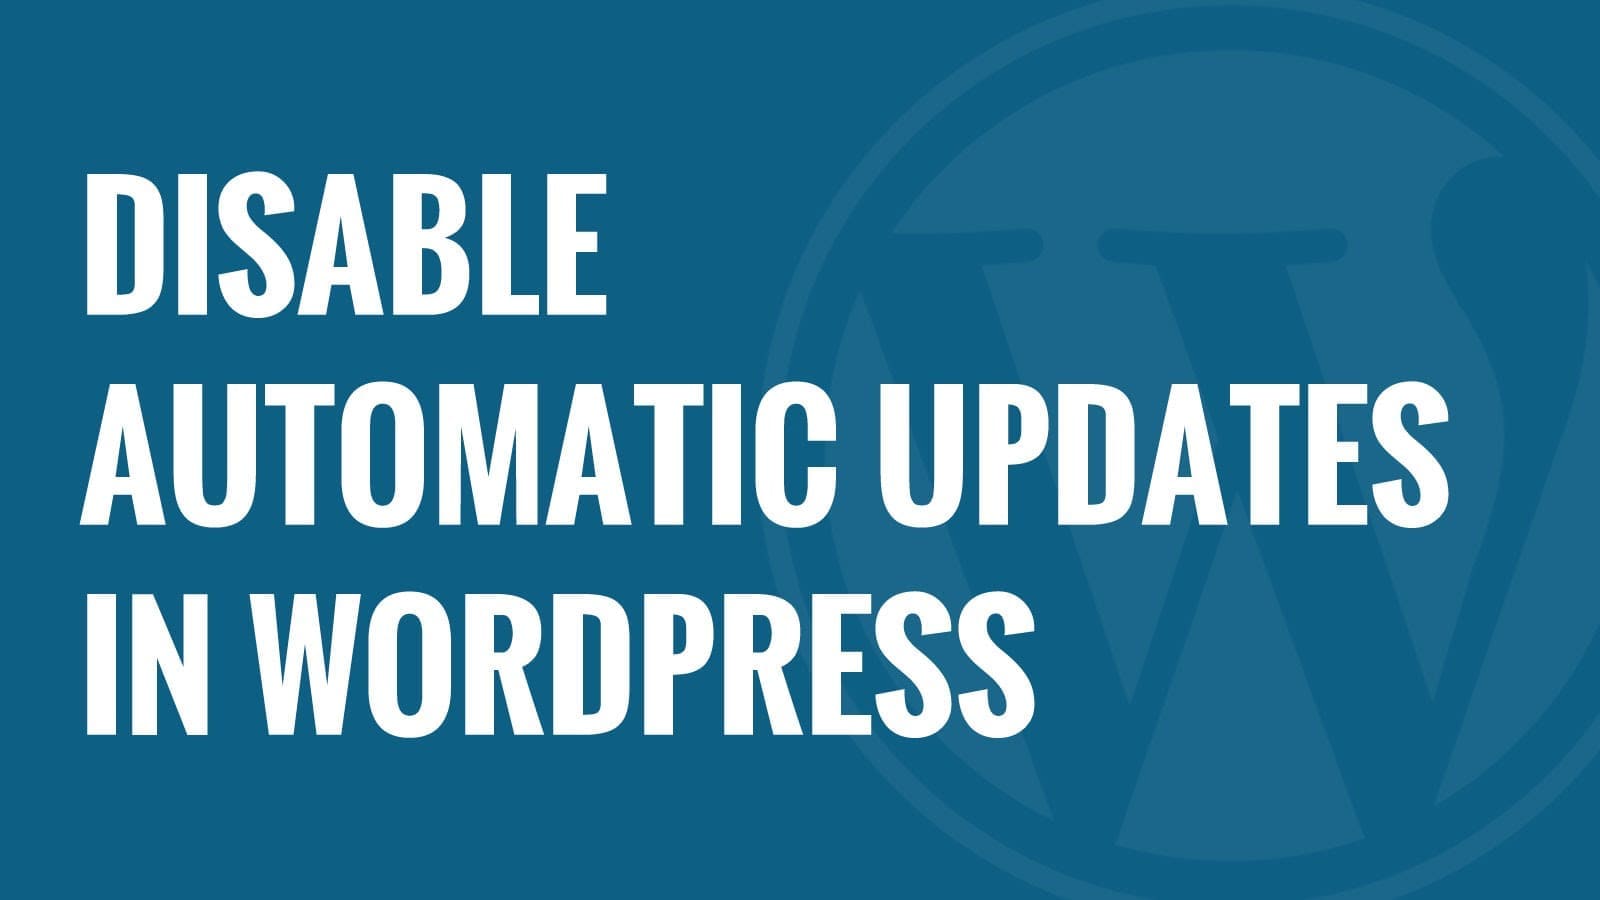
WordPress offers the possibility to upgrade the platform to new versions automatically.
This is a great advantage for most users.
However, most often some themes, plugins or platform configurations do not work well, have bugs or simply disappear when upgrading to new versions.
To avoid these cases, disable automatic updates.
So you can make changes to your theme or plugins to be compatible with the new version without worrying about having failures.
- Check the authenticity of your theme

Do you use authentic theme? By this, I mean if you download it for free, did you check if it has a corrupted code or does it has vulnerabilities.
The same if you use a premium theme. It is very important that the theme has not been modified, downloaded illegally or improperly programmed and possible failures that become doors for hackers and possible security attacks.
To perform this review, download the Theme Authenticity Checker plugin, which tells you quickly how authentic and well prepared is your theme.
- Add videos to your Articles
The text is the primary format for the Web and blogging, however, there are other formats that are usually much used and represent a new and different way to interact with the audience.
One of the best additions to the publication of written entries is the video.
Adding videos to your entries is very simple, even more since version 4.0.
Perform the following steps:
Copy video URL
Paste the URL in the WordPress editor
Ready! The video will appear automatically. No plugins or codes required.
That is why we love WordPress!
- Create a backup easily

Creating a backup or backups of your website is as important as it helps in protecting WordPress from possible attacks.
You never know when you have a complication that compromises the integrity of the platform and can bring serious problems.
With a backup that is always updated; no matter what happens, you always have the option to remove everything and regain access to content, settings, themes and plugins that are pre-installed.
How to create a backup?
You can use some plugins, among which are:
- iThemes Security
- BackWPUp
- BackupBuddy
These are just some of the options available. Sure there are many more.
Once you’ve installed the plugin, follow the settings for getting a backup (every day, every week, every month, etc.)
- Use advanced forms for contact

We all know the traditional forms of contact where name, subject and message is requested to contact the webmaster, blogger or owner of any website. However, with WordPress you can create more advanced forms for contact, more fields and synchronize with your email marketing campaigns.
Contact Form 7 has been the most popular plugin to create basic forms of contact and a little more advanced. I recommend this plugin.
Also, if you are looking for more options and customization, download free Ninja Forms, which offers many functions, types of shapes and even special plugins to improve the user experience.
Another excellent option is Gravity Forms, a plug that comes with the cost but 100% worth for users who are engaged in making and insert contact forms or more advanced forms.
- Import content from another blog

Say you have a blog on WordPress.com and are ready to make the jump to a site with your own domain and web hosting.
Or possibly longer you use with WordPress.org but you need to change to another domain.
What to do with all the content you have posted? Obviously you are not going to lose.
To import content from another blog, you need to first export everything from the original blog. To do this, go to Tools> Export, choose what you want to include and finally click on the button that says “Download export file“.
Then enter the blog or WordPress installation where you want to add this content, click Tools> Import , select WordPress, install the “WordPress Importer” plugin, select the .xml file that was downloaded and ready, have your posts, pages, categories and / or labels on the new blog.
You also have the option to download attachments (pictures or other media).
- Create a forum with WordPress

Just as we can create a virtual store by installing eCommerce plugins, the system also allows us to create a discussion forum.
In it you can create sections and discussion boards where users and readers of your blog can exchange information, ideas and all kinds of content to enhance learning and build an active community in your niche.
It sounds good, right?
To start, download bbPress plugin to create forums for better engagement.
- Do not fill both of your main sidebars
As bloggers, we are always tempted to offer content, links, information, banners and all that we can put in different sections of our blog.
One of the main sidebar is the side where we can insert widgets, subscription forms, banners, lists of popular or recent entries, a list of categories, contact forms and more.
A great tip somewhat is counterproductive but it works in a great way. To get the most out of your main sidebar, put the least amount of widgets.
In this way your blog will have fewer distractions and users can click on the important elements such as forms of email marketing or banners.
Plus they can consume the content in a more concentrated and efficient manner.
- Short Permalinks
Many times it is necessary to add a title to the somewhat long and wordy entries. By doing this, automatically, the URL field or permanent link is filled with each of the words that form the title (separated by a hyphen).
For these cases, it is best to manually change the URL structure and make it shorter for better readability, easily accessible and shareable in a better way on the Web.
Maximum 4 or up to 5 keywords in the URL. Preferably 2 or 3 if possible!
- Seize the footer
As we saw in a previous tip, it is best not to fill the main sidebar of the blog and only include the 100% essential and basic widgets.
Now, if you want to add more widgets, a great option is to take advantage of the footer. Most WordPress themes offer Widgets areas on the bottom of the site. They are usually 3 or 4 columns, where you can add information such as text, contact, address, maps, important links, categories and more.
- Optimize your images
 Image upload is inevitably something that needs to be done in WordPress. A site or blog without pictures has no life or success.
Optimized images, uses less disk space, loads faster and at the same time does not loses quality. Using the WP Smush.it plugin you can filter and optimize all images that you upload to WordPress.
Even you can also optimize your uploaded images by installing the plugin.
With this, the list of 50 tips and tricks for WordPress comes to an end!
I know it’s a lot of information, so take it easy. You do not have to apply each and every one of them at the same time or the same day. Depending on the use of WordPress, you may need some more than others.
I suggest you to save this page in your favorites and use it as a resource that can help you at any time.
I will keep adding some more WordPress tips on a regular basis.
If the post was useful for you, I invite you to share it on social networks, I’m sure many people need to see these tips and implement them.