
 Sommaya Singh
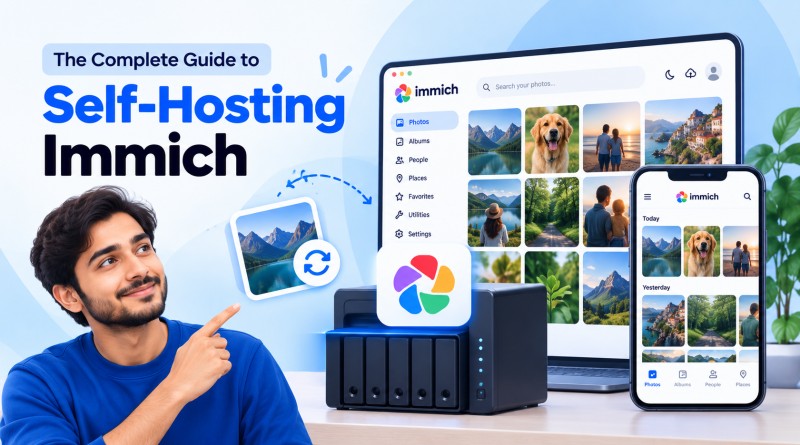
Immich is a secured and open-source Google Photos alternative. The open-source community actively develops both the server software and the mobile client application on GitHub.
Thanks to the Docker container technology, deploying a private, self-hosted instance of Immich is easy. The blog aggregates all setup guidance to safely manage and back up your photos and videos.
Table of Content
What is Immich?
Immich is an open-source, self-hosted photo and video management platform. The Google Photos alternative runs on a local server. Released under AGPL-3.0, it has passed 100,000 GitHub stars. The tool uses face recognition, semantic search, and machine learning algorithms for the data retrieval process.
Also Read: What are MEAN and MERN Hosting?
What does Immich Do?

- Automatic mobile backup: The iOS and Android apps automatically back up photos and videos in the background as soon as users take them.
- AI face recognition: Groups photos by the people in them using on-server machine learning.
- Smart, CLIP-powered search: Browse your library with the natural-language descriptions, not just filenames or tags.
- Shared albums: Invite others to contribute to or view a shared album.
- Map view: Browse photos geographically using embedded location data.
Also Read: Vibe Coding vs Traditional Coding
Requirements to Run Immich
- Operating System: We highly recommend a 64-bit Linux operating system for the best experience. Supported on Windows (using WSL 2) and macOS (using Docker Desktop), not recommended for production.
- RAM: 6 GB minimum, 8 GB recommended for smooth operation and uploading assets. Immich can run on 4 GB systems but only with machine learning features disabled.
- CPU: Minimum 2 cores, recommended 4 cores. AMD64 processors need to be at the x86-64-v2 microarchitecture level or higher.
- A Unix-compatible filesystem (EXT4, ZFS, APFS): The PostgreSQL database needs local SSD storage and at least 2GB of RAM allocated. In addition to the size of the photo library, allow for 10-20% more storage capacity for thumbnail generation and video transcoding.
Also Read: Supabase vs PostgreSQL
Self-Hosting Guide for Immich
1. Install Dependencies
Before deploying Immich, install Docker, Docker Compose, Nginx, and Certbot on the server. The Immich containers will run on Docker, Nginx will serve as a reverse proxy, and Certbot will assist in setting up HTTPS.
The following commands add your current user to the docker group so that you can run docker commands without having to use them repeatedly.
Update & install
sudo apt update && sudo apt upgrade -y

sudo apt install docker.io docker-compose nginx certbot python3-certbot-nginx -y

# Add user to docker group (avoid sudo)

sudo usermod -aG docker $USER
2. Create the Project Directory
Create a dedicated folder for your Immich installation and move into it. It keeps the Docker Compose file and environment configuration together in one place.
The touch command will create the files that will hold your Immich and database configuration.
mkdir -p ~/immich && cd ~/immich

touch docker-compose.yml immich.env
3. Write docker-compose.yml
The Docker Compose file describes the containers required to run Immich. The setup is a separate service for the Immich server, Redis, and the PostgreSQL database.
It defines the persistent volumes, networking dependencies, ports, and health checks so that the services seamlessly blend after deployment.
version: '3.8'

services:

immich-server:

image: ghcr.io/immich-app/immich-server:v1.115.1

container_name: immich-server

restart: unless-stopped

user: 1000:1000  # Non-root

env_file: ./immich.env

volumes:

- /etc/localtime:/etc/localtime:ro

- ./app:/usr/src/app/upload

- ./media:/usr/src/app/media

ports:

- '3001:3001'

    depends_on:

- redis

- database

    healthcheck:

test: ["CMD", "curl", "-f", "http://localhost:3001/api/server-info/health"]

interval: 30s

timeout: 10s

retries: 3

redis:

image: redis:7-alpine

container_name: immich-redis

restart: unless-stopped

command: redis-server --maxmemory-policy allkeys-lru --maxmemory 256mb

    volumes:

- redis-data:/data

database:

image: pgvector/pgvector:pg15

container_name: immich-database

restart: unless-stopped

    env_file:

- ./database.env

    volumes:

- db-data:/var/lib/postgresql/data

    ports:

- '5432:5432'

    healthcheck:

test: ["CMD-SHELL", "pg_isready -U $POSTGRES_USER -d $POSTGRES_DB"]

interval: 10s

timeout: 5s

retries: 5

volumes:

  redis-data:

  db-data:
4. Write immich.env.
Next, add the environment variables that the Immich application needs. The settings specify the production environment, Redis connection, log level, and trusted domain.
Therefore, machine learning has been turned off in the configuration for resource conservation. If you have the resources on your server and want to use Immich’s machine-learning features, you can turn the feature on later.
# immich.env

NODE_ENV=production

IMMICH_MACHINE_LEARNING_ENABLED=false  # Disable unless needed

IMMICH_TRUSTED_ORIGINS=https://photos.example.com

IMMICH_LOG_LEVEL=info

REDIS_URL=redis://redis:6379
5. Write database.env.
Immich utilizes PostgreSQL for application and metadata information. This file sets the database name, username, password, and hostname Immich will use to connect to PostgreSQL.
Instead of the example password below, use a strong, unique password for the database, especially on the production server.
# database.env

POSTGRES_USER=immich

POSTGRES_PASSWORD=supersecret

POSTGRES_DB=immich

POSTGRES_HOST=database
6. Start Immich Services
With the configuration files ready, start all the defined containers in detached mode using Docker Compose. Docker will download the required images and start the Immich server, Redis, and PostgreSQL services.
Give the services a short time to initialize. You access Immich through your server’s IP address on port 3001, creating an initial administrator account.
docker-compose up -dAlso Read: PostgreSQL Hosting Providers
Configure Nginx (Reverse Proxy + TLS)
Once Immich is running, you can configure Nginx to front the application. It allows you to access Immich via a domain name instead of directly using the server’s IP address and port. Nginx also forms the basis for securing connections with SSL certificates.
1. Server Blocking
Add a new Nginx server block for the Immich domain: The configuration forwards requests coming from the domain to the Immich service on port 3001.
sudo nano /etc/nginx/sites-available/immich

Replace photos.example.com with the domain or subdomain you pointed to the server.

server {

Listen, 80;

server_name photos.example.com;

location / {

proxy_pass http://localhost:3001;

proxy_set_header Host $host;

proxy_set_header X-Real-IP $remote_addr;

proxy_set_header X-Forwarded-For $proxy_add_x_forwarded_for;

proxy_set_header X-Forwarded-Proto $scheme;

proxy_buffering off;

  }

}
2. Enable and Test Nginx
Activate the newly installed server with a symbolic link on nginx’s sites-enabled directory. Then test the configuration and reload Nginx:
If the configuration is stable, run nginx -t, reload nginx to apply the changes without stopping the server.
sudo ln -s /etc/nginx/sites-available/immich /etc/nginx/sites-enabled/

sudo nginx -t

sudo systemctl reload nginx
3. Add HTTPS with Let’s Encrypt
The last step is to install Immich safely using the HTTPS protocol. Certbot automatically obtains and installs a free SSL/TLS certificate from Let’s Encrypt and configures Nginx for your domain.
After the certificate is configured, you must be able to access Immich securely using https://photos.example.com.
sudo certbot --nginx -d photos.example.comConclusion
Self-hosting Immich might overwhelm beginners. It is for people who would rather spend an afternoon setting up a Docker container than hand their entire photo library over to a company whose storage policies could change tomorrow. If you have explored this guide, you already have what you need: A working instance, mobile backup configured, and a system that’s genuinely yours to control.
That said, be honest with yourself about the trade-off you are making. You are gaining privacy, control, and freedom from subscriptions. Additionally, you manage the server, which cloud providers handle. Immich has matured a lot, but it’s still moving fast, which means staying on top of updates matters more here than it would with a polished commercial product.
FAQs
1. What are the minimum system requirements to self-host Immich?
To run Immich smoothly, your server needs a minimum of 6GB of RAM and 2 CPU cores, alongside Docker and Docker Compose installed. The RAM requirement is crucial because Immich utilizes machine learning models locally for facial recognition and automatic image tagging.
2. How do I access my Immich instance for the first time after deployment?
Once you run docker compose up -d and the database initializes, open your web browser and navigate to http://
3. How do I safely back up my self-hosted Immich data?
Immich separates data into two forms: metadata/user settings in a Postgres database and the actual media files in your designated upload folder. You must implement a 3-2-1 backup strategy that includes regular automated dumps of the Postgres database alongside a separate backup system (like Proxmox Backup Server or Duplicati) for the files stored in your UPLOAD_LOCATION.
4. Will switching to a self-hosted Immich instance save me money?
Probably not. While Immich eliminates recurring monthly cloud storage fees, self-hosting introduces other continuous costs including initial hardware purchases, expanding storage arrays, electricity, and the personal time required for server maintenance, security patching, and backup management.